KR250 Consolidated Build Thread

  • Thread starter KR250
  • Start date
  • This site may earn a commission from merchant affiliate links like Ebay, Amazon, and others.

KR250

Build addict
Joined
Aug 29, 2015
Messages
739
Reaction score
1,160
Location
Seattle
Creating a consolidated thread for current/past/future builds.

Past builds:
http://www.sevenstring.org/threads/second-guitar-black-limba-bb-multi-scale-7.302968/
http://www.sevenstring.org/threads/kr-build-3.307819/
http://www.sevenstring.org/threads/kr-build-4-7-string-maple-burl-ash-rosewood.319693/
http://www.sevenstring.org/threads/kr-build-5-evertune.321449/
http://www.sevenstring.org/threads/kr-build-6-neck-through-4-string-bass.325219/

Current work:

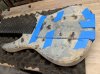
Calling this one "build #7", for a friend. Quite a few challenges, a few flaws, but turned out within expectation.

Specs:

8 String neck through
Evertune Bridge
Hipshot tuners
Stainless frets
Bareknuckle Juggernaut pickups
3 way toggle, Seymour Duncan "Liberator" volume knob
27" scale
Buckeye Burl top
Ash wings
Wenge/Purpleheart Neck
Luminlay side dots
Black Tusq nut
Brite Tone gloss finish

Final pictures first, working back:
IMG_20181110_110756.jpg
IMG_20181110_110809.jpg
IMG_20181110_110853.jpg
IMG_20181110_110910.jpg IMG_20181110_110736.jpg IMG_20180708_151543.jpg IMG_20180711_203253.jpg IMG_20180716_141418.jpg IMG_20180725_204228.jpg
IMG_20180801_101242.jpg
 

KR250

Build addict
Joined
Aug 29, 2015
Messages
739
Reaction score
1,160
Location
Seattle
Painting the wiring channels with conductive paint to connect the cavities.
IMG_20180819_141239.jpg Drilling out the Evertune saddle to accept up to a 90 gauge string.
IMG_20180916_135621.jpg IMG_20180928_162246.jpg
 

Attachments

  • IMG_20180823_141704.jpg
    IMG_20180823_141704.jpg
    215.4 KB · Views: 3

This site may earn a commission from merchant links like Ebay, Amazon, and others.

KR250

Build addict
Joined
Aug 29, 2015
Messages
739
Reaction score
1,160
Location
Seattle
Probably left a lot of details out.... I used the Stew Mac water based dyes. Took a bit of trial and error, but I did a sealer coat first, then grain filler, then sealer, then dye, then top coats. I found it tough to get the color to blend perfectly on top of the sealer, so next time I'll probably do it directly on the wood instead. The top is very lightly colored, and the back is done much darker, including the neck.
 

KR250

Build addict
Joined
Aug 29, 2015
Messages
739
Reaction score
1,160
Location
Seattle
Left this one out. I made the cavity plate a bit thicker, so I counter suck magnets on both the plate and the body. I had trouble with them adhering to the top of the plate of my last build. The liberator is the smoothest volume pot I've tried yet (CTS, Alpha).

For those wondering how the back plate comes off.... my buddy said there wasn't much need to get in there, so we decided that the toggle could be unscrewed from the top and pushed through to pop the plate off. Not the best way, but keeps the back cleaner which is what he wanted.

IMG_20181110_105208.jpg
 
Last edited:

KR250

Build addict
Joined
Aug 29, 2015
Messages
739
Reaction score
1,160
Location
Seattle
Can you do a step by step of your finishing process? That looks amazing.

Sealing, spraying, sanding, buffing, etc
This one had a lot of mistakes and re-do's (3 times through - started with brushing then went to spraying), but this is what I'm going to do for the next build which should be more consistent using water based finishes (Crystalac). Some of this may be unnecessary and could be condensed down.
  1. Zpoxy filler for any voids (mix in color or bits of sawdust as needed) - Use a heat gun to remove any bubbles. Usually have to do this step a few times.
  2. Sand to 320 or 400 - keeping epoxy only in the voids
  3. Spray 1-3 coats of sanding sealer - has an amber hue, not as much as oil based though
  4. Sand with 400
  5. Apply grain filler - brushed
  6. Sand with 400
  7. Spray 1-3 coats of sealer (step may be not necessary - top coat/dyes probably fine over the grain filler)
  8. Sand with 400 - very lightly, but finish should be near perfect as posibble
  9. Apply color/dyes - Going to do this between step 2-3 next time direct to the wood and skip steps 8-9 here
  10. Spray a very light coat of top coat gloss - I found some of the colors bled when I did this step with a brush. Spraying should be better, just a light mist to lock it in.
  11. Spray a new coat every 2-4 hours depending on temp. I used a hanger and went over every surface twice per "coat". Good amount of material but not enough to run
  12. let it dry for 24 hours (beauty of water based finishes!) technically it only needs 4, but overnight just to be safe.
  13. 13 Start sanding at 800 grit, no coarser (I had a ton of scratches I couldn't get out when I did 400 with a not perfect surface). This is where I could have done this build beter, and make sure every surface is totally matte. I left a few glossy spots in a few sections fearing I would cut through without enough top coats)
  14. Sand with 1000 grit, move to 1500 then 2000 (I had bad results with micro mesh - finish would build up under the pad and scratch the surface)
  15. Use a medium polish/buffing wheel - I bought the cheap stew mac ones that fit a drill
  16. Use fine polish/buffing wheel - Try and get all the scratches out with the polish
  17. Automotive wax with a micro-fiber.
  18. Put it under the light, sit back, have a beer and admire your work :)
 

KR250

Build addict
Joined
Aug 29, 2015
Messages
739
Reaction score
1,160
Location
Seattle
Amazing dude, thanks for the detail! That evertune looks crazy to install. I had no idea they were so big. Did it come with router templates?

I bought the templates from Evertune, way easier than trying to make one.
 

Defyantly

Aspiring Builder
Joined
Feb 15, 2018
Messages
706
Reaction score
458
Location
Idaho
:holy::minions: :holy: It's builds like yours and all the other skilled luthiers on here that make me both terrified and excited to start my first build! Hell of a guitar man!
 

KR250

Build addict
Joined
Aug 29, 2015
Messages
739
Reaction score
1,160
Location
Seattle
Ok, on to the next project. This one is a personal build so I'm pretty excited and motivated to get it done. I have all of the wood and hardware ready to go.

Specs:

Style: 7 string Set neck
Scale: 27"
Bridge: Evertune F model
Tuners: Hipshot open tuners - 4 bass/3 treble
Pickups: Instrumental SFTY3 (I tried these in build #5 but swapped them out. Trying in this one to see if it's a better fit)
Electronics: 1 toggle, 1 volume
Body: Mahogany - 1.75" Same shape as last couple
Top: Amboyna Burl - some kind of blood burst (black outer, red inner)
Neck: 5 piece Wenge/Rosewood w/scarf joint
Fret board: Macassar Ebony - luminlay on side dots (I might try the DIY powder instead)
Head Stock: Amboyna laminate and black burst - logo?
Nut: Black Tusq XL
Frets: 24 Medium Jumbo SS
Truss Rod: Spoke wheel at neck pocket
Finish: Brite Tone gloss

Neck glued up. I had thought about using purpleheart, but decided on the Rosewood I had which was similar thickness and better color scheme I think. Saving the PH for more neck throughs.
upload_2018-11-17_16-24-17.png

New Jig for doing scarf joints on the band saw. Still had to do some cleanup after the cut, but not bad. I can tilt the table and cut a compound radius if I want to do multi-scale. I can dial in whatever neck angle I want on the miter thingamabob. Clamp it, then push it through.
upload_2018-11-17_16-25-14.png

Cut and planed the headstock piece before gluing the scarf joint, using nails (drilled first) to locate it. I decided against adding more decorative laminates in the joint and tried to get the pieces as perfectly lined up as I could. We'll see how it comes out once I carve it. So far so good.
upload_2018-11-17_16-27-34.png

Body and fretboard. Spent a while trying to get all the right woods to compliment each other.
upload_2018-11-17_16-28-9.png

And the top, it looks like the inside of a lung with more finish on it. Top right corner has a marked section for the head stock laminate.
upload_2018-11-17_16-33-14.png

This is how it was advertised with finish:
upload_2018-11-17_16-42-6.png
 

KR250

Build addict
Joined
Aug 29, 2015
Messages
739
Reaction score
1,160
Location
Seattle
Got ahead of myself and did a step out of order, routed the neck pocket before gluing on the top. Oops. I went a little deep, so now I'm going to try and turn my mistake into a "feature" by laying some of the top wood as an exposed shim when carving the neck heel. Top is glued on now, and center lines are really close.

Hoping to move to the finish line quickly on this one. Still to do is figure out how to do a proper "blood burst" finish on the top. The Mahogany back looks great as is, probably will leave it as is or slight gray wash.

I did manage to save a piece of the top for the rear cavity plate, pictured below next to the head stock laminate.
upload_2018-12-2_19-18-6.png

upload_2018-12-2_19-18-50.png

Deciding on how much material to show, then will glue in and trim.
upload_2018-12-2_19-19-13.png

I painted the channels with conductive paint again before gluing up the top to ground all the cavities.
upload_2018-12-2_19-20-14.png

Added some rubbing alcohol.
upload_2018-12-2_19-22-1.png
 

KR250

Build addict
Joined
Aug 29, 2015
Messages
739
Reaction score
1,160
Location
Seattle
It's coming along now. Hoping to get more done on the neck tomorrow.

Shim glued in, neck pocket routed. Got it about where I want it. Need to do a mock up and double check neck angle before I glue it in.
upload_2018-12-8_17-28-30.png

Started the bevels on the top. I use a 45 router bit to get a clean line for the depth, then use shinto rasp to bring it further in to the body.
upload_2018-12-8_17-30-28.png

Rounded over the back side, and did the beer gut cut. Really digging the Mahogany grain. Slight hump near the back I need to sand out, not sure if I planed the back side or just the top. Could have been an artifact of planing though.
upload_2018-12-8_17-31-7.png

Fret board glue up. I also did luminlay side dots before this step.
upload_2018-12-8_17-32-17.png

Using a piece of the top burl for the rear cavity plate. Mostly shaped, still need to route the body for it. Took a long time to figure out something that would complete the burl. Now the burl gets to compliment the back side.
upload_2018-12-8_17-33-11.png


Latest posts

Top