KR250 Consolidated Build Thread

  • Thread starter KR250
  • Start date
  • This site may earn a commission from merchant affiliate links like Ebay, Amazon, and others.

Omzig

Well-Known Member
Joined
May 3, 2012
Messages
1,029
Reaction score
2,084
Location
West Midlands,UK
That BriteTone really does gloss up nice and great work on the builds very nice.

Just had a quick look and i cant seem to track BriteTone down in the UK,no doubt due to some EU rule or other !
 

This site may earn a commission from merchant links like Ebay, Amazon, and others.

Omzig

Well-Known Member
Joined
May 3, 2012
Messages
1,029
Reaction score
2,084
Location
West Midlands,UK
Maybe once we have our blue passports and food shortages we can use BriteTone on our guitars.

LOL project fear in full swing north of the boarder i see.....well i can always use the brightone to swilldown the chlorine chicken & hormone beef i'll also be importing from the US after we leave the EU club...

I can only hope after we've left that you get another chance to vote for your own independence from the UK (maybe they should give everyone south of the boarder a vote on that independence as well ?) No Doubt if you do leave the UK your leaders will then sell you new found back "Freedom" back to the EU for a few bags of silver and retirement postions in the EU parliment....

Sorry to Thread SHIT KR250.


Just took a quick look at shipping costs...$22 not to bad,i have a tin of Solarez to use up first but i'll add the Brightone the finishes to try out list.
 

KR250

Build addict
Joined
Aug 29, 2015
Messages
739
Reaction score
1,160
Location
Seattle
Well not much progress on guitars other than getting the single angled bridge pickup ordered from Instrumental pickups for the V. Have been working multiple weekends trying to finish an Ipe deck. Not sure it would make good guitar wood... but maybe worth a shot as some of the boards look pretty awesome.

Anyway, after playing the latest build for a while I'm definitely going to re-finish it again. Love the guitar, but some finish flaws are really bugging me. Also feel like some of the water based grain filler is shifting, or I didn't seal the wood well enough.

You can see one of the cracks is opening up, I can feel it with my finger. I had it pretty well filled before the finish went on.
upload_2019-2-28_20-36-28.png

Re-thinking my finishing process again after checking out a few past builds for durability. On build #2 I used Epoxy for the grain filler/sealer which has held up perfect over the last few years, in contrast the latest. Still want to stay water based, but use Solarez/epoxy as the base/grain filler.

Sand everything to 220/320
Apply dark stain to top if desired for extra contrast- then sand back
Seal/grain fill with Solarez (apparently doesn't yellow like Zpoxy does)
Apply again and sand until finish is perfectly flush - maybe 3+ applications. I like burl woods and filling the voids has been really time consuming.
Spray several sanding sealer coats (water based)
Scuff sand
Spray or apply stains/dyes - mixed with some clear coat instead of water/alcohol
Spray several sanding sealer coats
Scuff sand
Spray 10 top coats
Level sand with 400
Spray 3 more top coats
Level sand with 800
Spray 3 more top coats
Let cure for a week (seems water based finish still needs some cure time)
Sand with 1000, 1500, 2000, 4000 (have read conflicting things whether to dry sand only, or to wet sand which could reactivate the finish).
Buffing wheels - planning to upgrade to something nicer than the drill bits.
 

LiveOVErdrive

CNC hack
Joined
Aug 17, 2016
Messages
3,974
Reaction score
3,807
Location
Minneapolis, MN
That's really helpful. So you're basically doing dyes on the wood for grain/figure popping and then using candy paint (tinted clear) for your color? Nice.
 

Defyantly

Aspiring Builder
Joined
Feb 15, 2018
Messages
706
Reaction score
458
Location
Idaho
I always love reading your threads! They always contain such a detailed breakdown of what your doing and it helps out us noobs when we aren't really sure of how to do all of this luthier stuff!
 

KR250

Build addict
Joined
Aug 29, 2015
Messages
739
Reaction score
1,160
Location
Seattle
So you're basically doing dyes on the wood for grain/figure popping and then using candy paint (tinted clear) for your color? Nice.

Pretty close, I diluted black dye and applied directly on the wood to add contrast in the grain but it was more of a gray than black. Then I sealed it, and then rubbed in the color, then sealed it again before top coats. I've seen it done directly on the wood which may be easier to blend, but I think the color pops more on top of the sealer coat. Probably spray the color coats next go around for better consistency in application.
 

KR250

Build addict
Joined
Aug 29, 2015
Messages
739
Reaction score
1,160
Location
Seattle
helps out us noobs when we aren't really sure of how to do all of this luthier stuff!

I'm a noob still, lol. Lots of trial and error. I've been watching a lot of the Highline Guitars videos which have been mostly helpful, but he goes through so many different brands and changes technique constantly it can be confusing. I think that's just the nature of the game to come up what works best
 

KR250

Build addict
Joined
Aug 29, 2015
Messages
739
Reaction score
1,160
Location
Seattle
Had 15 minutes in the shop today so glued up the compound scarf on the V (build #10). It's trailing behind #9 just by a little bit which had the truss rod slot routed and part of the neck and head stock cut to shape. Carbon rods should arrive any day so that's up next.

upload_2019-3-2_17-4-2.png

Current state of build #9 on top.
upload_2019-3-2_17-5-27.png
 

KR250

Build addict
Joined
Aug 29, 2015
Messages
739
Reaction score
1,160
Location
Seattle
Eh, finally got a few things done. Fretboard for #9 (V) is cut and slotted. Not radiused. It's 27 frets, #26 was off a bit so I re-did it and the epoxy filler will get covered by the fret overhang. I found enough scrap pieces of Ash (and 1 piece of maple) to do the body V shape. I lined it all up over my drawing and all fits, even if it looks rather rough at the moment.

Going to do some kind of routed line for fret markers using epoxy or glow resin to fill. Not sure on color yet. Thinking black or with just a touch of luminescence will be the best color. Want it seen from side and the top over the corner edge.

upload_2019-3-20_19-23-10.png

Truss rod "jig". It's crude but it works. Still need to route out for the spoke wheel, but got hungry.
upload_2019-3-20_19-25-6.png
 

KR250

Build addict
Joined
Aug 29, 2015
Messages
739
Reaction score
1,160
Location
Seattle
Back from a work trip and first weekend to put some time back into the V project (#10), #9 sort of on hold at the moment. Routed the back side of the neck to approx thickness, finished truss rod routing, routed and glued in carbon rods, working on the fret board transition to body (more curve on the treble side?), and finally today working on the inlays. Also got a note from Ethan that my custom pickup is done and shipping out soon.

upload_2019-4-7_17-14-0.png

Still a little more sanding to do, one of the rods is slightly below the surface. Next time I'll just leave both proud by a small amount and sand back for a cleaner look. Glue kind of got everywhere too.
upload_2019-4-7_17-16-50.png

Bit of an experiment with the inlay idea, but going to fill it with an epoxy/phosphorous powder. I used my table router with a miter for the slots with a ton of measurements, marking, and swearing. Got a little router tear out in a few spots, but only one slot is slightly wonky. Super PITA, and I went full depth in 1 pass to avoid doubling up the time on the router. My table router has a really sloppy miter so I wanted to avoid the number of re-tries. I think that was a mistake. A CNC with multiple thin passes would ace this.

Decided on the inward depth based on string spacing, so ends in between strings 6-7.
upload_2019-4-7_17-19-33.png


upload_2019-4-7_17-20-31.png

Anyway, some clean up work to do but think it'll come out fine once all done. Just deciding on what color to go with. A straight black epoxy might be cool too, or go with the glow in the dark stuff.
 

KR250

Build addict
Joined
Aug 29, 2015
Messages
739
Reaction score
1,160
Location
Seattle
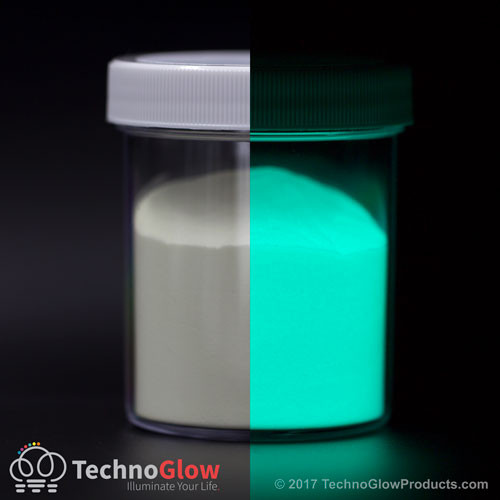
Might give these guys a shot. Looking at a few different color options.

https://www.technoglowproducts.com/ultra-glow/

white-glow-powder-strontium-aluminate__67248.1492495294.jpg

red-glow-powder-zinc-sulfide__93869.1492493202.jpg

aqua-glow-dark-powder__58865.1519097266.jpg
 

KR250

Build addict
Joined
Aug 29, 2015
Messages
739
Reaction score
1,160
Location
Seattle
I went ahead with the first of the glow options, shipped fast. I mixed it with epoxy and poured into the routes, curing now. It glows nicely, easily as good or better than Luminlay. More pics on that later.

Ethan contacted me to let me know the pickup was done and shipping out. I asked about the new SFTY4's that he teased about on IG, and he said he went ahead and made this one a SFTY4. Super stoked! He even cut a template. Can't wait to get this one completed.

In his words:
The SFTY4 has as a design feature an asymmetry to the coils. The Bass side has a more aggressive attack and the top end has a smoother and more harmonically rich tone for lead playing.

upload_2019-4-12_17-19-28.png
 

KR250

Build addict
Joined
Aug 29, 2015
Messages
739
Reaction score
1,160
Location
Seattle
Some after work time in the shop. Neck is shaped, fret board radiused, and inlay stuff mostly done. Sanded to 400 grit. I'll take it to 800 then oil it.
upload_2019-4-16_21-34-6.png

I seem to have some contamination in the inlay mixture. I think it's just on the surface still from sanding. I had let the mixture sit for 24 hours before touching it.
upload_2019-4-16_21-35-20.png

Profile came out really nice. It's still slightly thick at 21 mm on the thin end, but it feels really nice. I did a 1 mm taper to the big end. The color mish mash will be solidified all in black.
upload_2019-4-16_21-35-45.png
 

Defyantly

Aspiring Builder
Joined
Feb 15, 2018
Messages
706
Reaction score
458
Location
Idaho
That fretboard is stunning!! I wish I had access to that kind of timber where I'm at!


Latest posts

Top