Manton Customs Build: 8 String True Temperament Matriarch Guitar

Manton Customs

Well-Known Member
Joined
Aug 4, 2013
Messages
72
Reaction score
10
Location
Shropshire, UK
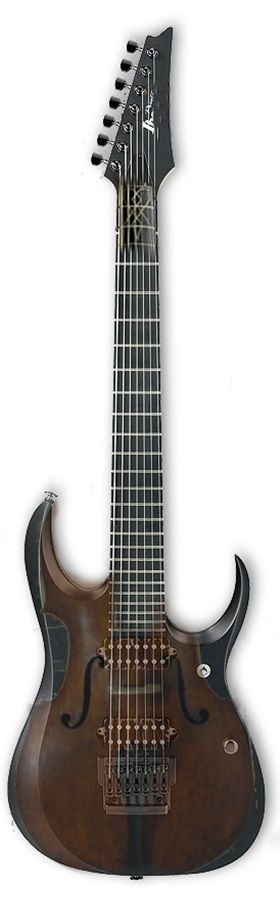
It's been too long since I shared anything due to general busyness and lack of time...so lets put that right! Here is one of the projects I have been working on during the short social media/forum hiatus. It's an 8 string True Temperament guitar built in the style of a Cello, featuring a Spruce top, F holes and Ebony fingerboard, see the specs below for a full list. The philosophy behind this being the meeting of two worlds- traditional (Cello) and modern (see spec!).

This commission is now complete and the guitar is already with it's new owner (whom shall be revealed later) so the updates will be going up quicker than usual and pictures of the finished guitar just around the corner.

Perhaps the most interesting thing about this guitar is the True Temperament system. For this guitar the neck was sent off to Sweden where it was fretted by TT. We are very impressed by the system and it really does have a noticeable effect on the guitar. Every note is perfectly in tune. This was the first TT guitar we have done but will not be the last, with a second one already in process.


8 String
27" scale
True Temperament
Bolt On
Mahogany Body
Thick Carved Spruce top
5 Pc Maple and Black Walnut Neck
Matching Spruce Head Plate
AAA Grade Ebony Fingerboard
Large Inlay Spanning Lower Frets
F Holes
Chambered
Floyd Rose Bridge
Seymour Duncan Black Winter Pickup Set
CTS Pots
Gotoh 510 Tuners
Schaller Strap Locks


This was our starting point. A rough picture the client generated. We made some noticeable changes to the actual guitar. Most importantly the headstock which was changed to a 4+4 tuner layout. The F holes were also moved to a more appropriate location and the control layout revised to incorporate a tone control. The inlay here is also different.


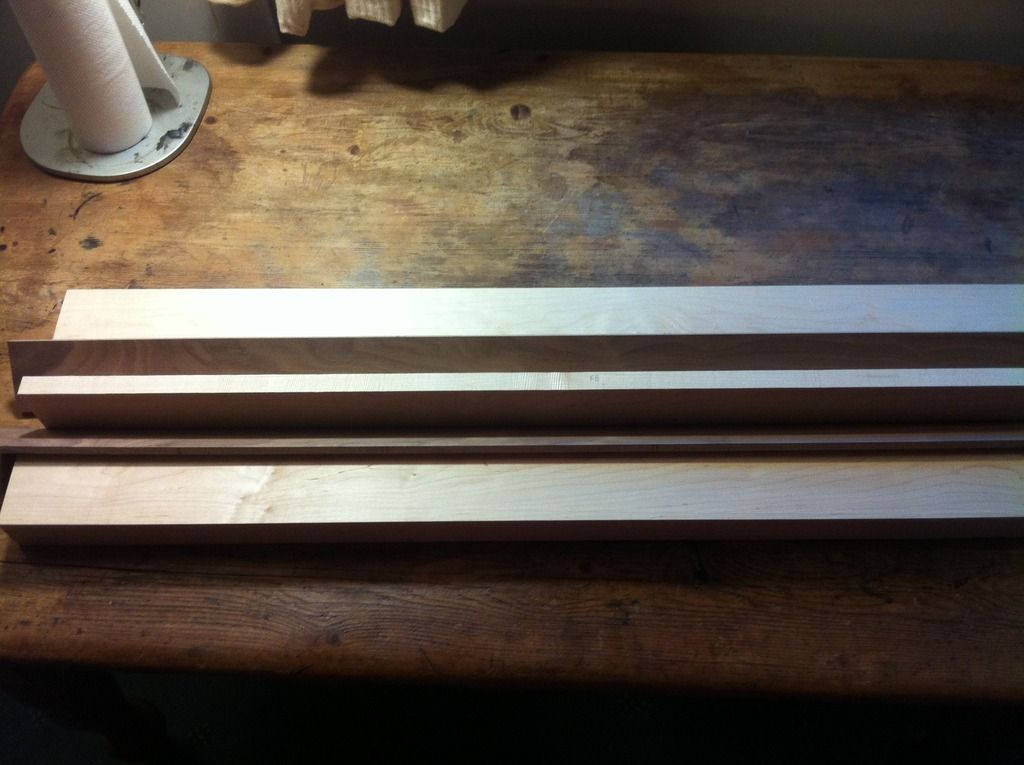
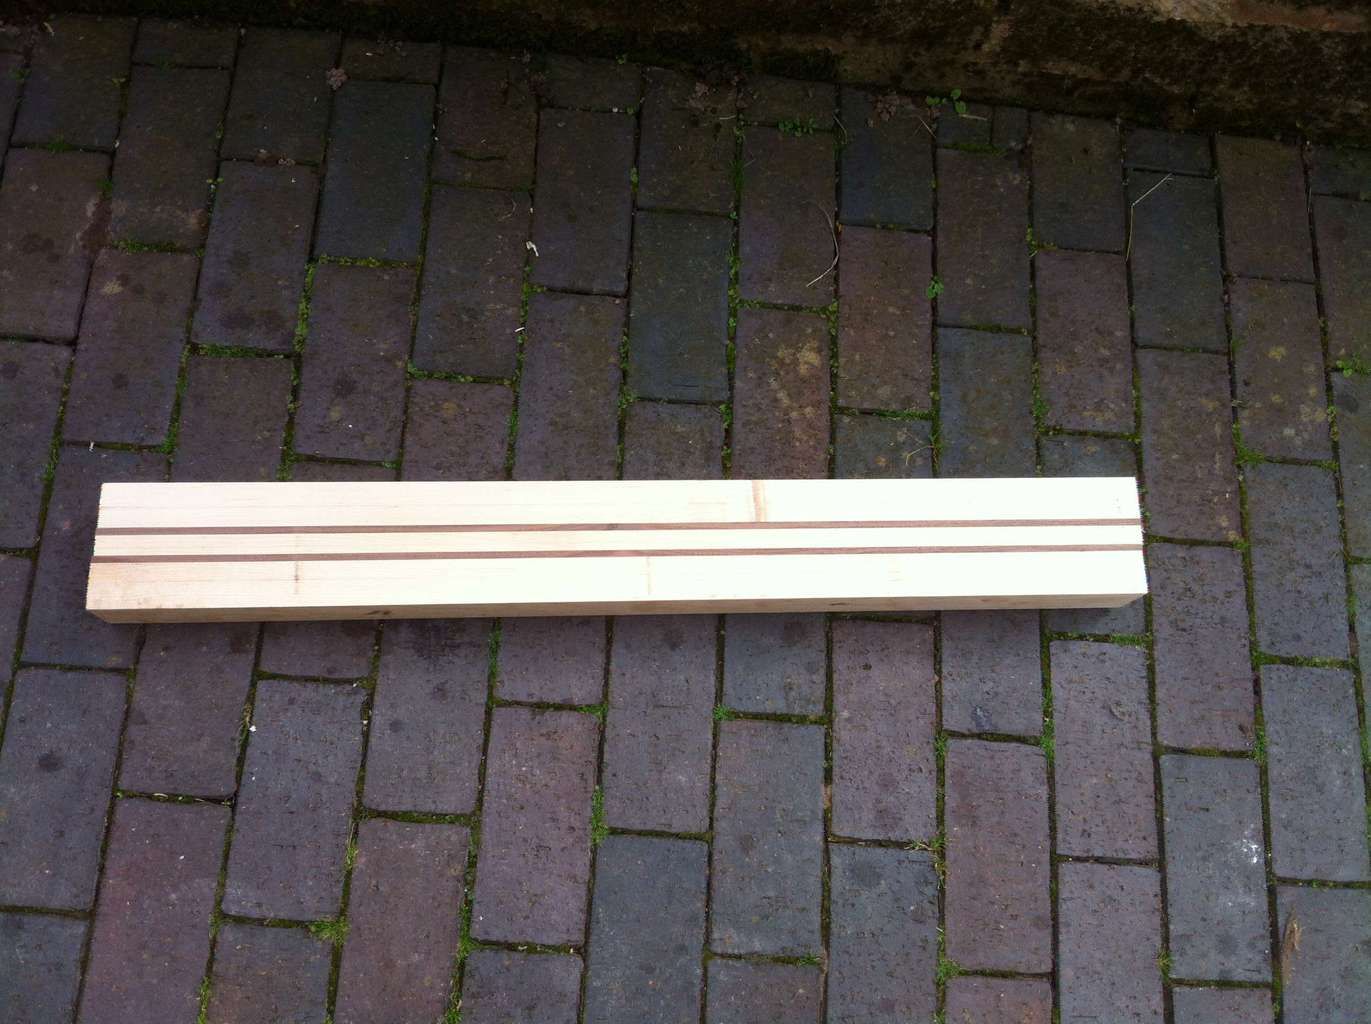
Here are the neck woods which have been planed and are ready to be glued up


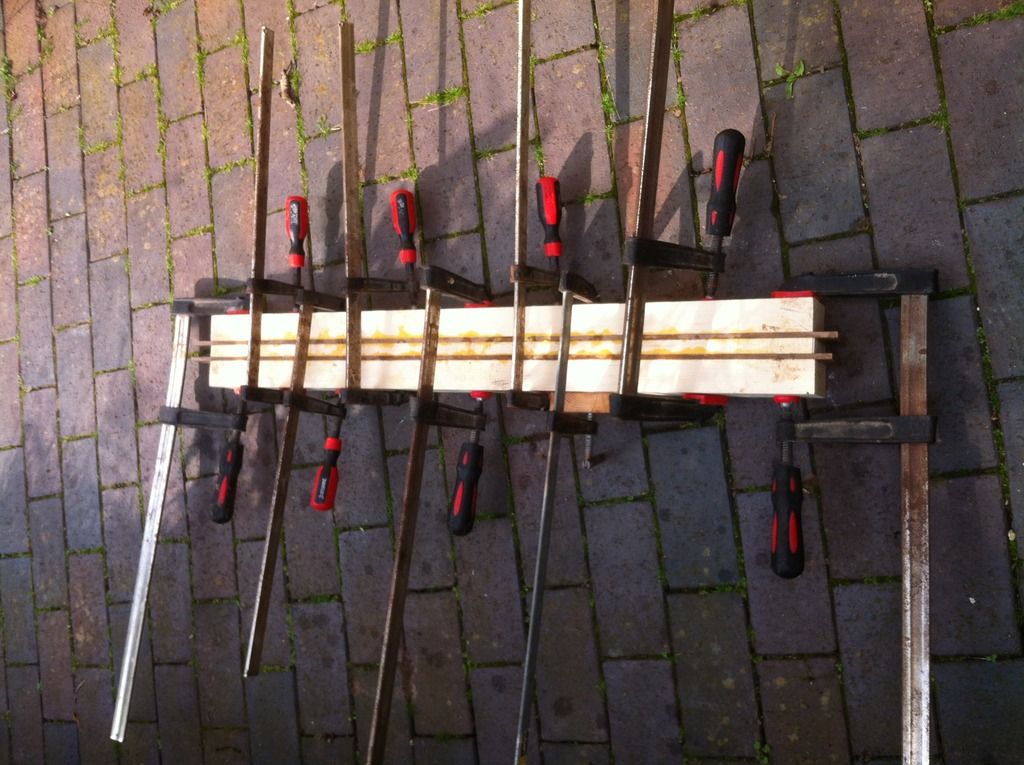
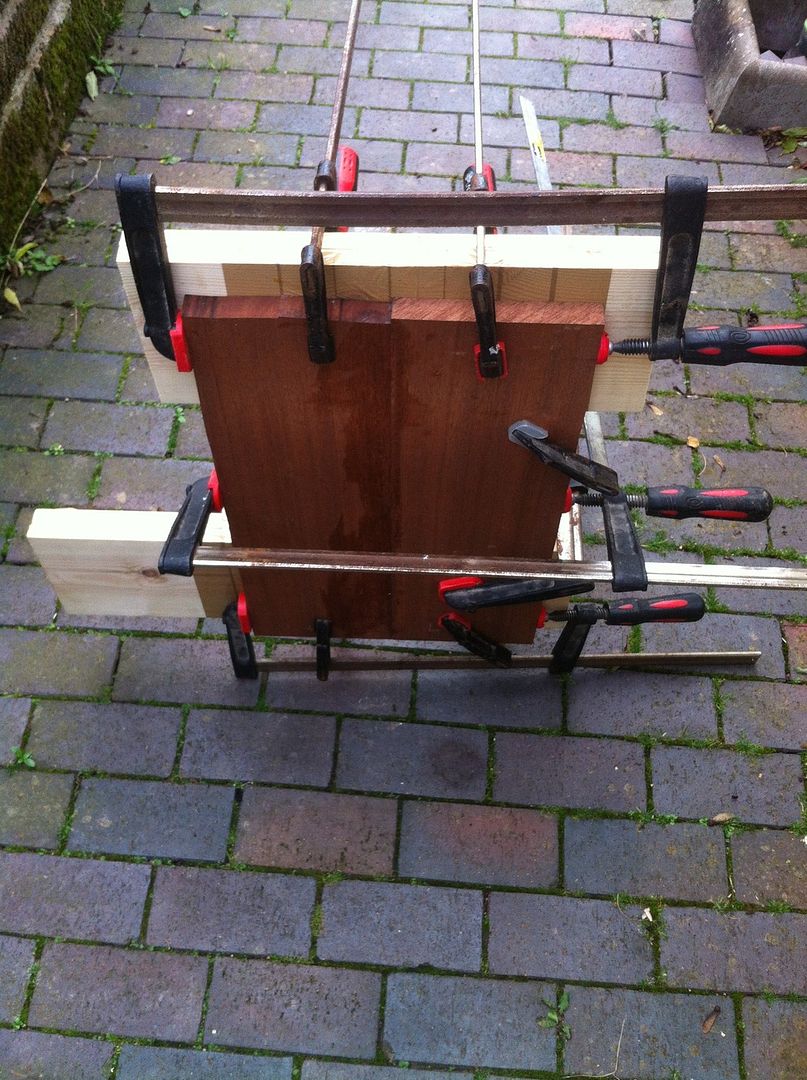
And here they are in the clamps! In answer to what you are thinking...No I do not glue up outside! The blank was carried out to benefit from better lighting for the picture


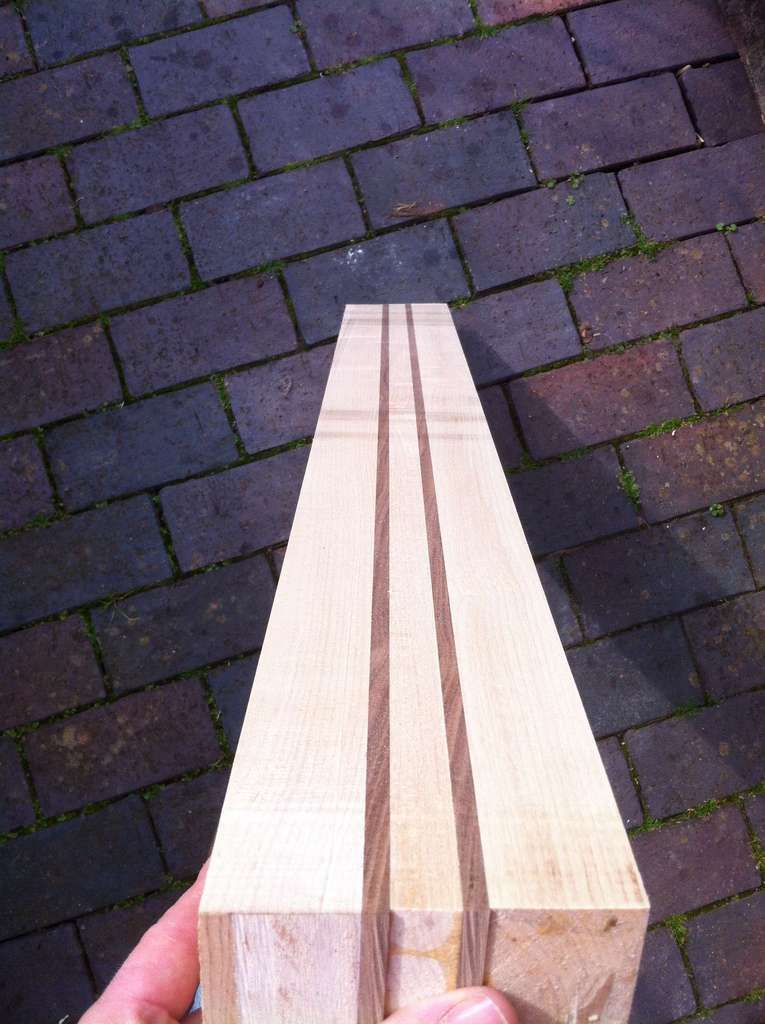
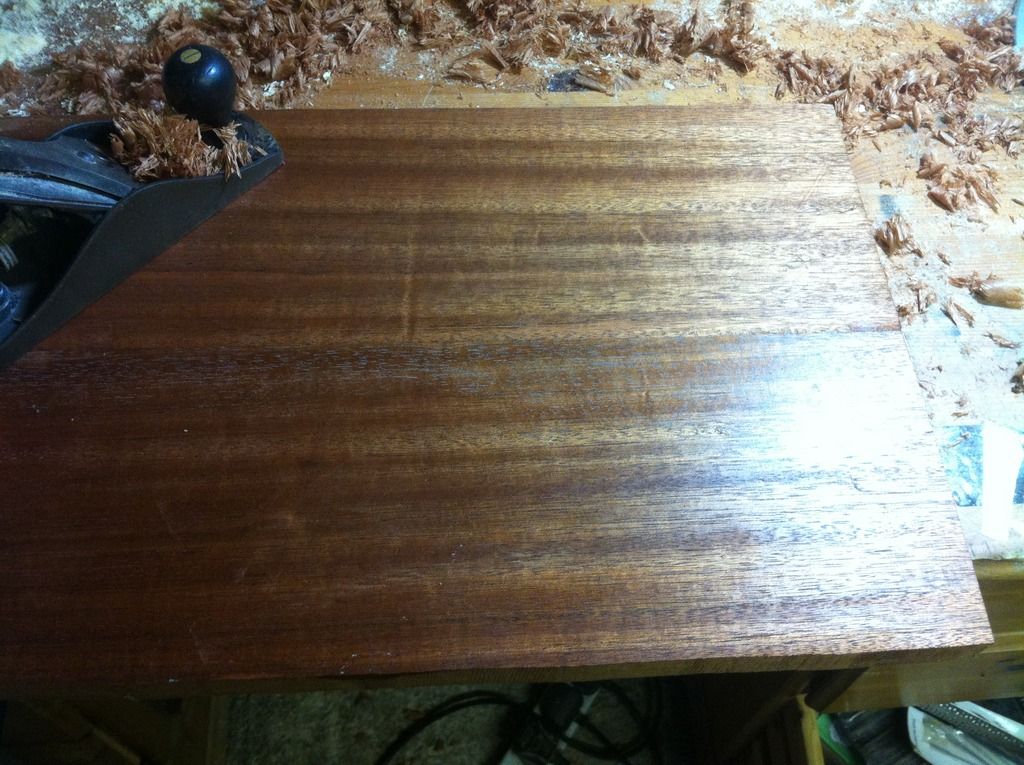
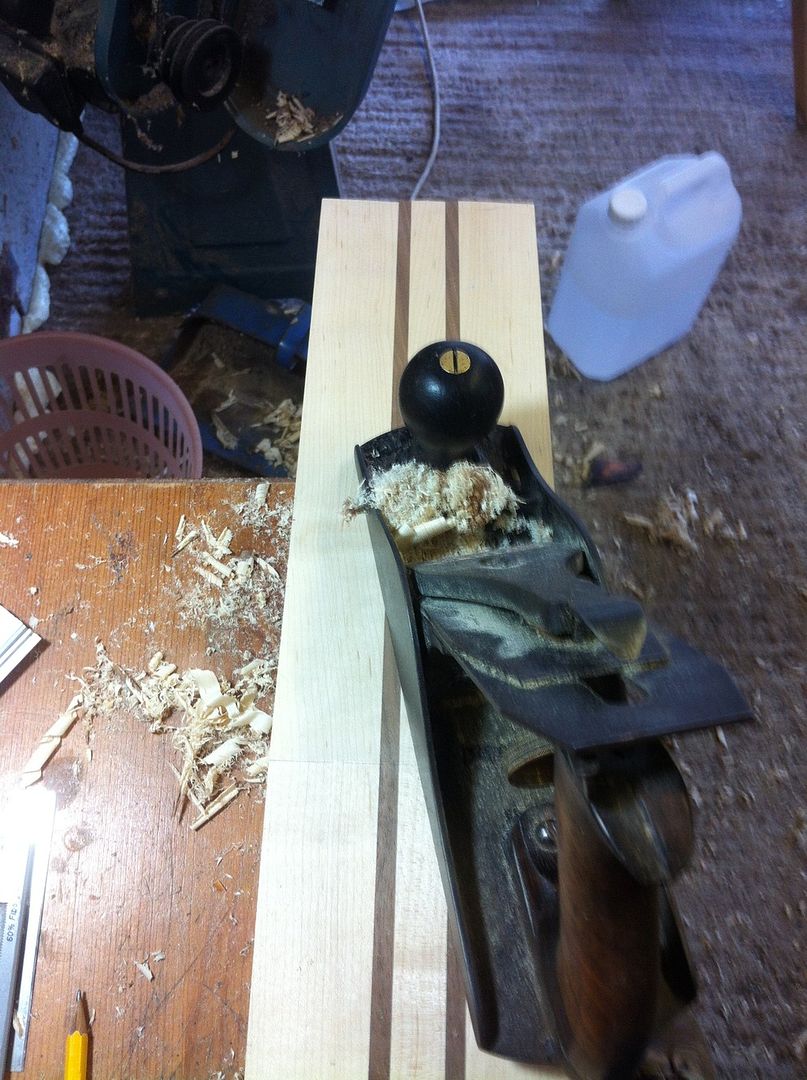
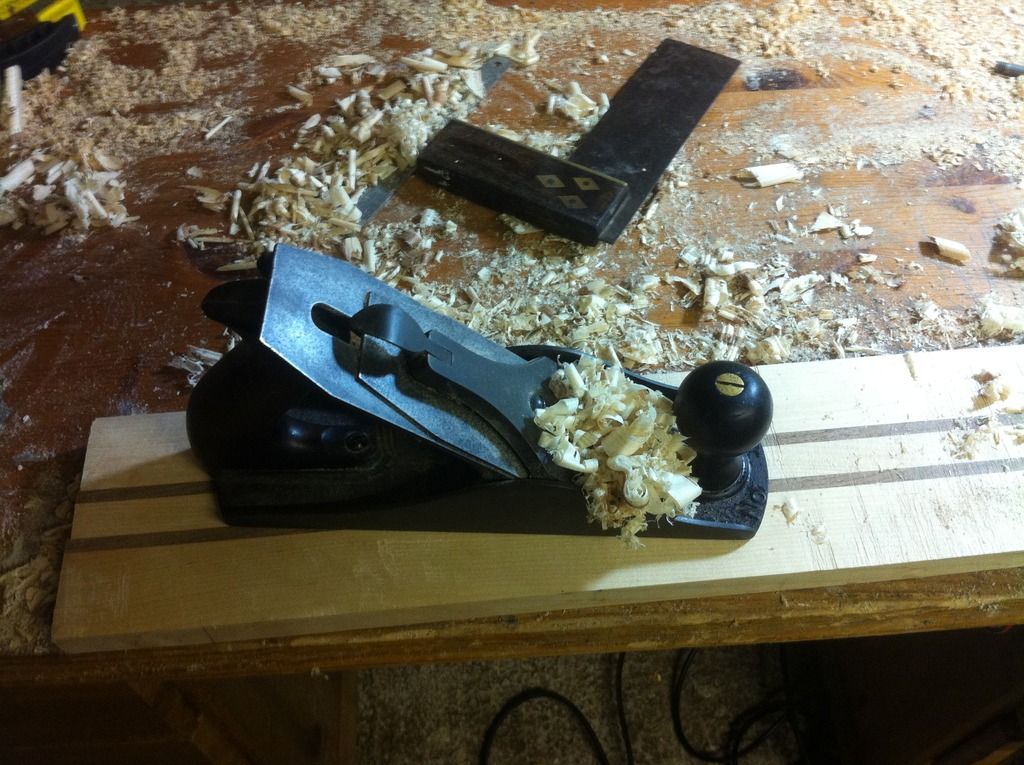
Here it is after it has been through the planer


Another neck blank shot.


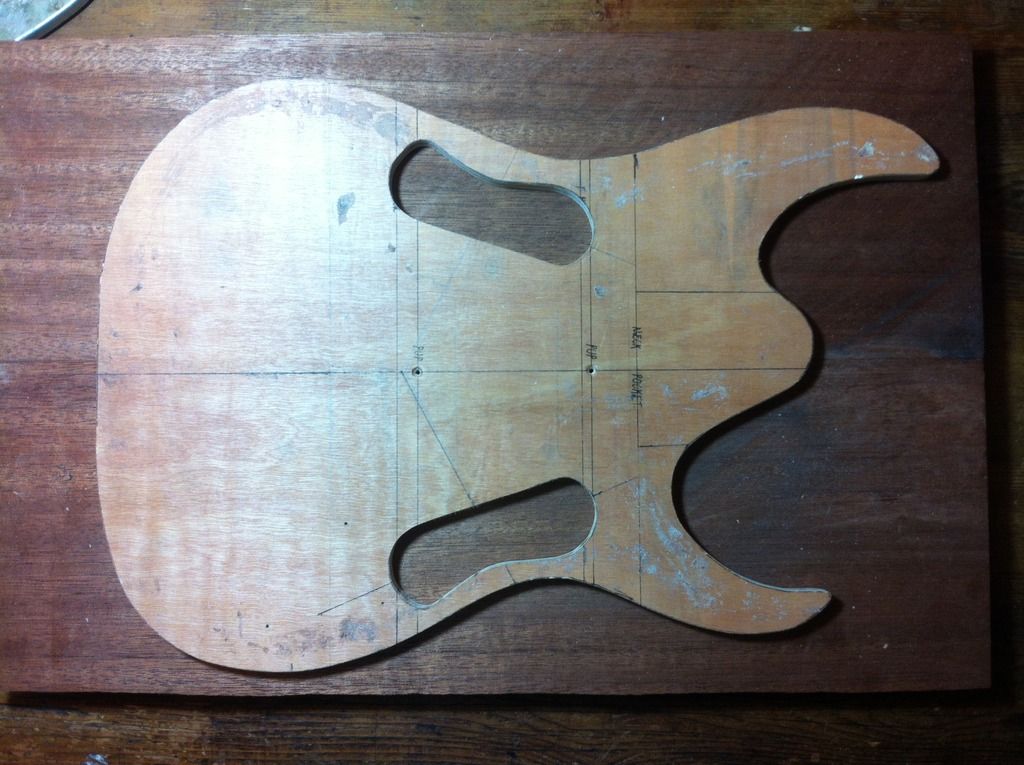
Onto the body! This is the body template, notice the two cutouts either side, these are for the chambers which will be under the F holes. Careful thought was given to the location of these chambers as it would have been disastrous to place them somewhere which was going to be carved into or have hardware mounted to (pickups, bridge etc) and space was tight! They also needed to be in a location where the F holes looked correct and pleasing to the eye.


The Mahogany body being glued up. Notice the large pine cauls at the top and bottom, these keep the two halves level during glue up.


This is the body after it has come out of the clamps and is being lightly planed by hand to ensure 100% flatness for it to later receive the Spruce top.


That's all for now, stay tuned for more updates very soon!

Next up we cut the angle for the headstock, I use a bandsaw to rough cut followed by a handplane to smooth it out. This guitar will have a volute to reinforce the headstock without using a scarf joint.


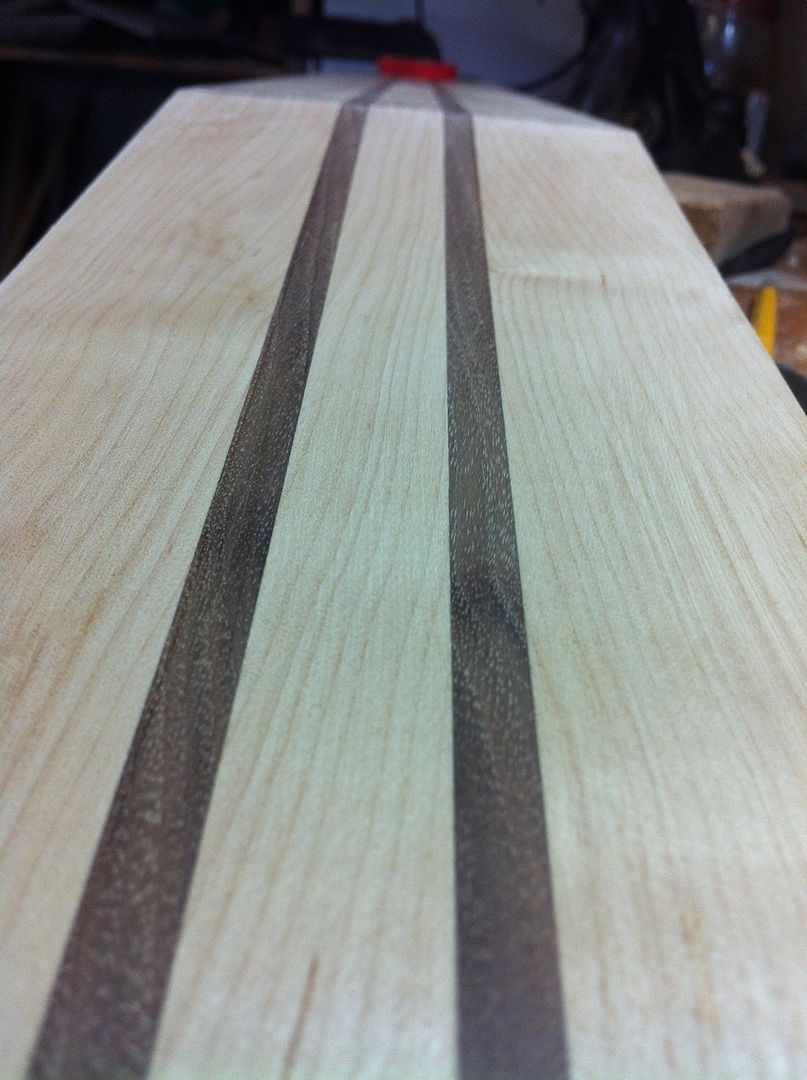
Here's a shot of the now planed headstock angle and a good close up of the neck laminates.


Next I rout for the double action truss rod using this very simple jig.


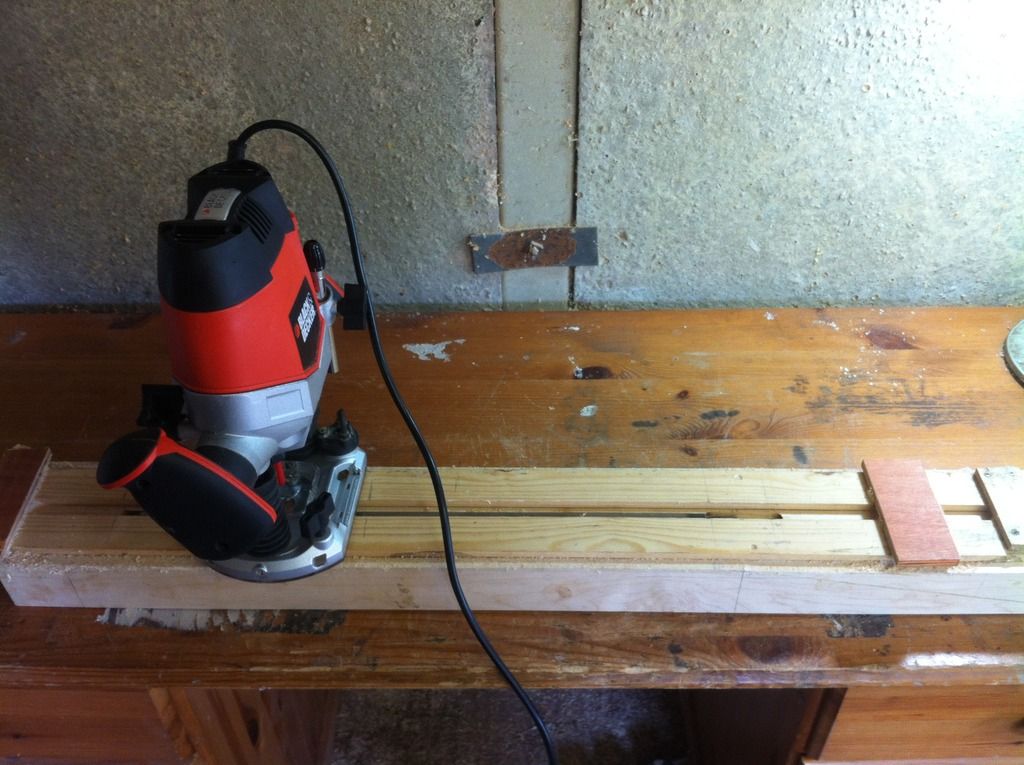
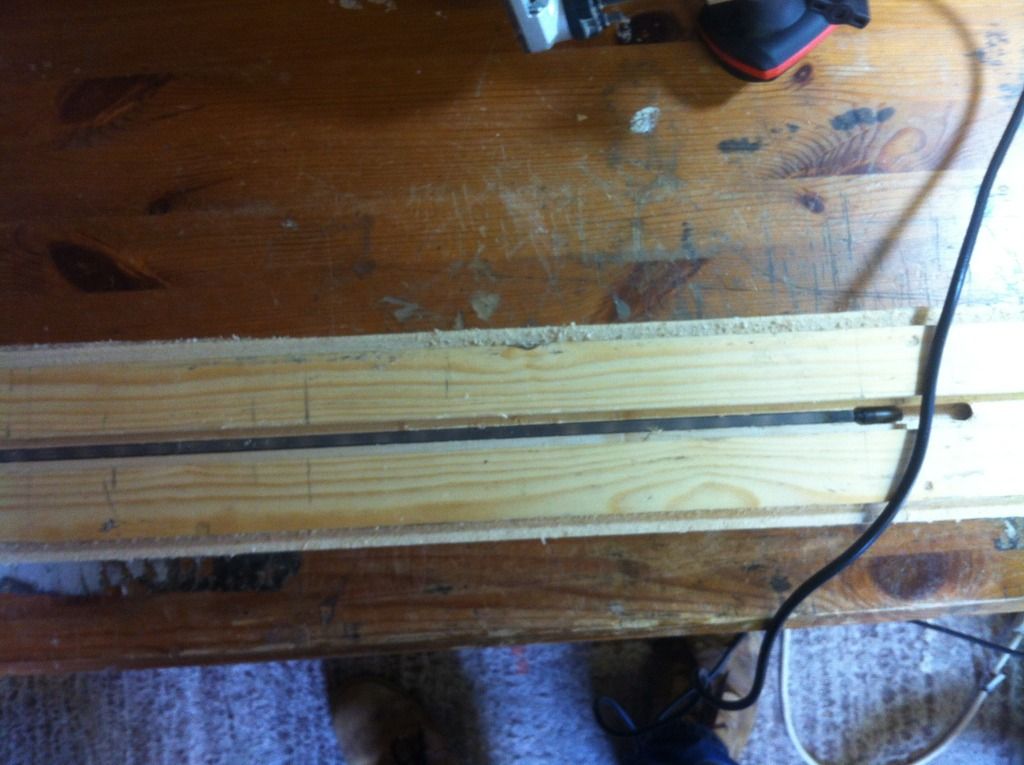
The truss rod in place and the jig still attached to the neck


Now I saw away the waste (which will be used for another neck blank) from the back and plane the neck down to the final thickness of the heel.


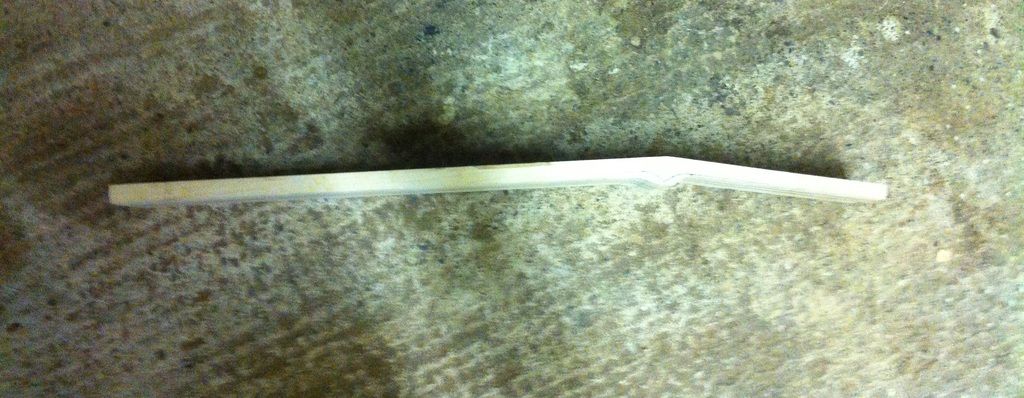
Here is the very rough profile sawn out and viewed from the side. Notice the lump behind the headstock... this will form the volute.


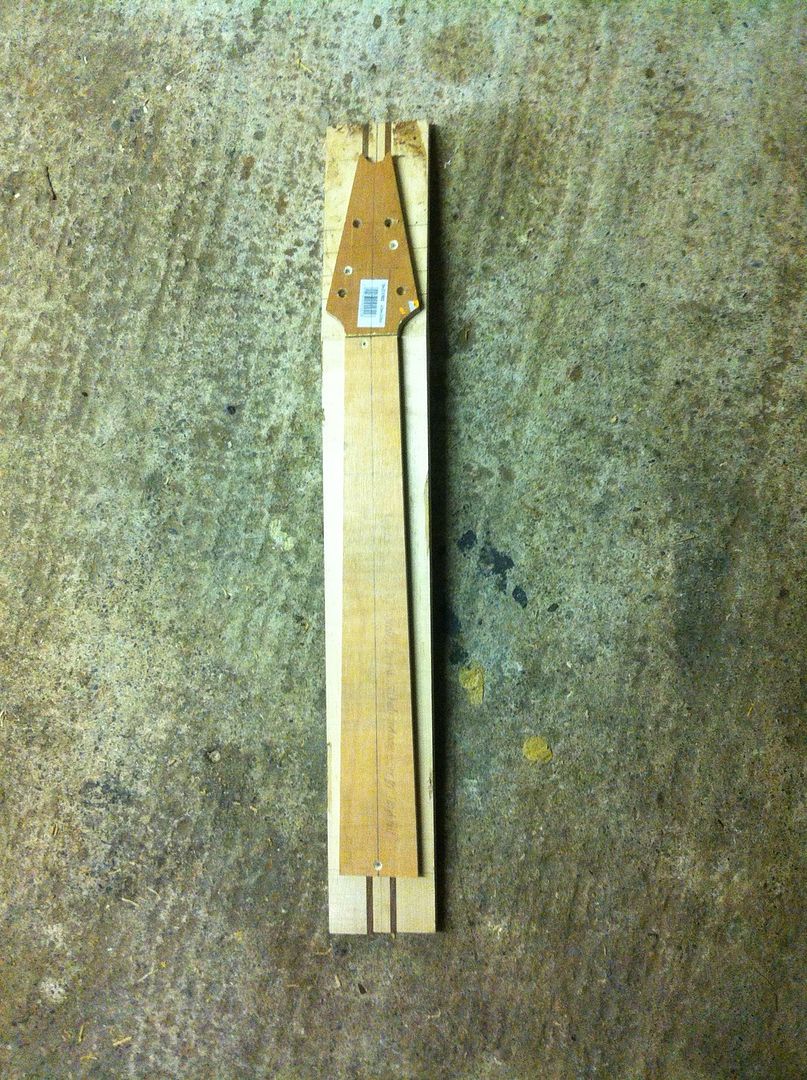
The templates attached, ready to be cut out using bandsaw and router.


More updates coming soon!
 

This site may earn a commission from merchant links like Ebay, Amazon, and others.

Manton Customs

Well-Known Member
Joined
Aug 4, 2013
Messages
72
Reaction score
10
Location
Shropshire, UK
Sorry I didn't realise

Now the Mahogany has been glued and planed the next job is the chambers. As the Spruce top is quite thick (20 mm) the portion of the chamber in the Mahogany is quite shallow...Too deep and we'd risk exposing them when carving the rear tummy cut/carve!


Here you'll notice I have glued up the two halves of the bookmatched Spruce top and cut it out using the template seen previously.

You'll also notice I have cut the first F hole. These are quite narrow in places so were done by hand using a template to ensure symmetry rather than using the router. They are just rough at the stage and will be refined before completion.


Here the chamber has been cut into the spruce, leaving a thickness of 5-6 mm around the F hole.


This is what it looks like on the back before gluing up


A shot of both F holes sitting a top of the yet to be glued and cut out Mahogany body. Lots of pen/pencil lines to ensure symmetery in the placement!


And now gluing the Spruce top to the Mahogany again using large cauls to distribute clamping pressure. Indexing pins were used to ensure both halves of the chamber line up perfectly.


The top glued to the body. Next the top will be used as a template to cut the Mahogany to the same size as the top. The white chalk lines were used as a guide for where to spread glue to during the glue up.


That's all for now! Thanks for checking this build out :)
 

Manton Customs

Well-Known Member
Joined
Aug 4, 2013
Messages
72
Reaction score
10
Location
Shropshire, UK
Here is the body cut out. As previously mentioned, I used the spruce top as a template for the router.


Another shot of the body.


Side view showing the thick Spruce top. This is obviously before any sanding has taken pace and straight from the router.


The Mahogany back.


Next up we will be returning to the neck. Thanks for looking :)
 

Manton Customs

Well-Known Member
Joined
Aug 4, 2013
Messages
72
Reaction score
10
Location
Shropshire, UK
On with the neck! Here the Spruce head plate is being glued to the headstock. Again using a caul to distribute the clamping pressure with waxed paper in between to stop the caul being glued to the neck!


Next the fingerboard is glued on.


...and trimmed down to the neck using the bandsaw and flush cutting router bit.


Next up was carving. I didn't actually get any carving 'action shots' but here is the result. This shows the volute from the side. The volute does not only look attractive but also adds significant strength where it is needed.


A shot of the heel, carved so that it flows nicely into the body.


A shot looking down the neck. You'll also notice I have drilled for the tuners.


Another shot of the volute


And a picture of the now carved and sanded neck. Next up inlay!


Thanks for looking!
 

Manton Customs

Well-Known Member
Joined
Aug 4, 2013
Messages
72
Reaction score
10
Location
Shropshire, UK
This is the inlay design the client came up with, it is loosely inspired by a pentagram. It was a tricky shape to cut from mother of pearl and had to be made from two pieces due to the size. This is the result after several hours cutting and filing it to shape.


Here is a quick symmetry check.


Here I have scribed round the inlay, the next step is cutting the recess for it using Dremel, scalpel and fine chisels.


The completed inlay!


I also inlaid side MOP position markers...this was actually done after the neck had returned from Sweden, though as this update was focusing on inlay I included it here.


After the inlay was complete I oil the board to protect, seal and improve colour. The neck here is in a purpose made drying cupboard powered by a single 100w light bulb. This aids with drying and keeps dust off, it comes into it's own when using a wiping varnish/oil finish (which I seldom do anymore!).


A shot of the finished fingerboard (minus frets!) and inlay.


The neck, all ready to be sent off to Sweden!


Thanks for looking
 

Manton Customs

Well-Known Member
Joined
Aug 4, 2013
Messages
72
Reaction score
10
Location
Shropshire, UK
Back to the body and I'm routing for the neck. In this picture I have drilled out the waste with a Forstner bit.


Here I've routed the pocket. The router will leave the corners of the pocket untouched and as the neck has a square heel we need to deal with these corners. 5 minutes with a couple of chisels and a scalpel and they are taken care of!


I then move onto the Floyd Rose cavity. No sharp corners here, so no chisel work is necessary.


The tremolo spring cavity is then routed.


This is the control cavity shape we decided on, fairly standard but I feel it's is a big improvement on the "one cavity for every component" approach which features on the Ibanez. The lip for the lid will be routed later. You'll also notice I have drilled for the controls...more on this on the picture after next.


Now the pickups are routed. Again the router will leave behind the corners which need to be chiseled out around the pickup tabs. Here I'm halfway through and your can see I've already dealt with the lower corner but not the upper one.


This is the control layout we decided upon, everything is within easy reach and it creates a nice A-Symmetry.


That's all for now, more very soon! Thanks for looking
 

Manton Customs

Well-Known Member
Joined
Aug 4, 2013
Messages
72
Reaction score
10
Location
Shropshire, UK
Next up the carves are drawn up (pencil lines around edge).


And the rear carves (tummy cut and lower horn)


Here's the body after the carves have been cut and it has been given a good sanding! The glare in the photo makes the carves look a little less pronounced than they actually are.


Another shot of the front, the carves are a bit easier to see in this picture.


The rear carves.


A close up of the tummy cut.


Next up was grain filling on the rear and sides (Spruce does not require grain filling). The body now appears much darker but this is before the excess has been sanded off. I used black grain filler to highlight the grain through the dark finish which will be added later.


A close up of the now filled grain.


That's all for now, thanks for checking out this build.
 

fogcutter

Well-Known Member
Joined
Aug 8, 2014
Messages
143
Reaction score
5
Location
singapore
this build is awesome! What an interesting concept. I bet the mahogany/spruce with the chambers will be a really interesting sound and feel.
 

Manton Customs

Well-Known Member
Joined
Aug 4, 2013
Messages
72
Reaction score
10
Location
Shropshire, UK
Next we do a trial assembly to make sure everything works as it should, give it a play test and drill any final holes before the finish is applied. It's far better to find any issues at this stage rather than after the finish has been sprayed! Fortunately there were none and the guitar played and sounded great.


A shot of the headstock with the Gotoh 510 tuners.


Now the guitar will be stripped of all hardware again and we go into finishing. Next up is the colour coats!


Thanks for looking...we are nearing the end!
 

Manton Customs

Well-Known Member
Joined
Aug 4, 2013
Messages
72
Reaction score
10
Location
Shropshire, UK
Now we spary the colour coats. The colour we went for is a darker version than that of a typical Cello but still in keeping with the theme. This picture was taken in direct sunlight so looks a little brighter than it does in reality.


A shot of the back after receiving the colour


And the headstock (apologies for the glare!)


The neck gets the same colour


After the colour coats are complete we apply the clear coats. Following this the guitar is set a side for 2 weeks for it to cure. We went for a Satin finish in keeping witha Cello. This picture is before the 2 week wait (when the lacquer has just been applied).


Next update will be the finished pictures! Thanks for looking.
 

Manton Customs

Well-Known Member
Joined
Aug 4, 2013
Messages
72
Reaction score
10
Location
Shropshire, UK


Here we are at the end! The finished pictures! The guitar will be used with an organ so to run with that theme and provide some athompheric shots we took the guitar to a local church where we were kindly given permission to shoot.


A shot in front of a Lychgate, why will become obvious later!


The back, we made some anodised aluminium plates for the rear which set it off nicely.


A shot in front in front of the lovely church organ


The inlay (now with frets!)


A shot of the TT frets


Here's a shot of the headstock featuring our new logo.


A close up of the F holes and now fitted hardware.


The rear of the headstock with the Gotoh 510s fitted


Thanks for watching this build. Details on the new owner and a testimonial will be put up shortly.
 

Manton Customs

Well-Known Member
Joined
Aug 4, 2013
Messages
72
Reaction score
10
Location
Shropshire, UK
My client from the band Lychgate was kind enough to write a testimonial for us:

"It was almost surreal to finally play a guitar with such accurate intonation everywhere on the fretboard. I would press a key on my keyboard and find the corresponding note on the guitar, and find a very pleasing-to-the-ear relationship. There was no more tuning oscillation to be heard in the third "G" string (as is the case with most guitars) and no buzz anywhere on the fretboard; even on the first fret, bottom string. The action is exactly as I like it and I think we also couldn't have chosen our string gauge any better.

Working with Manton Customs has been a positive experience from start to finish. Nothing was ever too much trouble and all my concerns at every step of the building process were answered by the kind of luthier that really knows his job. This guitar is the model I have waited for in the back of my mind for a very long time, and it is truly given me back the passion and inspiration that I need. I'm now looking forward to pushing myself as a musician to the next level with a truly reliable and greatly engineered instrument."

Here's a picture of Lychgate guitarist Vortigern with his new guitar!

 
Top