Multiscale Chambered 8-string Hybrid Singlecut - build thread

  • Thread starter Erik Hauri
  • Start date
  • This site may earn a commission from merchant affiliate links like Ebay, Amazon, and others.

Erik Hauri

Lumber -> Guitars
Joined
Jan 2, 2008
Messages
114
Reaction score
46
Location
Gaithersburg MD
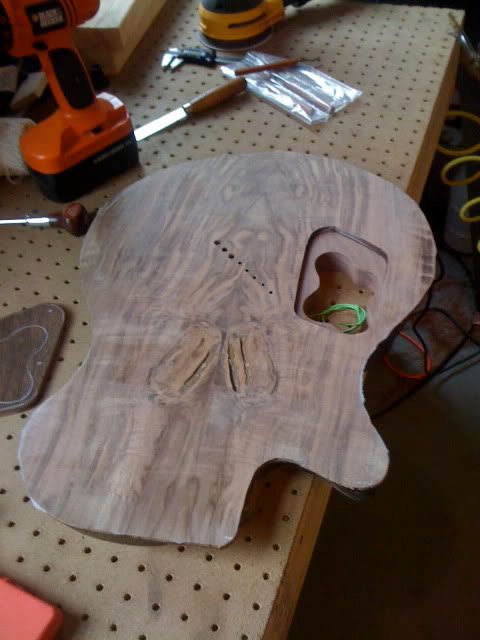
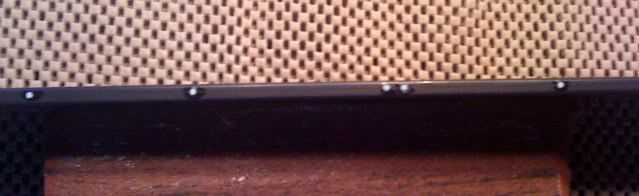
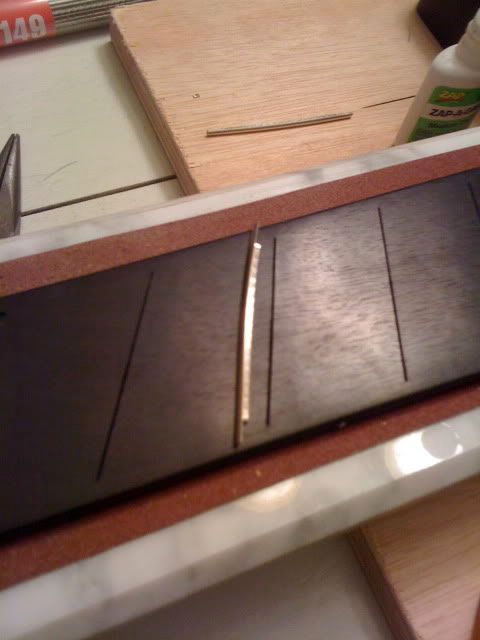
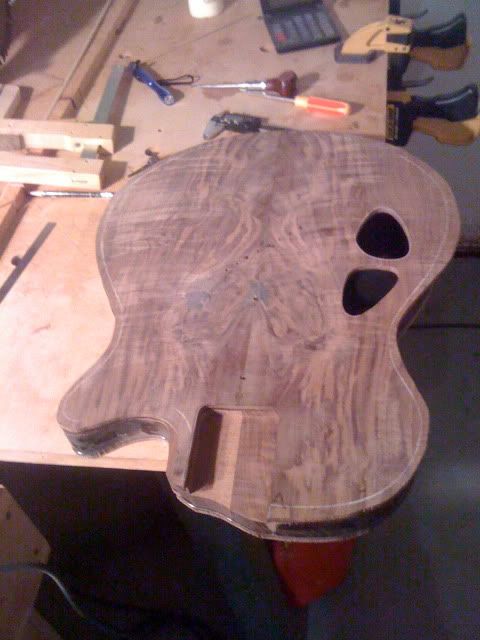
The brass ball-end retainer plate, with ground wire soldered on, is inlayed into the back and now it's time to glue the back plate on.

For this I'm using - again - the West System epoxy adhesive. No special reason except that I like it, it has more "open time" on it than Titebond, and I'm relaxed and not in a rush today. Titebond would have been fine too.

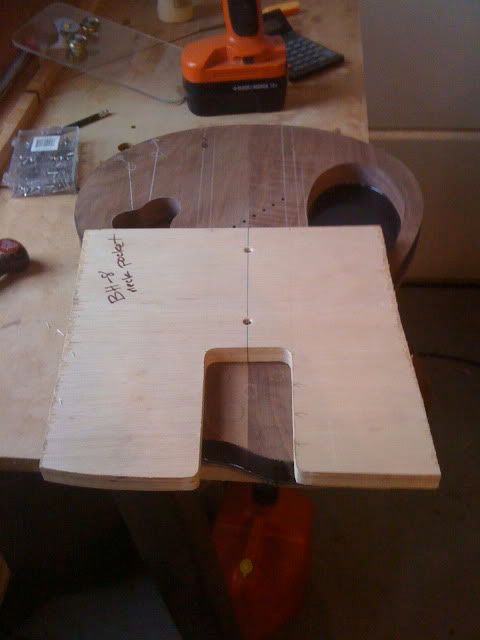
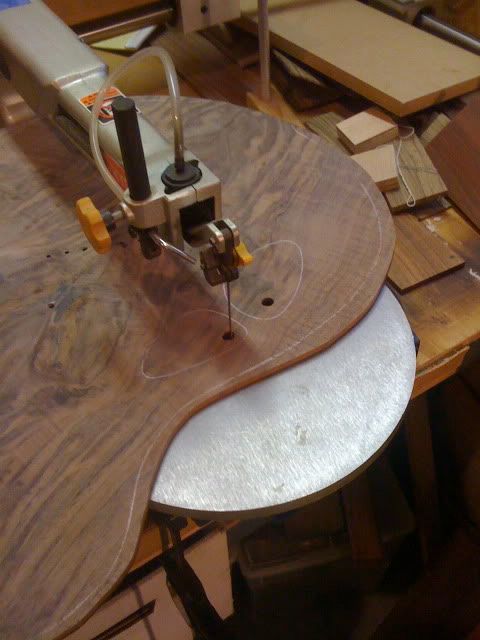
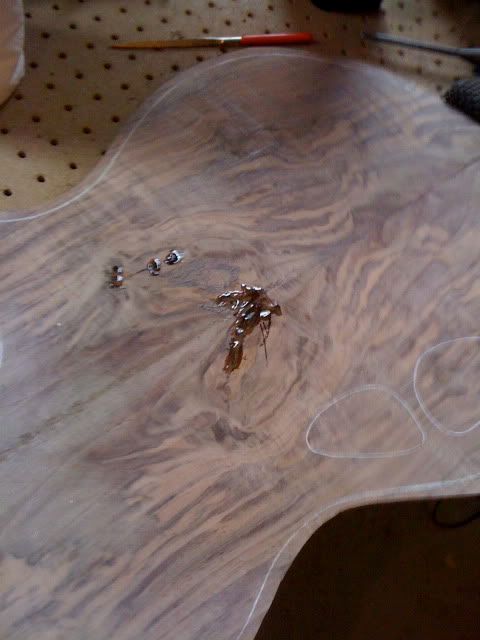
In this shot notice that I've drilled the string-through holes through the back - I have an outline drawn that will allow me to line them up perfectly with the bridge plate inlayed into the body core once the two are laid up together.
back1.jpg


The back goes into the press on a layer of wax paper.
back2.jpg


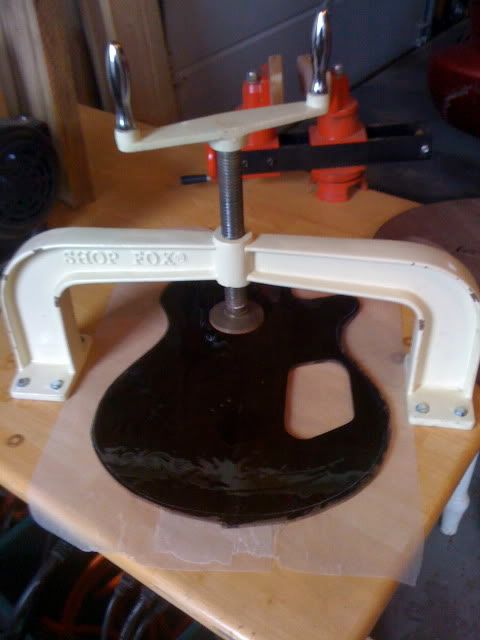
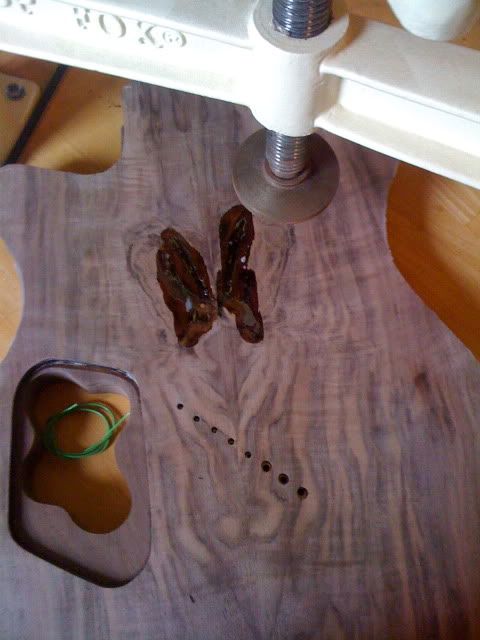
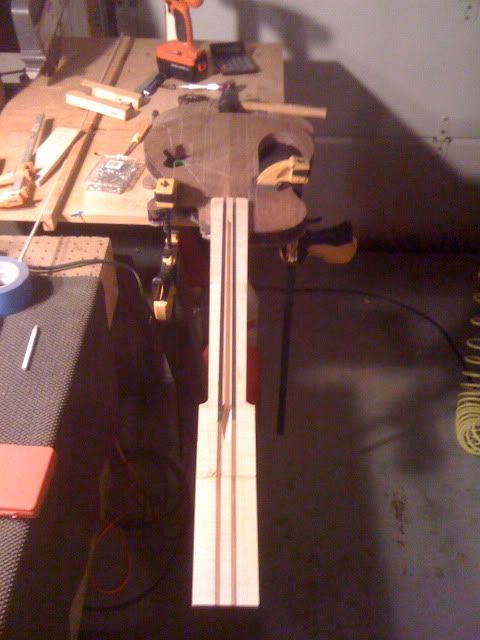
Then the body core goes over top, being VERY careful to keep it well aligned as I tighten the press screw onto a black limba block to distribute the pressure. I don't need a ton of pressure here, just enough to close the joint and make sure I have squeeze-out all around the body. The green wire is the ground wire from the ball-end retainer.
back3.jpg


Sorry for the blurry shots today - wearing rubber gloves and trying not to get epoxy on the iPhone....

The left-over epoxy is used to stabilize a couple of knots on the top, which will mostly be routed away for the pickups anyway, but still...

top1.jpg


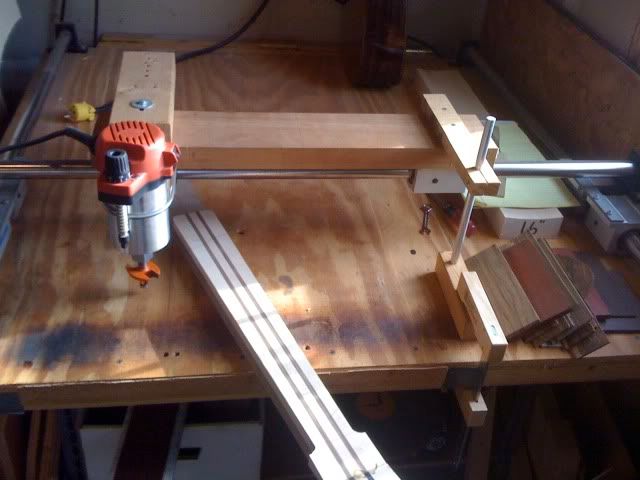
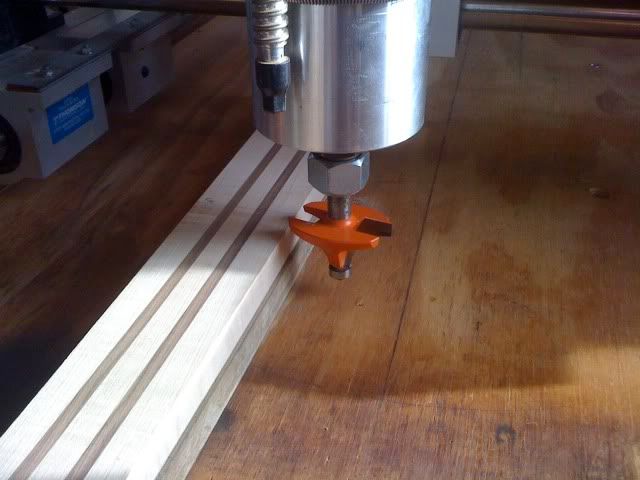
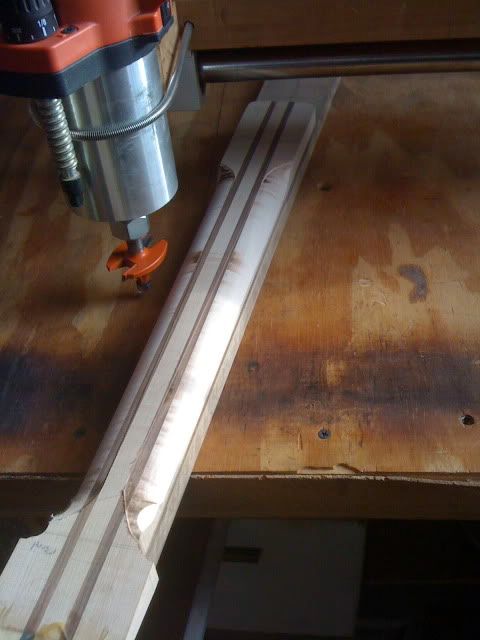
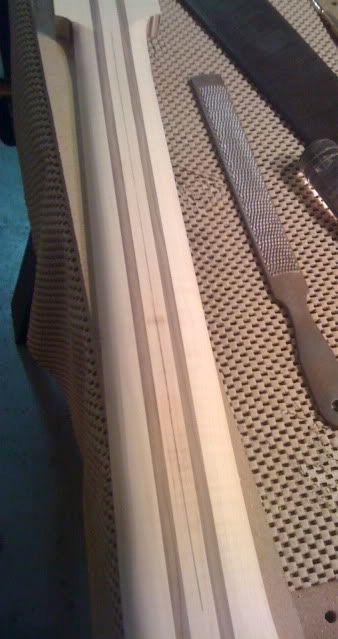
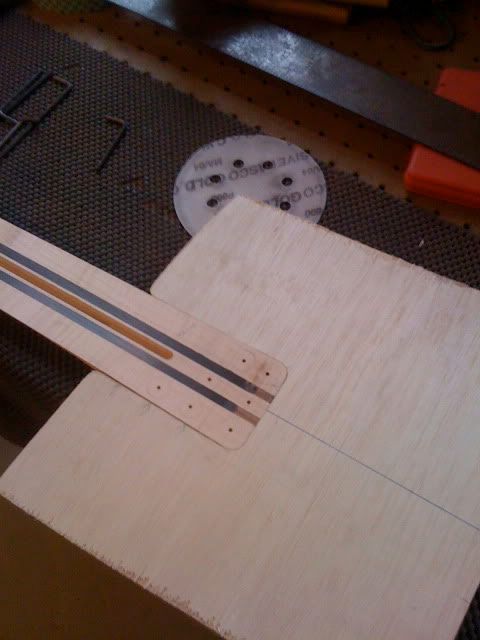
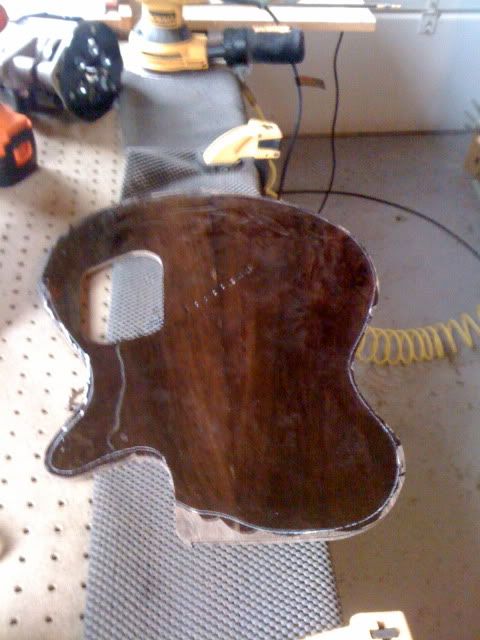
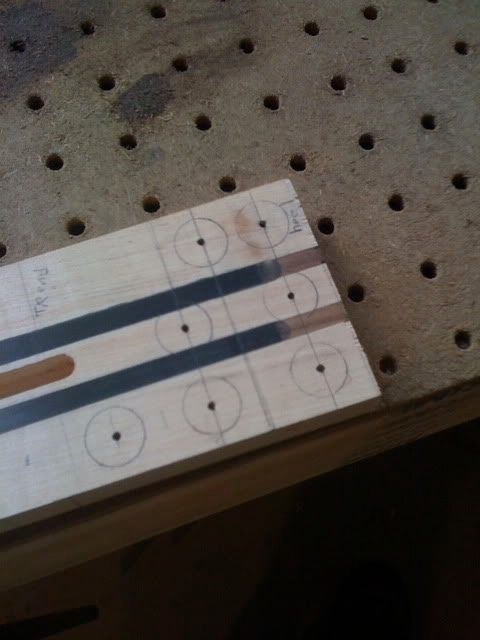
And now laying out the screw holes in the neck heel - want to avoid drilling into the CF bars! Pilot holes will be drilled here on the drill press, and once the neck pocket is routed, these will serve as guides as I drill through the bottom of the neck pocket. Perfect hole alignment will be the result.

There is an extra screw on the bass side as there will be more string tension there, and the treble-side holes are closer together because the heel underneath the neck pocket will be sculpted to improve upper-fret access.

neckheel.jpg
 

This site may earn a commission from merchant links like Ebay, Amazon, and others.

Erik Hauri

Lumber -> Guitars
Joined
Jan 2, 2008
Messages
114
Reaction score
46
Location
Gaithersburg MD
Body with the back attached is out of the press -

back4.jpg


- needed to ream out the string-thru holes a little, and stabilize the knots on the back with a little epoxy

back5.jpg


Fretboard is tapered *just* a hair wider than the neck (here it is taped to the neck taper template), and buffed out & ready for fretting

fretboard12.jpg


Also roughed out the neck's back contour today - for this I use my DIY duplicarver with the stylus pinned so that the router doesn't move.

neck20.jpg


7/8" roundover bit for this, set the depth so that the bearing rides on the neck taper template that the neck is mounted to.

neck21.jpg


In about 5 minutes the back of the neck is roughed out, leaving room at the heel for hand carving, and at the headstock for a small volute. This is far from a final carve, as the neck needs to get a little thinner toward the nut and I need to knock down the shoulders a little, otherwise it feels like a baseball bat.

neck22.jpg


One of these days I'm going to have a set of custom compound roundover bits made that will be very close to final shape - but today is not that day.
 

vansinn

Well-Known Member
Joined
Sep 22, 2007
Messages
2,923
Reaction score
172
Lovely work, Erik. I so enjoy reading/seeing how different luthiers do it, technique, tools et al..
 

troyguitar

Well-Known Member
Joined
Jan 7, 2009
Messages
9,015
Reaction score
797
Location
St Petersburg, FL
That's a good idea for rough carving the neck, I might have to get a big roundover bit and do something similar. I did my other 2 necks so far by hand with draw knives - it works but the profile is not terribly consistent.
 

Andrew_B

Well-Known Member
Joined
Oct 27, 2008
Messages
1,507
Reaction score
153
Location
sydney
looking good man!
i like the diy duplicarve.... i might have to do something like that :idea:

looks great :yesway:
 

hartguitars

New Member
Joined
Sep 1, 2009
Messages
2
Reaction score
0
Location
Pittsburgh
Erik, This is really starting to shape (pun intended). I can't wait to see the next step!

And for everyone that is checking this thread. I must say, Erik is an absolute delight to work with. I'm already in the mental planning stages for my next instrument from him.
 

Erik Hauri

Lumber -> Guitars
Joined
Jan 2, 2008
Messages
114
Reaction score
46
Location
Gaithersburg MD
More work on the neck carve today - I planed the back of the neck down to final thickness at #12, then carefully sanded a gentle graduation toward 0.05" thinner at #1. The neck will also have a subtle volute underneath the rout for the headstock truss rod access, so that is left thicker.

Then I mark a thin pencil line along the center of the back of the neck, and DON'T touch it until very final sanding. I still have a bit of work to do on the shoulders of the carve and around the heel & volute, but I don't want to touch the final neck thickness until I get to the finish sanding stage - so I avoid that pencil mark from now until then.

neck23.jpg


Yeah! Side dots!

sidedots.jpg


On a multiscale fretboard with binding, where the slots don't protrude from the edge, it can be easy to mess up the side dots. The temptation is to look perpendicular to the edge of the board and mark the center between where the slots end - but no. What you want to do is to site down between the slots, at an angle to the edge of the board that is equivalent to the fret slot angle, then mark THAT center. So that from the player's position looking at the neck, the dot is centered between the frets. It would look messed up the other way.
 

Hollowway

Extended Ranger
Joined
Dec 28, 2008
Messages
17,981
Reaction score
15,283
Location
California
Many thanks for the explicit walk though on this. Very helpful tips!
 

Erik Hauri

Lumber -> Guitars
Joined
Jan 2, 2008
Messages
114
Reaction score
46
Location
Gaithersburg MD
After a very busy trip out of town, and with the holidays under wrap, I have a blessed week off work to spend in the shop!

Quite a bit done today. The board is now fretted, for this I first bevel the slot edges with a triangle file, and I use Titebond in the slots and tack the fret ends down with superglue, after first trimming the tangs off where the fret will sit over top of the binding. I like to press them in with an arbor press.

fretboard14.jpg


Ta-da!

fretboard16.jpg


There's a little bit of back-bow induced by the fretting, but the binding helps minimize it and most of it is worked out by flexing the board so that the tangs bite into the edges of the slots.

Before gluing the board onto the neck - comes the neck pocket template, out of 3/4" ply. I traced around the neck heel, rough-cut inside the line on the bandsaw, then fine tuned it with a spindle sander and hand file. The alignment is checked by sighting down the truss rod channel and marking a corresponding centerline on the template. This centerline is then used to register onto the centerline of the body when routing the actual neck pocket.

neck25.jpg


Neck pocket action - here I am screwing the template to the body to assure that it won't slip. The screw holes are located in pickup routs so they will be routed away eventually. Here I'm routing into the body core and later I will rout into the top.

neck27.jpg


Here the soundholes are roughed out using a scroll saw and cleaned up on the spindle sander.

top2.jpg


Here is the top replete with soundholes and neck pocket.

top3.jpg


First dry-fit of the neck looks great!

top4.jpg


Now - remember the screw holes I drilled through the neck heel? With the neck in place like this, these are extended into the bottom of the neck pocket and through the back as pilot holes for the final screw holes (including ferrules).
 

Andrew_B

Well-Known Member
Joined
Oct 27, 2008
Messages
1,507
Reaction score
153
Location
sydney
good stuff man,
looks sweet :yesway:

that fretboard is the cleanest i have ever seen :agreed:
 

drezdin

Well-Known Member
Joined
Jun 10, 2005
Messages
164
Reaction score
54
looks great

clean work on that neck pocket template


Latest posts

Top
')