My First Build

  • Thread starter mperrotti34
  • Start date
  • This site may earn a commission from merchant affiliate links like Ebay, Amazon, and others.

mperrotti34

Well-Known Member
Joined
Aug 3, 2014
Messages
303
Reaction score
47
Location
Harrisburg PA
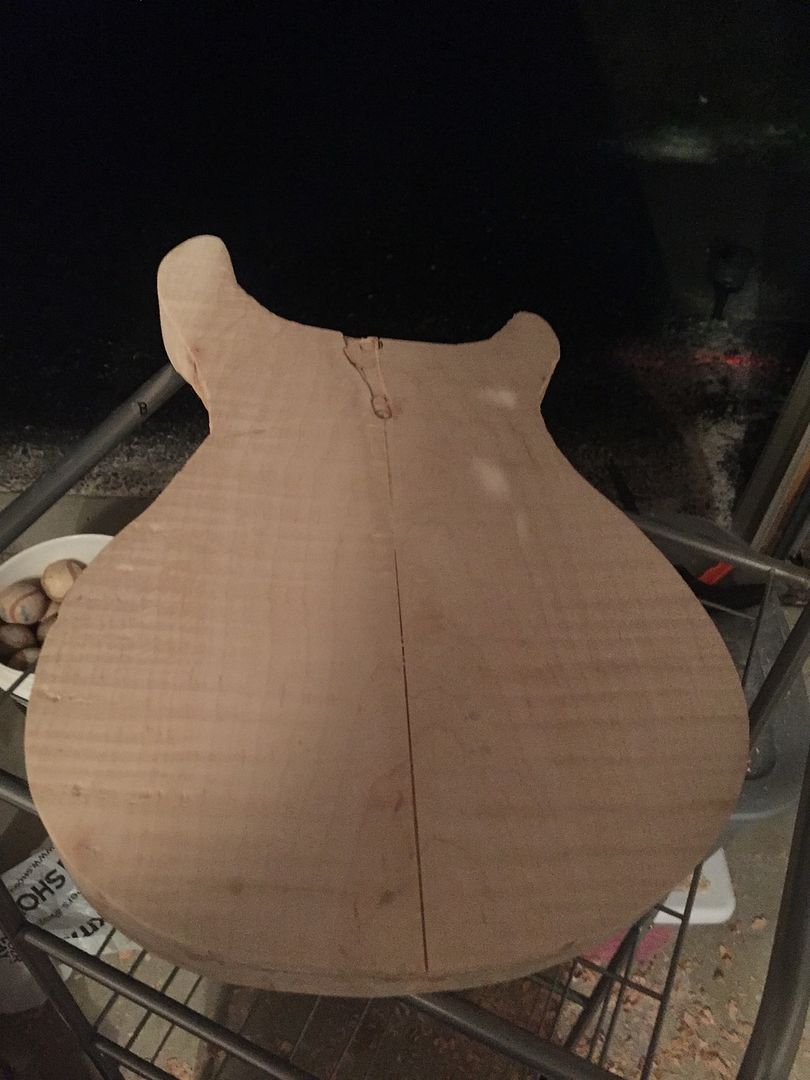
Was planning on uploading pics earlier today but I lost track of time while working haha. here is what I have so far


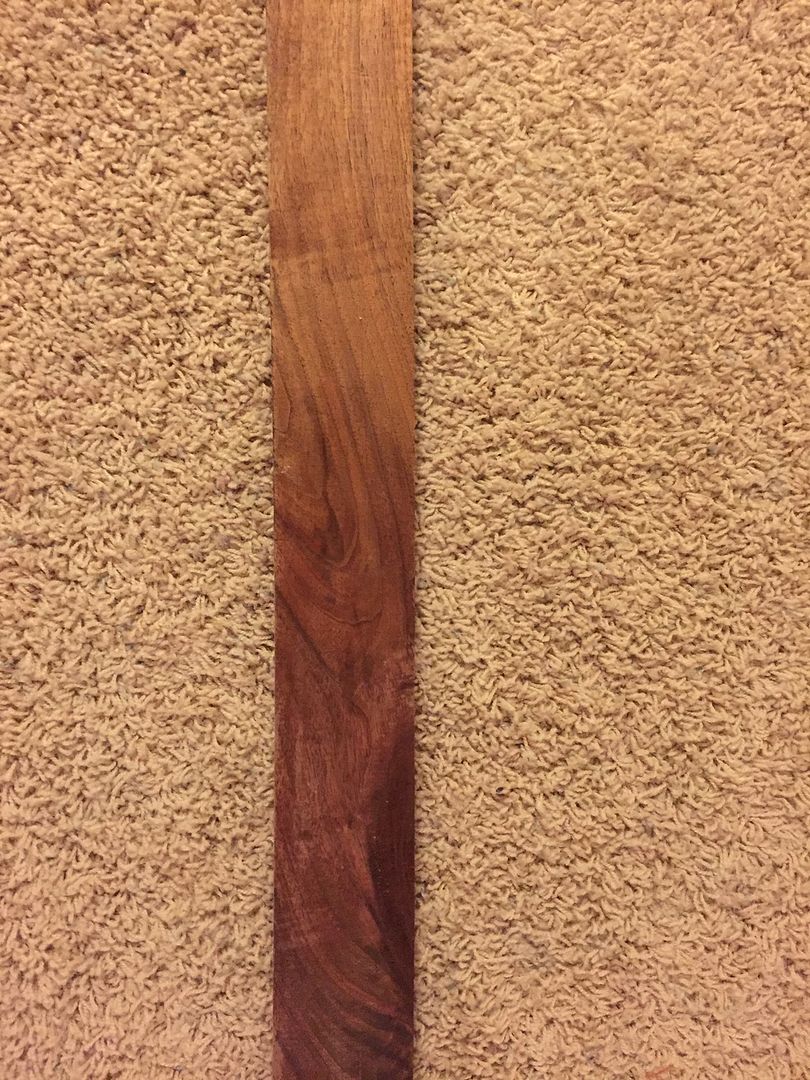
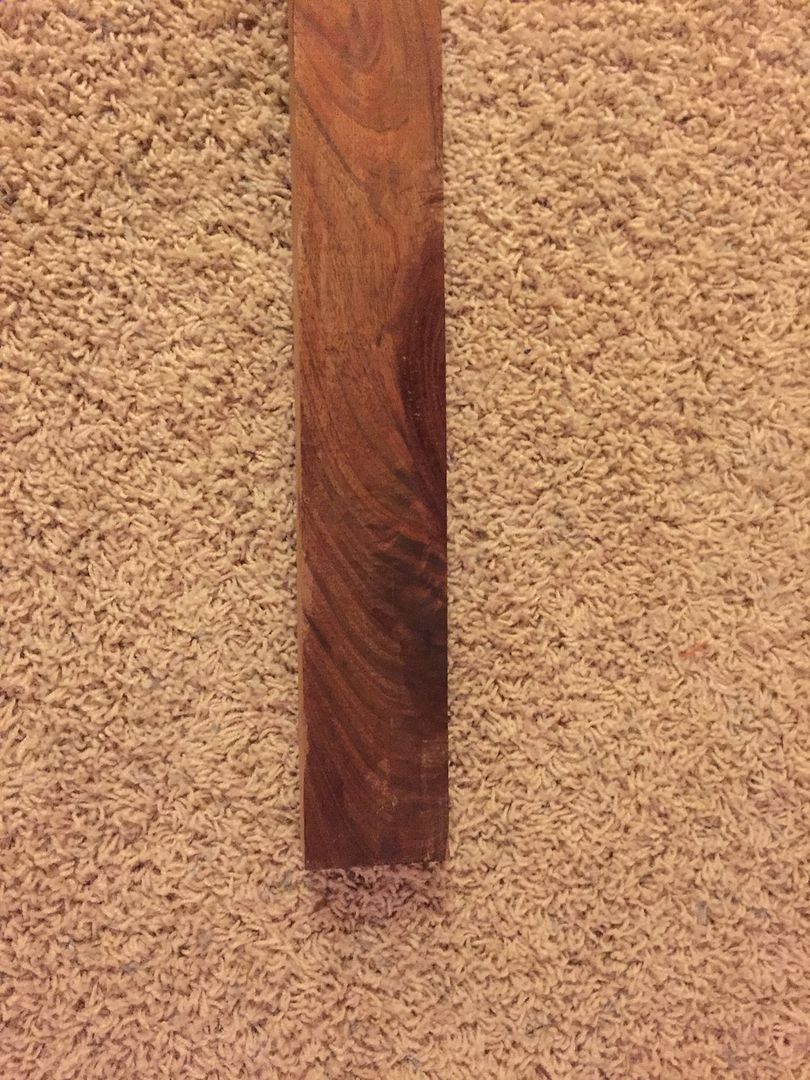
Here are pics of the walnut neck blank as well


This site may earn a commission from merchant links like Ebay, Amazon, and others.

mperrotti34

Well-Known Member
Joined
Aug 3, 2014
Messages
303
Reaction score
47
Location
Harrisburg PA
got some more work done today. Here is a pick of the body and the neck blank I decided to use next to the guitar that inspired me to start building
 

mperrotti34

Well-Known Member
Joined
Aug 3, 2014
Messages
303
Reaction score
47
Location
Harrisburg PA
BIG UPDATE

Got a lot of work done the past few days. I will just let the pic tell the story


Front and back


First coat of blue


Starting the Blue Burst


Sanded back and second coat
 

Hywel

Well-Known Member
Joined
Sep 10, 2012
Messages
680
Reaction score
84
Location
UK
There's some really nice flame going on there! :yesway:
 

mperrotti34

Well-Known Member
Joined
Aug 3, 2014
Messages
303
Reaction score
47
Location
Harrisburg PA
I am curious which method you used to join the top. That is a pretty massive gap.

ya I know. the problem is I dont have access to many tools. basically I am doing this entire build with a router, a few chisels, a handsaw and basic household tools. to join the top I borrowed my grandfather's handheld belt sander and tried to joint the pieces as best as I could. For my next build I will be using much higher quality materials and I am going to make sure I have it jointed somewhere. I believe the new lumber supplier I found will joint pieces for me.
 

Obstsalat

Well-Known Member
Joined
Nov 28, 2013
Messages
137
Reaction score
2
Location
Obrigheim Pfalz, Ger
could've used a router and a straight edge to guide it. Then run the router along the joint.

Another simple, but not so good method is to stick sandpaper onto your workbench (has to be about twice the length of your top) and then sand the entire joint straight at once...although it takes some practice to apply even pressure

for the next time then
 

mperrotti34

Well-Known Member
Joined
Aug 3, 2014
Messages
303
Reaction score
47
Location
Harrisburg PA
Yup...wait until it's strung... the body pieces might start to move and shift under the string pressure...

I know this, because it's happened to me. And the gaps were nowhere near this...

If i was the OP i'd start over.

Im not starting over now. I have already spent too much time on this. Im also one of those people who finishes no matter how bad it is. This whole build was supposed to be a learning experience for me. Thats why I used cheap materials. If the body pieces shift or something else happens then Im fine with it. I learn well from making mistakes. I am also tend to over-analyze things so if something does happen actually seeing it and figuring out why it happened will help me learn.


Edit: just realized what you guys were talking about in terms of the gap. there isnt actually a clean gap between the body pieces. the line you see is actually glue thats on the top. I havent scraped it and sanded it flat yet. the pic with the dye on the top is pretty flat but you can still see glue. I couldnt get it all off. next build I will try to do a better job of removing excess before it dries so that it doesnt look like a massive gape between the pieces haha
 

Obstsalat

Well-Known Member
Joined
Nov 28, 2013
Messages
137
Reaction score
2
Location
Obrigheim Pfalz, Ger
yeah. i dont think the top will move.

however, take your time. pay attention to details :)
execute every step in the correct order.

Dont get exited like: i want to glue the top and i want to do it NOW.
First the jointing, then the glueing.

for example: staining/finishing should be the last step of your build. focus on a clean construction first. with the stain already applied, you can't draw on the body with a pencil anymore.

furthermore, during the whole routing process, you probably gonna get some scratches in your top that need to be sanded out...you gonna sand half your stain off. then sand all the stain off cuz u want an even finish etc...

doing things in the wrong order and rushing some steps WILL result in frustration and even more work.

I wouldn't start over either, keep going and see how far you can get. it would be a shame if you start over and make an irrepairable mistake at another point!

good luck mate :wavey:
 

mperrotti34

Well-Known Member
Joined
Aug 3, 2014
Messages
303
Reaction score
47
Location
Harrisburg PA
thanks man. I think you are right I may have gotten a little impatient and rushed things and then maybe did some things out of order but now I know for next time. Like I said before I learn better from actually making the mistakes. I actually just found out I have another build set up. A friend of mine wants me to build him a tele body and for that I will be taking my time and doing things more by the book rather than how I want to do it. I think that one will turn out a lot better. he wanted me to try to find a one piece top so that will kill the glue joint haha


yeah. i dont think the top will move.

however, take your time. pay attention to details :)
execute every step in the correct order.

Dont get exited like: i want to glue the top and i want to do it NOW.
First the jointing, then the glueing.

for example: staining/finishing should be the last step of your build. focus on a clean construction first. with the stain already applied, you can't draw on the body with a pencil anymore.

furthermore, during the whole routing process, you probably gonna get some scratches in your top that need to be sanded out...you gonna sand half your stain off. then sand all the stain off cuz u want an even finish etc...

doing things in the wrong order and rushing some steps WILL result in frustration and even more work.

I wouldn't start over either, keep going and see how far you can get. it would be a shame if you start over and make an irrepairable mistake at another point!

good luck mate :wavey:
 

eddiewarlock

Well-Known Member
Joined
Sep 19, 2011
Messages
501
Reaction score
53
Location
Seville, Spain, but i am from Venezuela.
yeah. i dont think the top will move.

however, take your time. pay attention to details :)
execute every step in the correct order.

Dont get exited like: i want to glue the top and i want to do it NOW.
First the jointing, then the glueing.

for example: staining/finishing should be the last step of your build. focus on a clean construction first. with the stain already applied, you can't draw on the body with a pencil anymore.

furthermore, during the whole routing process, you probably gonna get some scratches in your top that need to be sanded out...you gonna sand half your stain off. then sand all the stain off cuz u want an even finish etc...

doing things in the wrong order and rushing some steps WILL result in frustration and even more work.

I wouldn't start over either, keep going and see how far you can get. it would be a shame if you start over and make an irrepairable mistake at another point!

good luck mate :wavey:

Not only the top is wrong. The back as well. Give it a few months and see that glue line swell ... :/
 

eddiewarlock

Well-Known Member
Joined
Sep 19, 2011
Messages
501
Reaction score
53
Location
Seville, Spain, but i am from Venezuela.
Im not starting over now. I have already spent too much time on this. Im also one of those people who finishes no matter how bad it is. This whole build was supposed to be a learning experience for me. Thats why I used cheap materials. If the body pieces shift or something else happens then Im fine with it. I learn well from making mistakes. I am also tend to over-analyze things so if something does happen actually seeing it and figuring out why it happened will help me learn.


Edit: just realized what you guys were talking about in terms of the gap. there isnt actually a clean gap between the body pieces. the line you see is actually glue thats on the top. I havent scraped it and sanded it flat yet. the pic with the dye on the top is pretty flat but you can still see glue. I couldnt get it all off. next build I will try to do a better job of removing excess before it dries so that it doesnt look like a massive gape between the pieces haha

Do whatever you want. After all, it's your guitar.

It's just not right, and while it might end up being a playable instrument, it won't be pretty.

This happened to me a few years ago, and like I said: Those gaps were nowhere near as bad as the one on your guitar.


This bass was perfect...until i put strings on it, string tension made the whole thing move :/
 

mperrotti34

Well-Known Member
Joined
Aug 3, 2014
Messages
303
Reaction score
47
Location
Harrisburg PA
Not only the top is wrong. The back as well. Give it a few months and see that glue line swell ... :/

Do whatever you want. After all, it's your guitar.

It's just not right, and while it might end up being a playable instrument, it won't be pretty.

This happened to me a few years ago, and like I said: Those gaps were nowhere near as bad as the one on your guitar.


This bass was perfect...until i put strings on it, string tension made the whole thing move :/


Well if it happens then it happens. thats why I didnt spend a crazy amount of money on materials.
 
Top