SSO build tutorials

  • Thread starter J_Mac
  • Start date
  • This site may earn a commission from merchant affiliate links like Ebay, Amazon, and others.

electriceye

Well-Known Member
Joined
Jan 22, 2014
Messages
1,801
Reaction score
638
Location
New England
You arnt allowed to post anything that shows your work at all if you are a builder that sells or does it for a living. You have to pay for a subscription if you want to do that.

I guess I never heard that rule. To me, that makes no sense at all (I get it to a SMALL degree, it COULD be, sorta, kina, considered advertising, but not really, IMO). A build process, no matter who does it, is educational. And EVERYONE DOES IT DIFFERENTLY! EVERYONE. I'm still accumulating tools and woods, etc., and constantly watch videos and pictorials, here and elsewhere. I'm just banking teh knowledge. At this point in my life, with two kids, etc., I just don't have a lot of free time to undertake such things. OP, the resources listed above are invaluable. Al of them. If I was at awork, I'd have my list of other sites to check out, too. I would, however, recommend searching for the Fletcher Guitars videos (I have NO affiliation with him). He does some very straightforward builds with a lot of education during the process. Every time I want to think about building a neck, I go to his neck videos.

Sully, who is on here, also has a TON of incredibly informative videos on YouTube.
 

This site may earn a commission from merchant links like Ebay, Amazon, and others.

Deegatron

Well-Known Member
Joined
Jun 29, 2013
Messages
796
Reaction score
581
Location
Edmonton, AB
For this to be an effective thread you would need something more than a list of how to's.
Something more along the line of

Jointing a body blank.
-Here's now Larry does it.
-Here's how Deegatron does it.
-Here's how Batman does it.

There's literally 100,000 ways to skin each cat in the build process. everyone does things a little differently. As a noob, looking to joint a body blank you can look through all 3 and decide which process would likely work best for you and the tools you have available.

Break the build into a number of processes... and show different build techniques.
 

Ram150023

NutzKustoms
Joined
Dec 15, 2009
Messages
451
Reaction score
21
Location
Rochester, NY
...
Don't have enough clamps to glue a top to a body blank? I have literally parked a car on top of it once to get enough clamping pressure over that large a surface area. I jacked the car up, positioned multiple blocks and flat pieces of MDF over the body blank, then let the car (front end with the engine) come down and rest on the wood. I calculated it out a few times after reading the sticker inside the door, the ammount of weight distributed to the front end of the car by the surface area of the glue joint came out to around 35 psi. Which still was not quite enough, but the glue joint came out great anyway. It was a Wenge top and Cherry body. I'll build something with it this year hopefully.

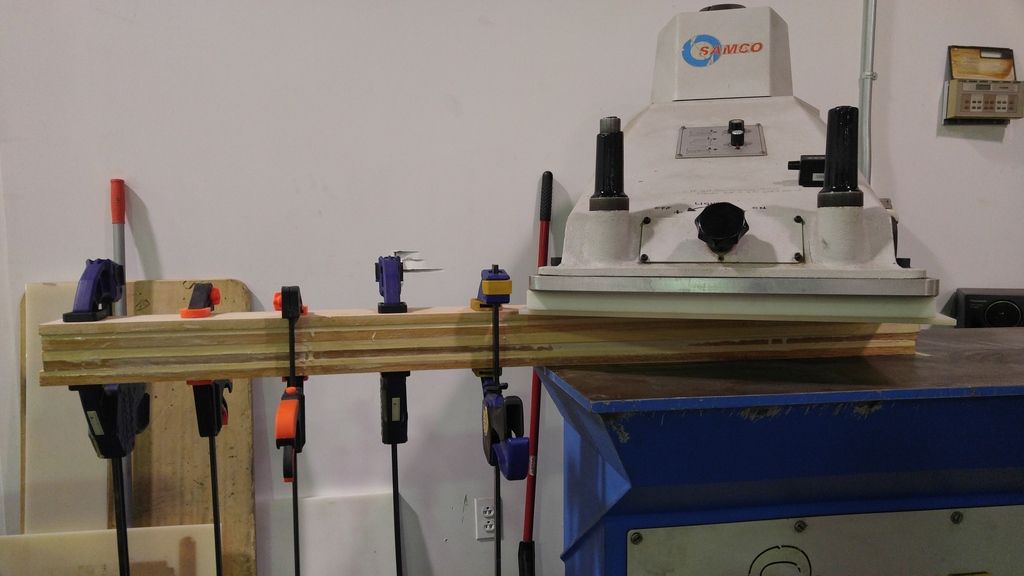
Haha i have a 20 ton clicker press at my disposal... Worked WONDERS clamping half of the neck down to glue together...

1231151456_zpszxdogav1.jpg


Ill bet itll hold a body no problem!!

Subbed to this thread as i too am veey curious on build process... Regardless on which way... A, B or C way its done!!
 

DistinguishedPapyrus

Well-Known Member
Joined
Oct 1, 2012
Messages
1,212
Reaction score
444
Haha i have a 20 ton clicker press at my disposal... Worked WONDERS clamping half of the neck down to glue together...

1231151456_zpszxdogav1.jpg


Ill bet itll hold a body no problem!!

Subbed to this thread as i too am veey curious on build process... Regardless on which way... A, B or C way its done!!

Really cool. I could do alot with one of those... until then this it what I got to work with:

20150720_142032_zps2tpmk68x.jpg


Full weight of the front end of the car was resting on the body blank. This was just half the body, I did each half one at a time. End result was pretty nice.

20150802_061902_zpsozikvoit.jpg
 

Deegatron

Well-Known Member
Joined
Jun 29, 2013
Messages
796
Reaction score
581
Location
Edmonton, AB
perhaps a more appropriate/helpful sticky thread would be "Epic unconventional techniques, tips and tricks for the budding Luther with limited tools".

Guy's could share things like "the car clamp method", "router sled jigs", "home depot binding jigs", "methods for painting with rattle cans", etc
 

Ram150023

NutzKustoms
Joined
Dec 15, 2009
Messages
451
Reaction score
21
Location
Rochester, NY
perhaps a more appropriate/helpful sticky thread would be "Epic unconventional techniques, tips and tricks for the budding Luther with limited tools".

Guy's could share things like "the car clamp method", "router sled jigs", "home depot binding jigs", "methods for painting with rattle cans", etc

Oooh thats a good one!! Ill be first in the rattle can category!!

0304160435_zps5f06wnrf.jpg
 

StarbardGuitar

SS.org Decaf
Joined
Oct 15, 2014
Messages
114
Reaction score
8
Location
Central MA
As other members have already mentioned, everyone has their own methods and order of doing things. What I can suggest to you though are some video series on YouTube that I remember watching before starting my first build. Check out Fletcher Guitars - he's posted a couple different series of builds from start to finish that you can learn a lot from. I think I watched his Strat build series before starting my first build.

To use something like this to help guide you in your first build, you could take notes as you watch of what order he goes about doing things and how he does them. Then when you're done watching the videos, you could look through that list that you made, thinking about the limits of your tools and shop set-up, and how that affects the order that you should do things. This is what I did before starting my first build. Now that I've built a couple guitars, I can remember everything that needs to be done, so when I start a new build I just think about the limits of my tools and set up and consider what order I should do things to get the best results and also to make my life easiest during the build.

I hope that helps! :metal:
 

J_Mac

Well-Known Member
Joined
Jan 18, 2016
Messages
778
Reaction score
368
Location
Stockton-on-Tees, UK
Really cool. I could do alot with one of those... until then this it what I got to work with:

20150720_142032_zps2tpmk68x.jpg


Full weight of the front end of the car was resting on the body blank. This was just half the body, I did each half one at a time. End result was pretty nice.

20150802_061902_zpsozikvoit.jpg

Epic! That's incredible :lol:

perhaps a more appropriate/helpful sticky thread would be "Epic unconventional techniques, tips and tricks for the budding Luther with limited tools".

Guy's could share things like "the car clamp method", "router sled jigs", "home depot binding jigs", "methods for painting with rattle cans", etc

This is a superb idea for a thread with added entertainment potential like the car clamper :lol: start that thread dude! Looking forward to it :)
 

pondman

Build Whore.
Contributor
Joined
Jan 24, 2007
Messages
3,649
Reaction score
7,354
Location
UK
A cat makes a great sounding board when things get frustrating.
 

BlackMastodon

\m/ (゚Д゚) \m/
Contributor
Joined
Sep 26, 2010
Messages
8,688
Reaction score
5,661
Location
Windsor, ON
Here's my order that I wrote down about a year ago, I'm sure a couple of things should be moved around. By all means, people who know more than me correct me on this. :lol:

1. Cut neck blank to size and scarf joint for headstock.
2. Plane headstock piece flat with neck piece.
3. Slot neck for truss rod (and CF rods and/or T nuts if used)
4. Rough neck width and headstock.
5. Slot fretboard and nut.
6. Glue side dots while side of fretboard is still flat.
7. Cut fretboard to proper dimensions, draw centre line.
8. Radius fretboard.
9. Drill for tuner holes.
10. Cut neck width and headstock to proper size.
11. Cut body wood and glue up blank.
12. Plane body and rough shape.
13. Clean up body shape.
14. Route neck pocket, line up neck.
15. Glue fretboard, lining up centre lines.
16. Drill for bridge holes and ground channel to bridge plate.
17. Route pickup cavities.
18. Drill channel for pickup wires.
19. Drill for control layout, route control cavity.
20. Drill for input jack.
21. Glue/attach neck to body.
22. Press frets and glue in nut.
23. Rasp back of neck to correct thickness at nut and 12th.
24. Rough shape neck profile.
25. Fine sand neck and body.
26. Fret dress and nut slots.
27. Drill for strap buttons.
28. Fine sand again and seal grain.
29. Apply finish.


Cloudy

Pacific Wood Lab
Joined
Oct 26, 2010
Messages
2,064
Reaction score
507
Location
Vancouver
Definitely check out Crimson Guitars and BigDGuitars on youtube, they have an insane amount of tutorials.
 

J_Mac

Well-Known Member
Joined
Jan 18, 2016
Messages
778
Reaction score
368
Location
Stockton-on-Tees, UK
Thanks dudes. I've learned a lot from Fletcher, although prefer Ben's stuff over at Crimson as he always seems to be stretching himself and tinkering with techniques.

Haven't heard of Big D but will certainly check it out.

This:

Here's my order that I wrote down about a year ago, I'm sure a couple of things should be moved around. By all means, people who know more than me correct me on this. :lol:

1. Cut neck blank to size and scarf joint for headstock.
2. Plane headstock piece flat with neck piece.
3. Slot neck for truss rod (and CF rods and/or T nuts if used)
4. Rough neck width and headstock.
5. Slot fretboard and nut.
6. Glue side dots while side of fretboard is still flat.
7. Cut fretboard to proper dimensions, draw centre line.
8. Radius fretboard.
9. Drill for tuner holes.
10. Cut neck width and headstock to proper size.
11. Cut body wood and glue up blank.
12. Plane body and rough shape.
13. Clean up body shape.
14. Route neck pocket, line up neck.
15. Glue fretboard, lining up centre lines.
16. Drill for bridge holes and ground channel to bridge plate.
17. Route pickup cavities.
18. Drill channel for pickup wires.
19. Drill for control layout, route control cavity.
20. Drill for input jack.
21. Glue/attach neck to body.
22. Press frets and glue in nut.
23. Rasp back of neck to correct thickness at nut and 12th.
24. Rough shape neck profile.
25. Fine sand neck and body.
26. Fret dress and nut slots.
27. Drill for strap buttons.
28. Fine sand again and seal grain.
29. Apply finish.


...is getting printed out for my garage wall dude, thanks \m/ >_< \m/
 

Dana

Well-Known Member
Joined
Jan 29, 2014
Messages
716
Reaction score
44
Location
boston,Ma
a couple of tricks I've learned.

when glueing pieces together, to keep them from sliding everywhere when clamping, punch a staple into one piece just a bit, then snip the other end, so you end up with a tiny piece that will grab the other piece you're glueing. then stuff won't move when you are clamping. if that makes sense.

when drilling holes through anything, clamp a block of wood to the backside of what you're drilling so when the bit goes thru, it makes a clean hole instead of pushing and splintering the wood on the backside
 

BlackMastodon

\m/ (゚Д゚) \m/
Contributor
Joined
Sep 26, 2010
Messages
8,688
Reaction score
5,661
Location
Windsor, ON
Also realized that pretty early in that list I posted, you should probably glue the headstock piece to the neck. :lol:

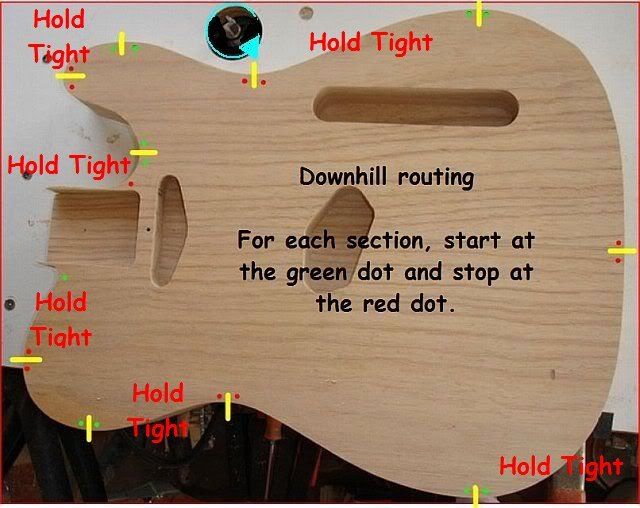
Also, downhill routing is important when routing your body to final shape:
DownHillRouting.jpg


BodyRouting2.jpg


Comic Sans aside :rolleyes:
 

Deegatron

Well-Known Member
Joined
Jun 29, 2013
Messages
796
Reaction score
581
Location
Edmonton, AB
I very strongly disagree with the downhill routing method.
You run into conventional milling vs climb cutting.

Climb cutting is safe and valid on a milling machine where everything is clamped down and fed by machine screws. Even then it's only used for finish passes that are very shallow. unfortunately when your holding onto a body it's not as good of an idea at any depth...

a good sharp bit will cut clean up and downhill... if your having issues with splinters, it's time to replace your bit or reduce your cut depth.

I had to do climb cutting on a wenge neck for my last build and it was the scariest .... ever... the rotation of the bit wants to suck the work piece into the bit and it can snowball quickly... it's incredibly hard to smoothly feed the work piece in this way. just 100% unsafe....
turns out my router bit was getting a little bit dull and I just hadn't realized it.... bought a new bit and routed some wenge again... MUCH better... no climb cutting needed. smooth as a baby's ass...
 

DistinguishedPapyrus

Well-Known Member
Joined
Oct 1, 2012
Messages
1,212
Reaction score
444
Interesting stuff about routing the body. I almost always get a little bit of tear out though, I'm thinking of getting a router for reverse rotation just for that reason for my next build. I think I know what climb cutting is, but could somebody expound on it?
 

J_Mac

Well-Known Member
Joined
Jan 18, 2016
Messages
778
Reaction score
368
Location
Stockton-on-Tees, UK
Also realized that pretty early in that list I posted, you should probably glue the headstock piece to the neck. :lol:

Also, downhill routing is important when routing your body to final shape:
DownHillRouting.jpg


BodyRouting2.jpg


Comic Sans aside :rolleyes:

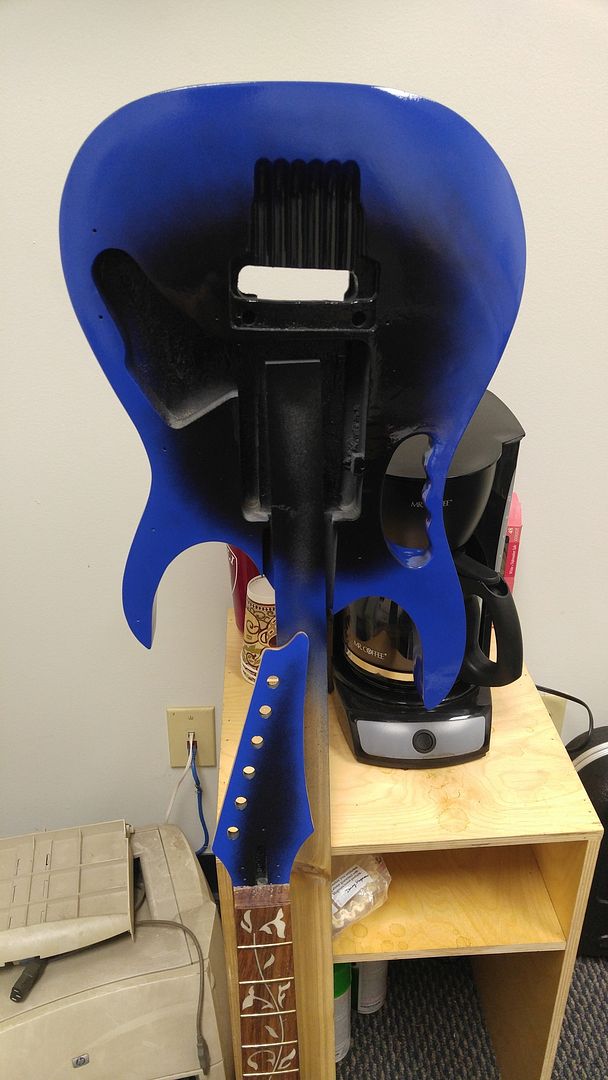
Good diagram man, I saw that only recently on the telecaster forum when I was reading about why my router took big chunks out of my job and spat it across the room. The cutting edge dug into the grain as I was going uphill on the lower horn:

Photo%2007-04-2016%2C%2018%2013%2043.jpg


Mainly cos my stoopid jigsaw left too much to rout properly. Although I was taking a shallow pass the router (table mounted) must have dug into a ragged cut, I don't think it would have happened going downhill. I finished the job by doing all the downhill sections then putting the template on the other side so uphill became downhill. Pic shows the redrawn horn shape to avoid the holes. Doh.
 
Top