Wenge, mahogany and maple, 6-string custom build

  • Thread starter Ape Factory
  • Start date
  • This site may earn a commission from merchant affiliate links like Ebay, Amazon, and others.

Ape Factory

Well-Known Member
Joined
Nov 6, 2012
Messages
324
Reaction score
61
Location
San Antonio/Florida
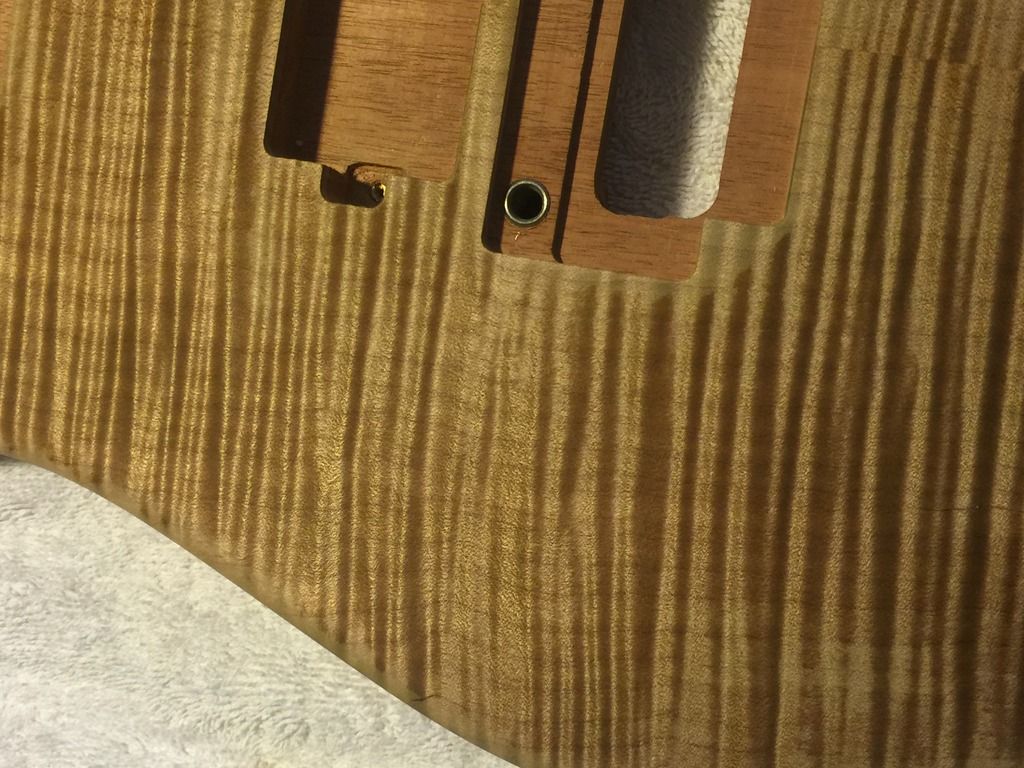
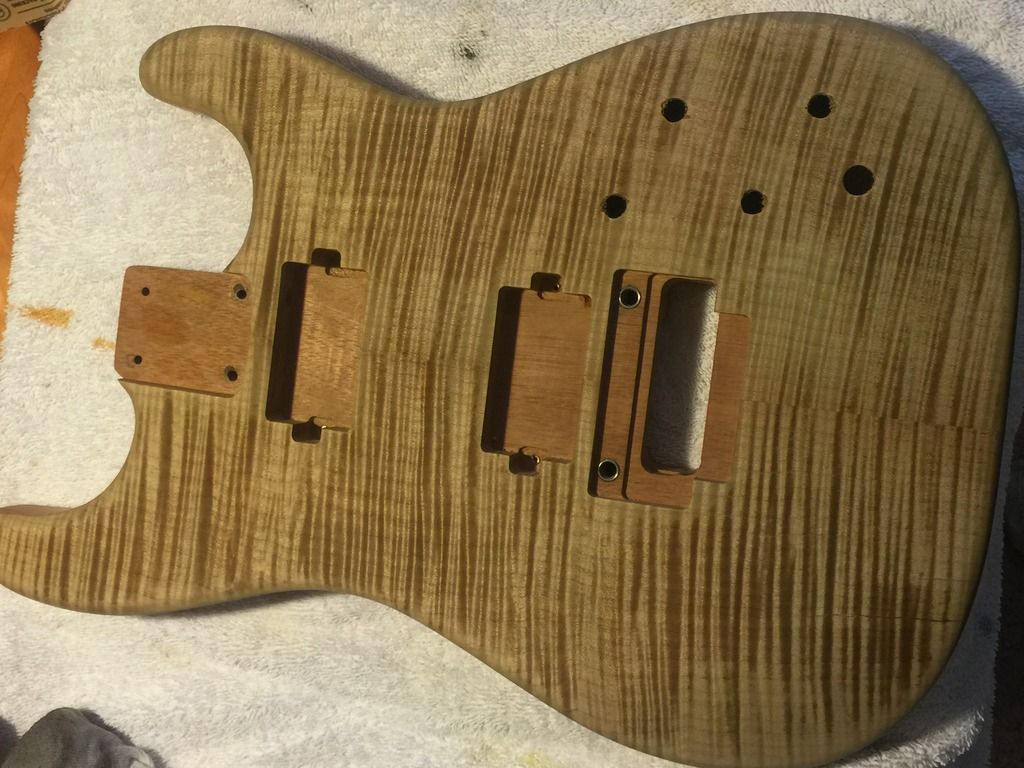
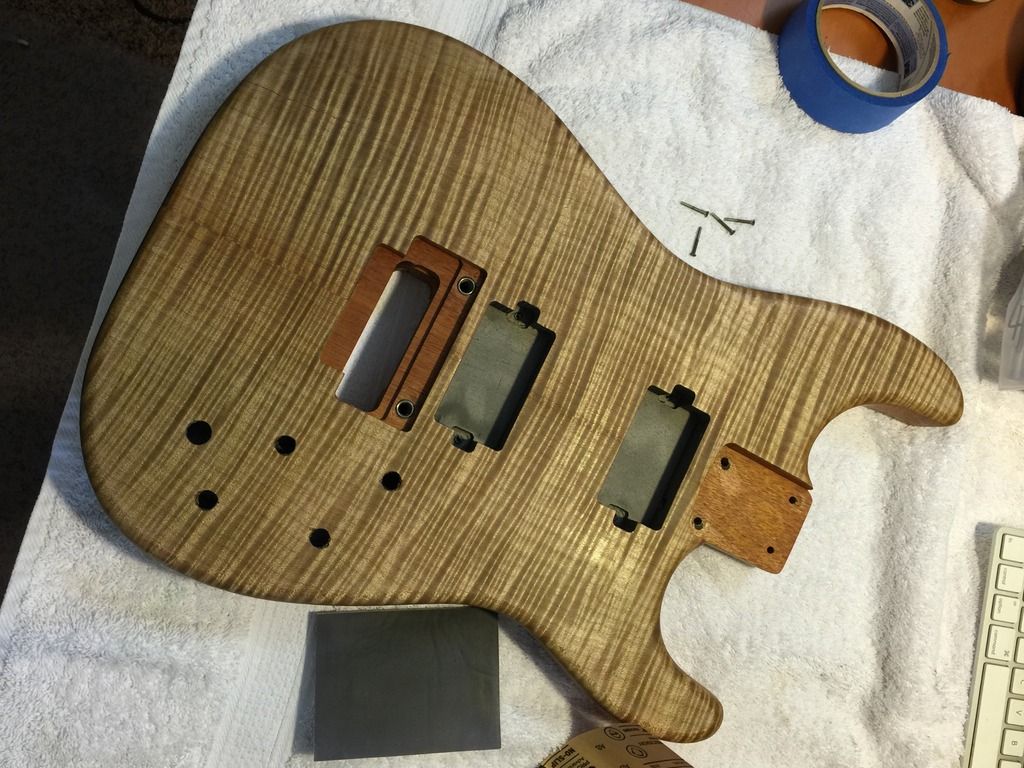
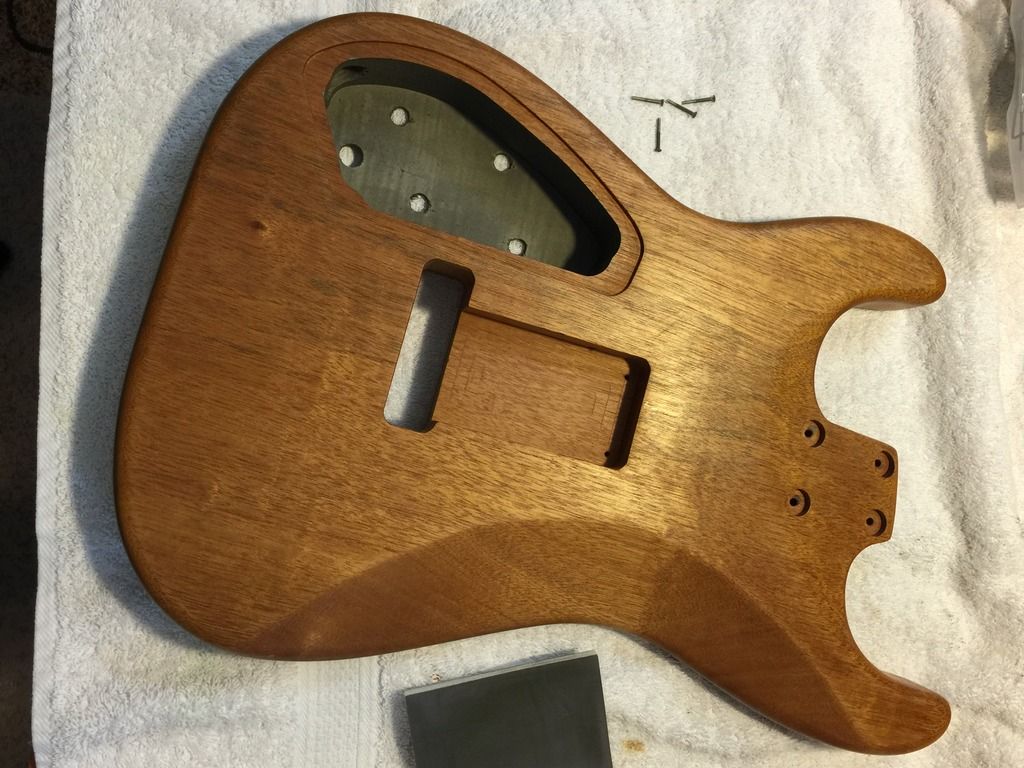
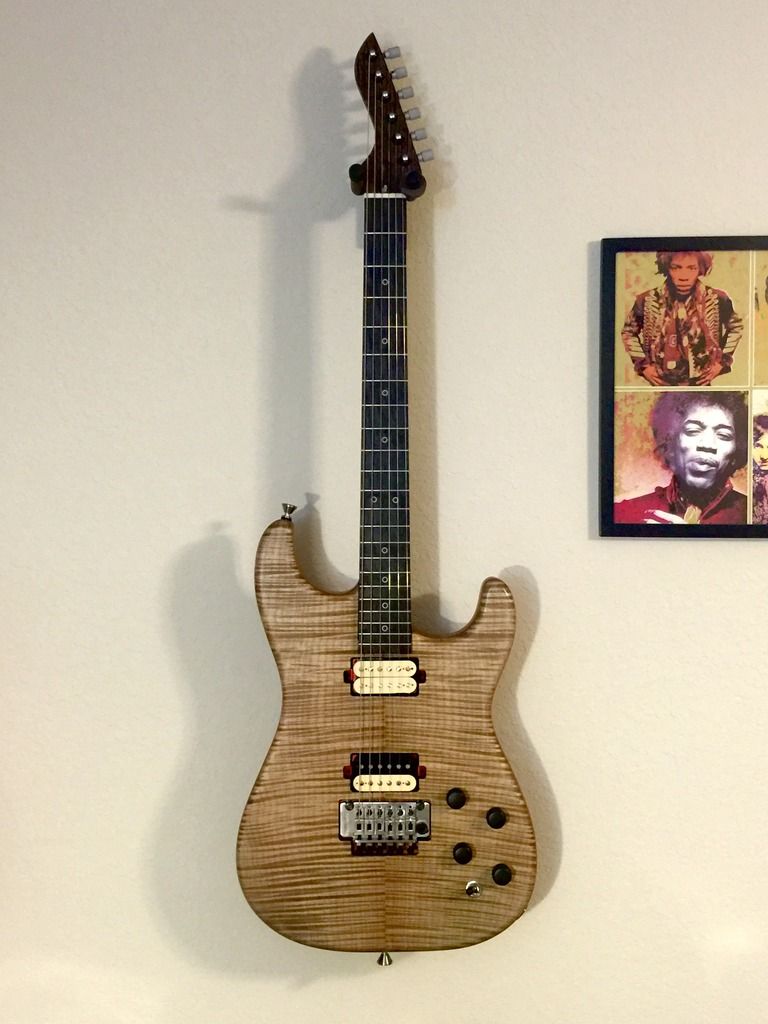
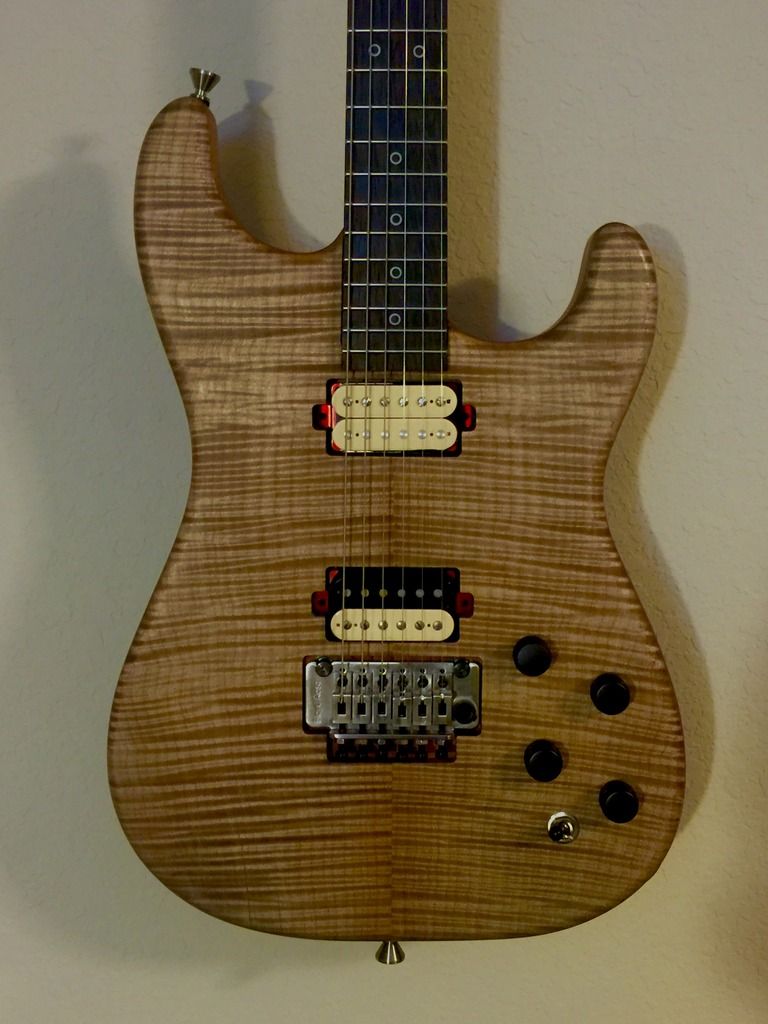
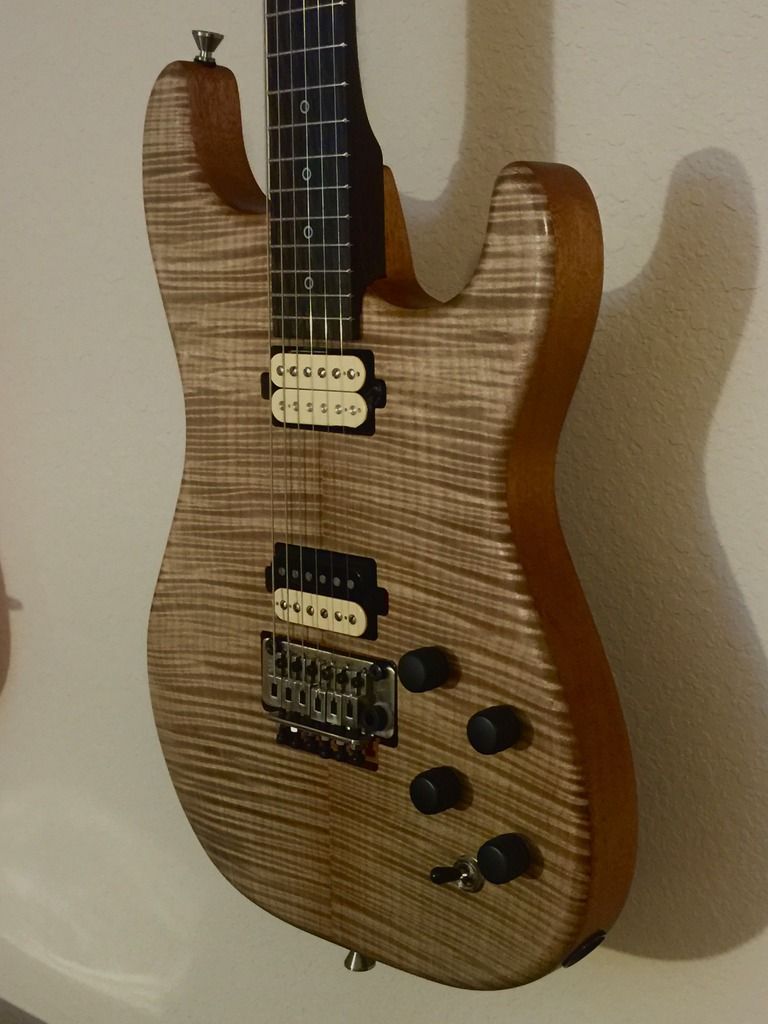
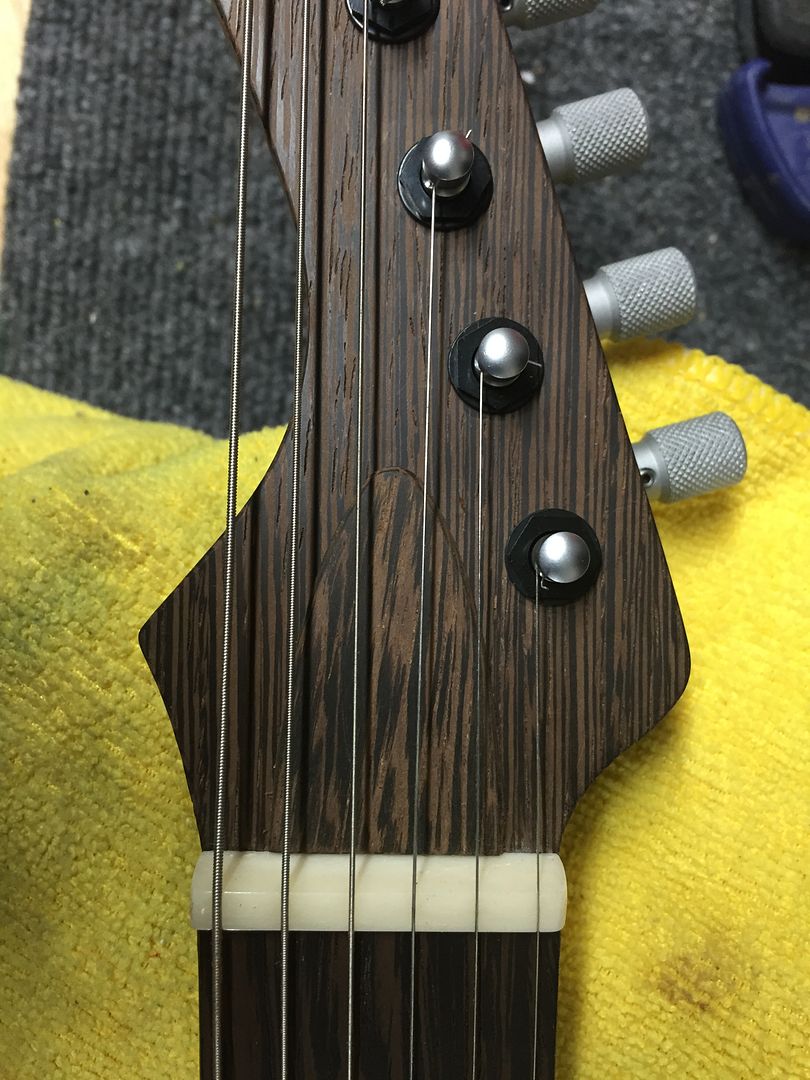
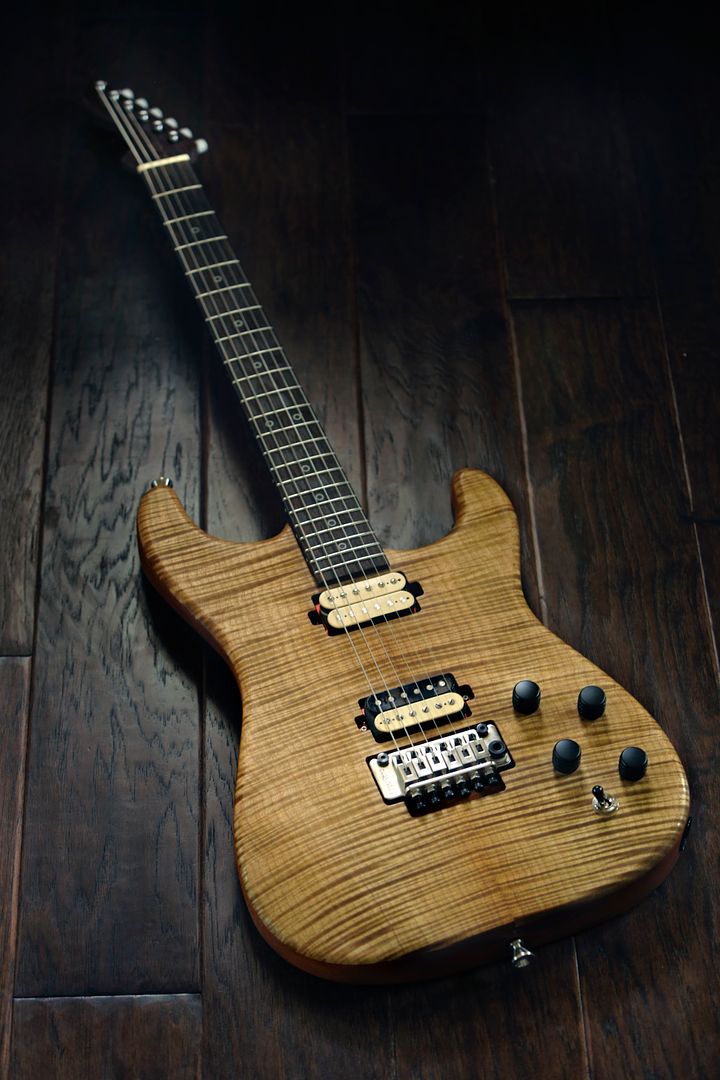
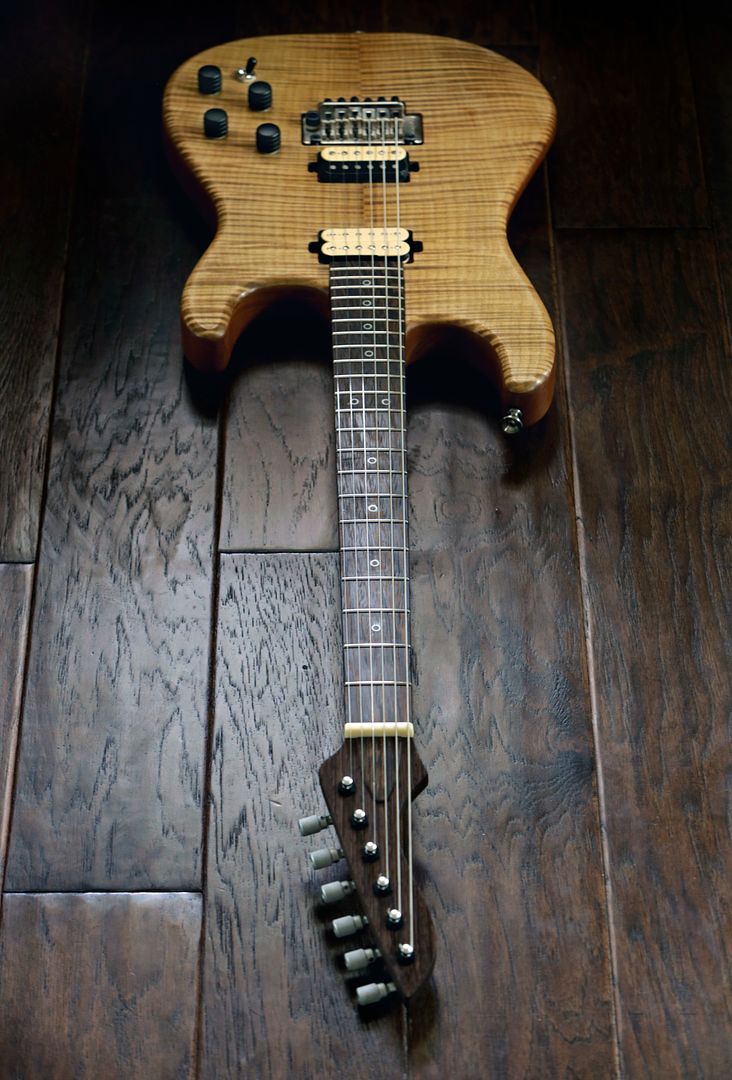
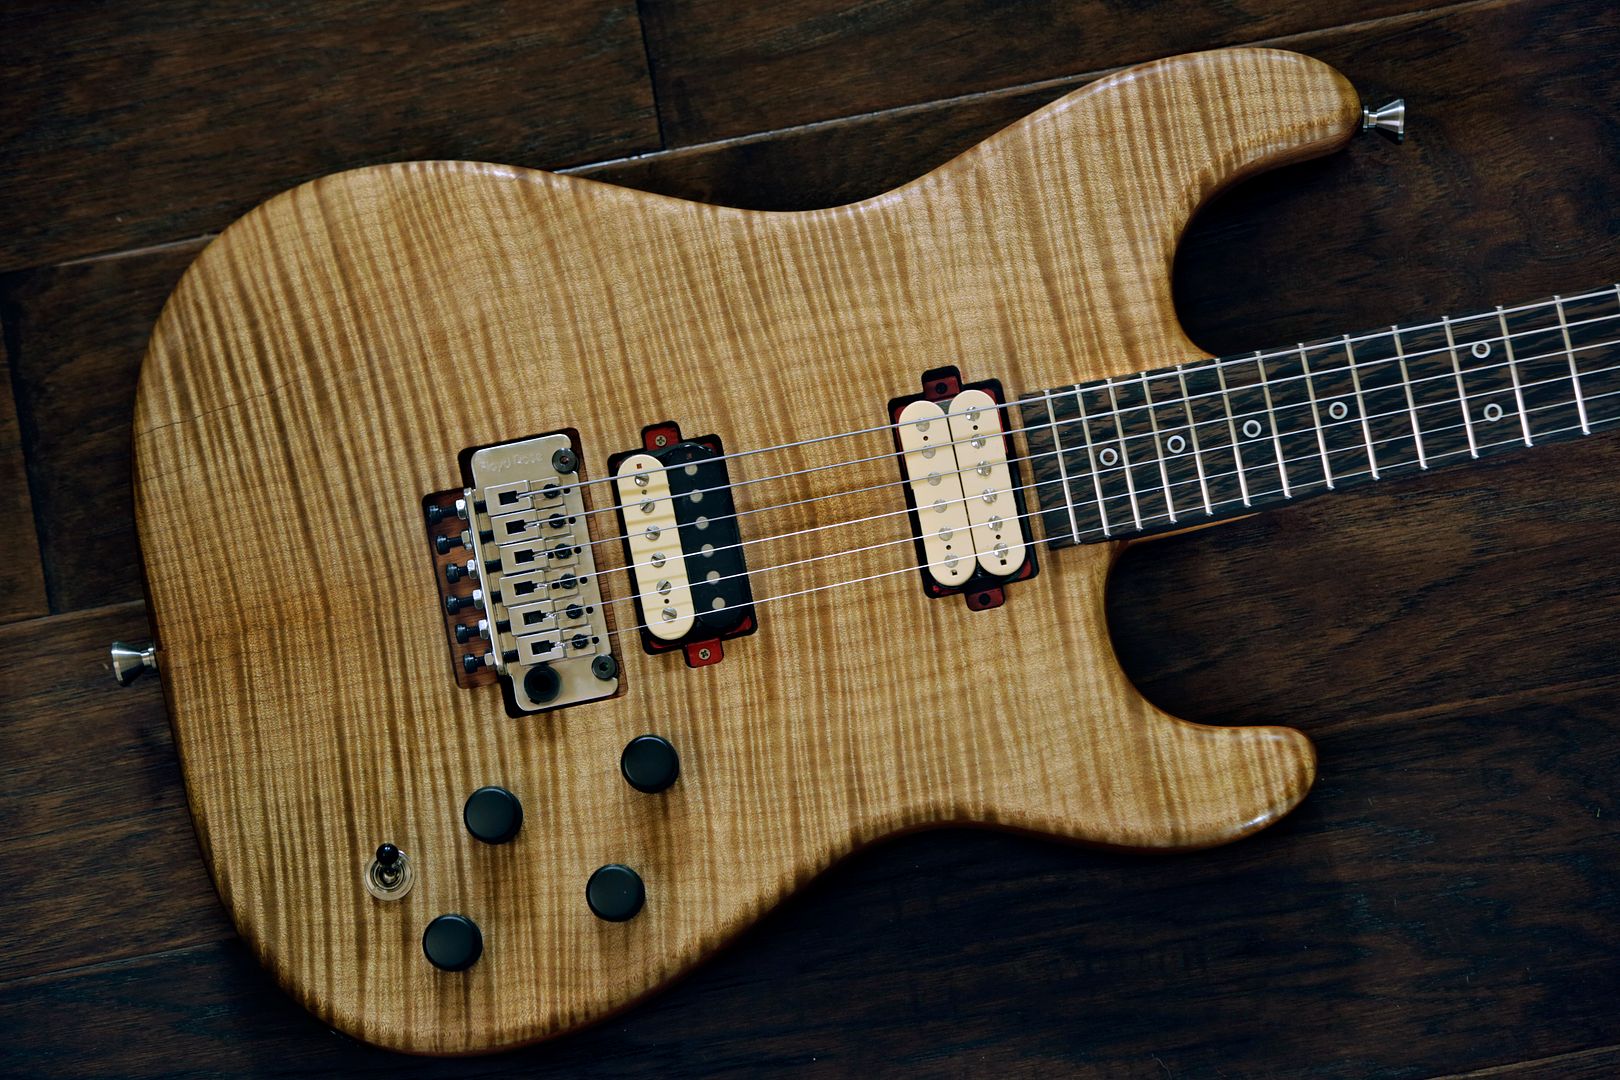
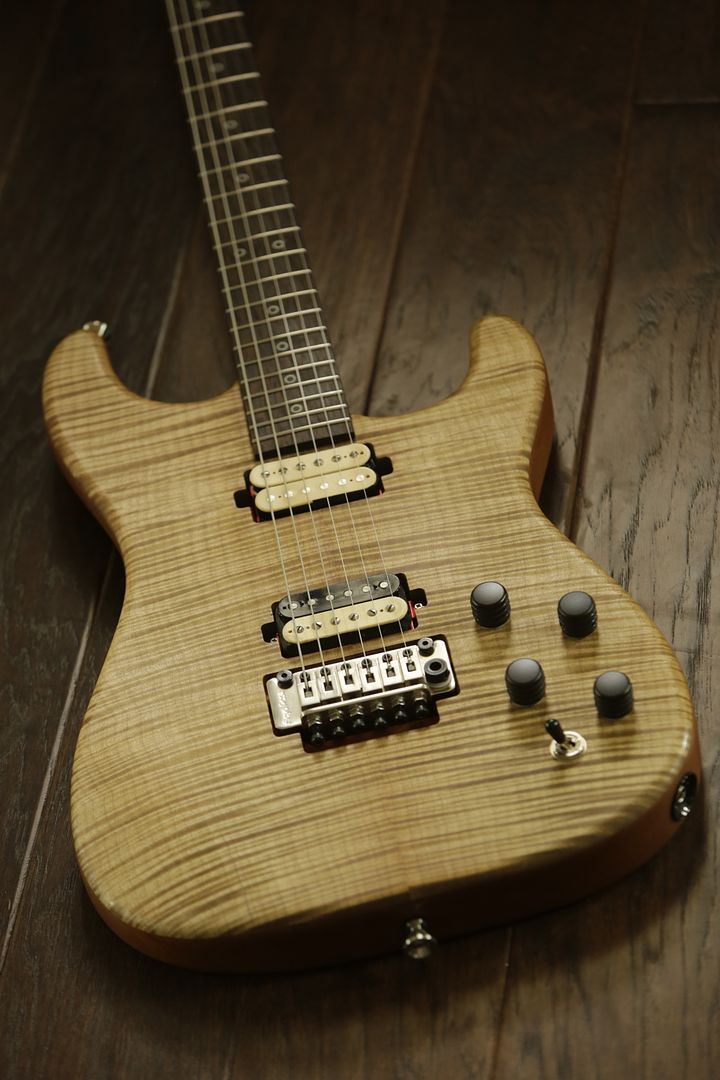
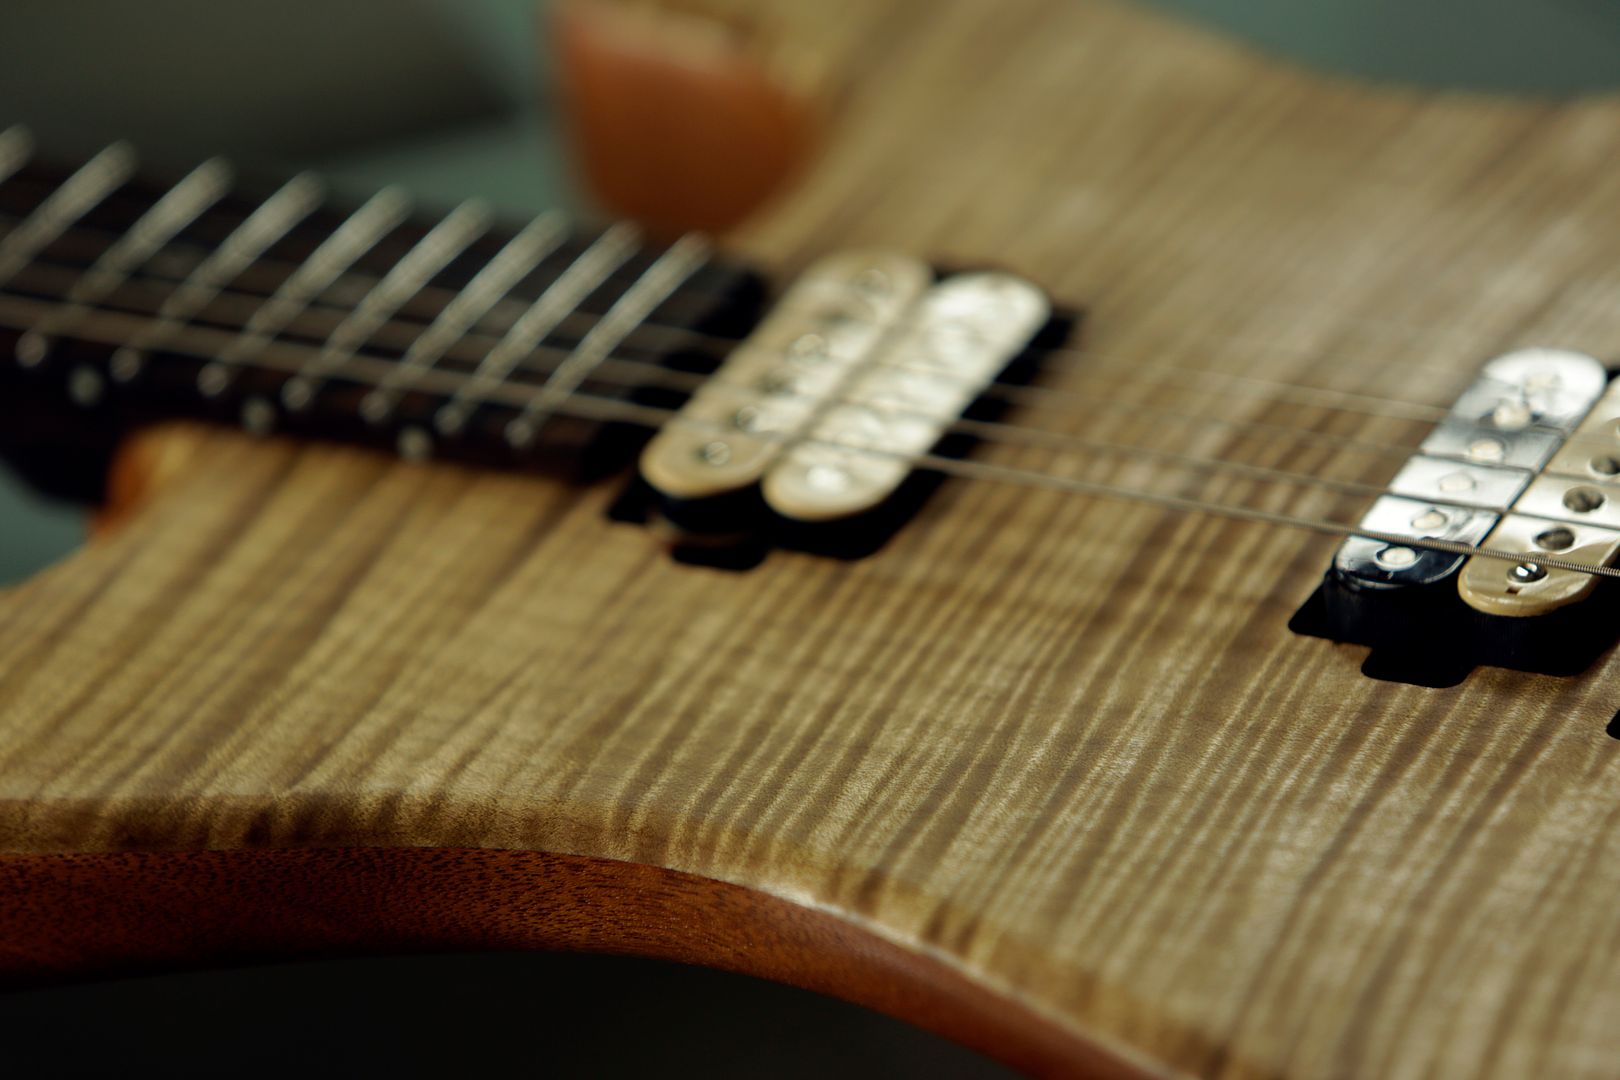
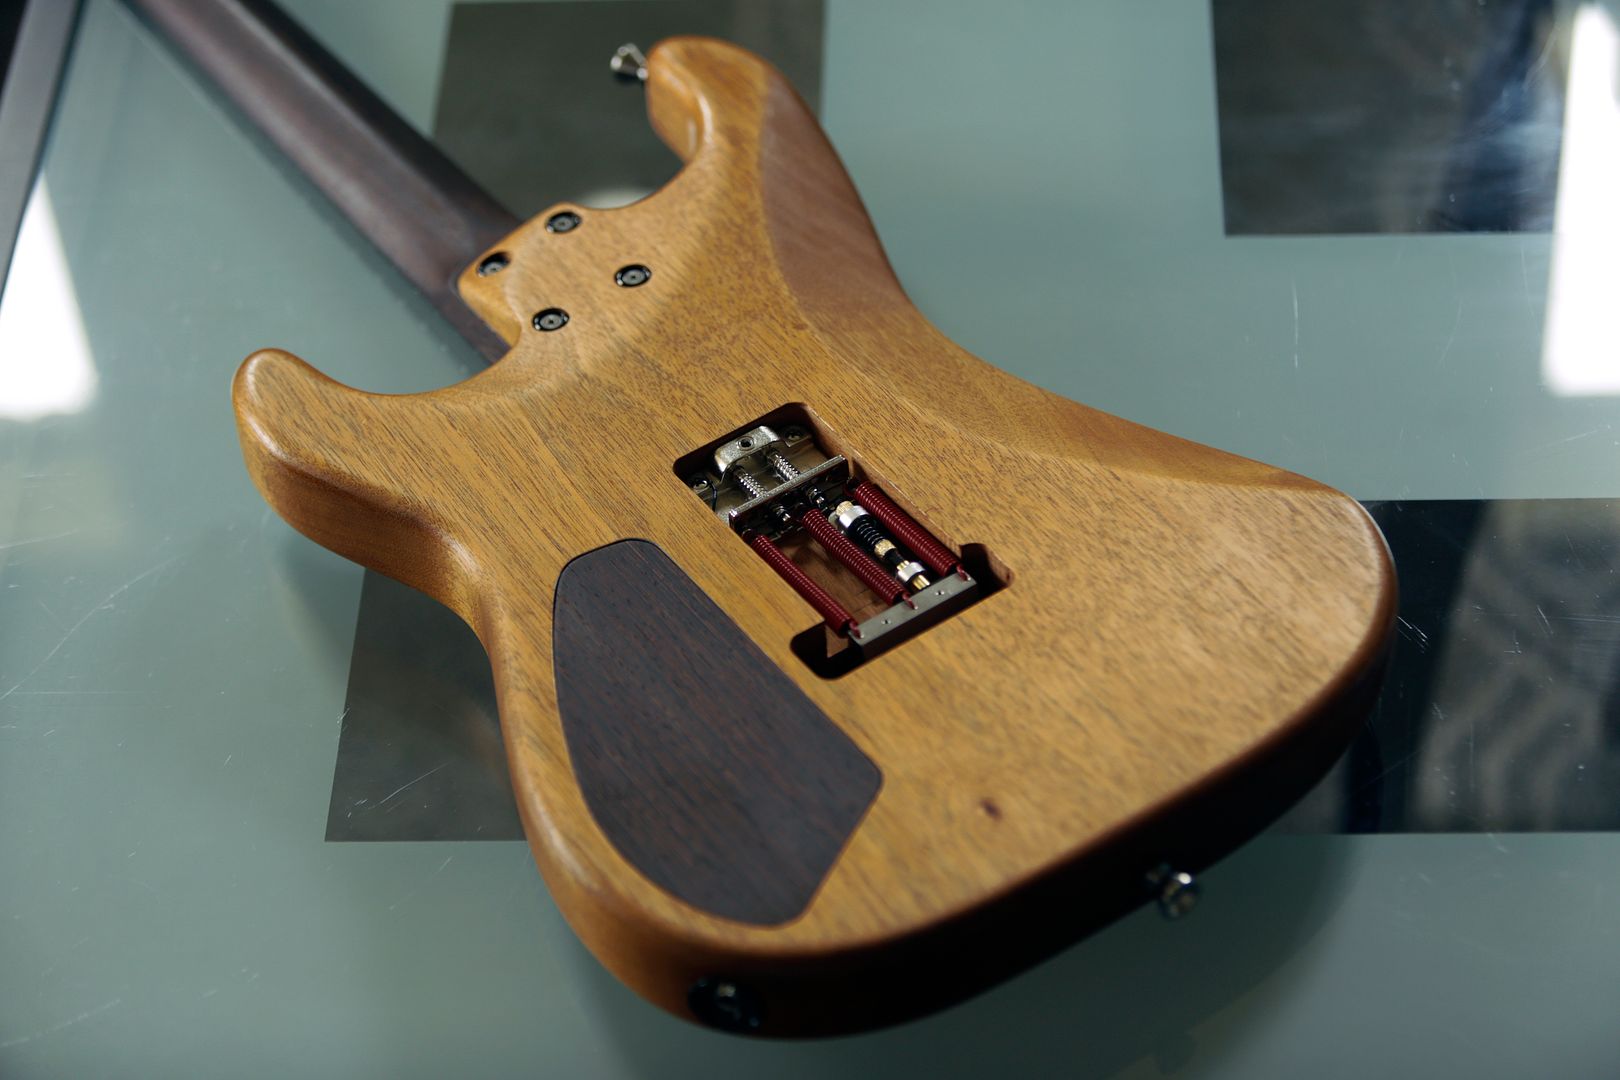
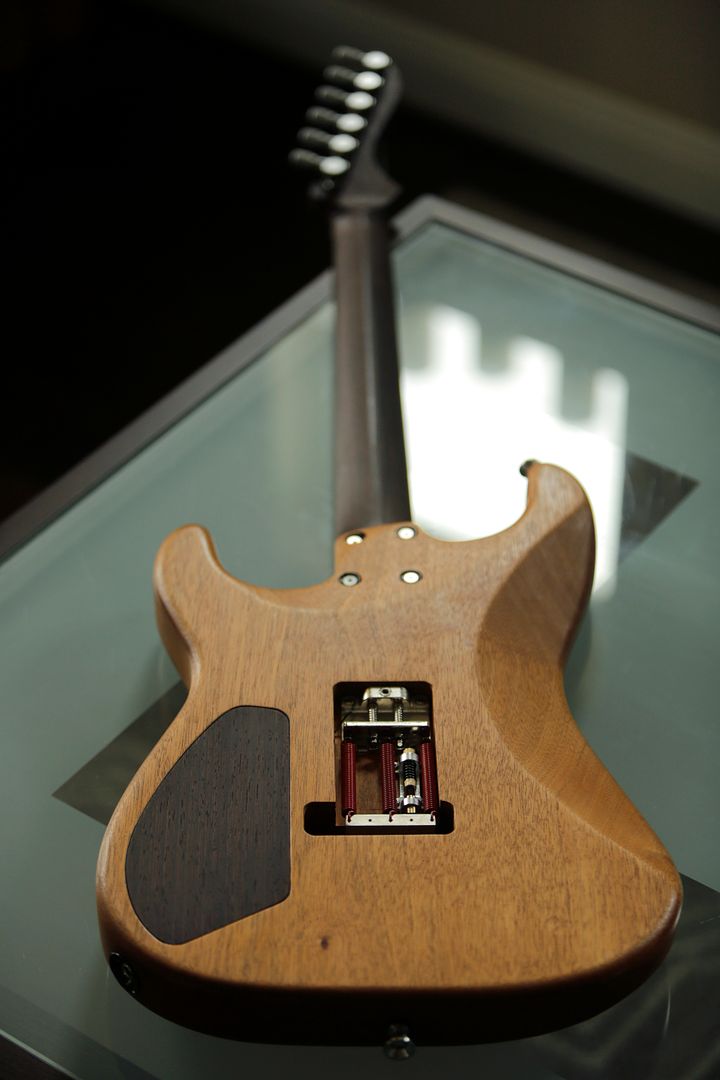
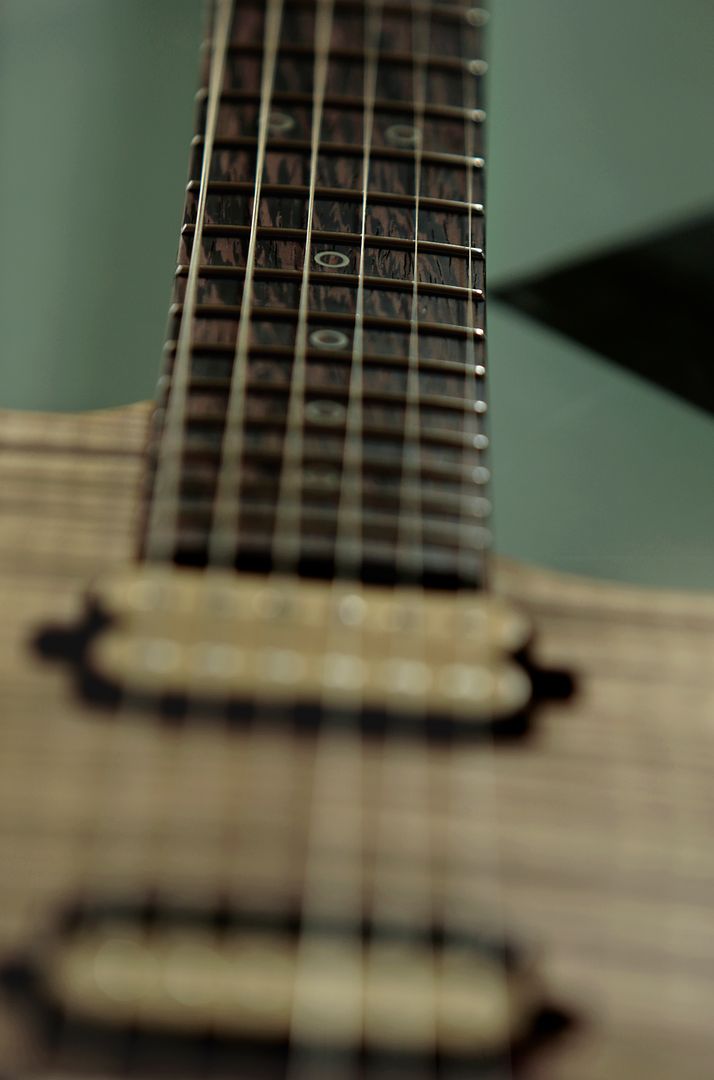
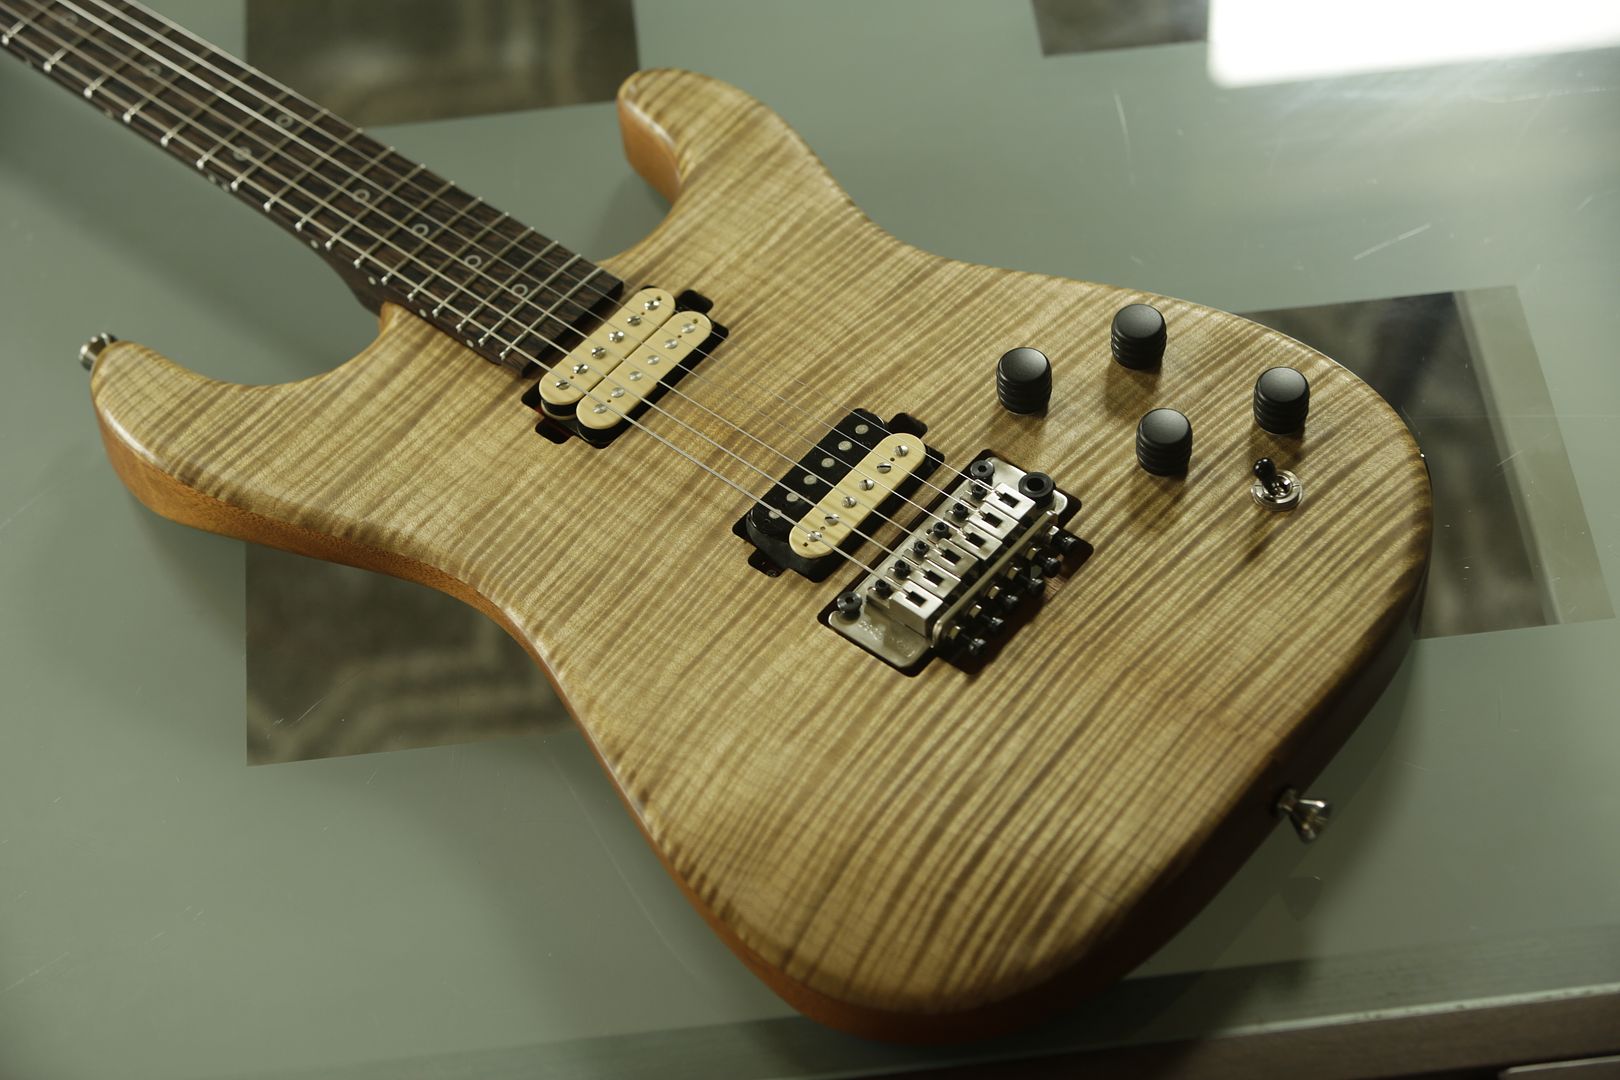
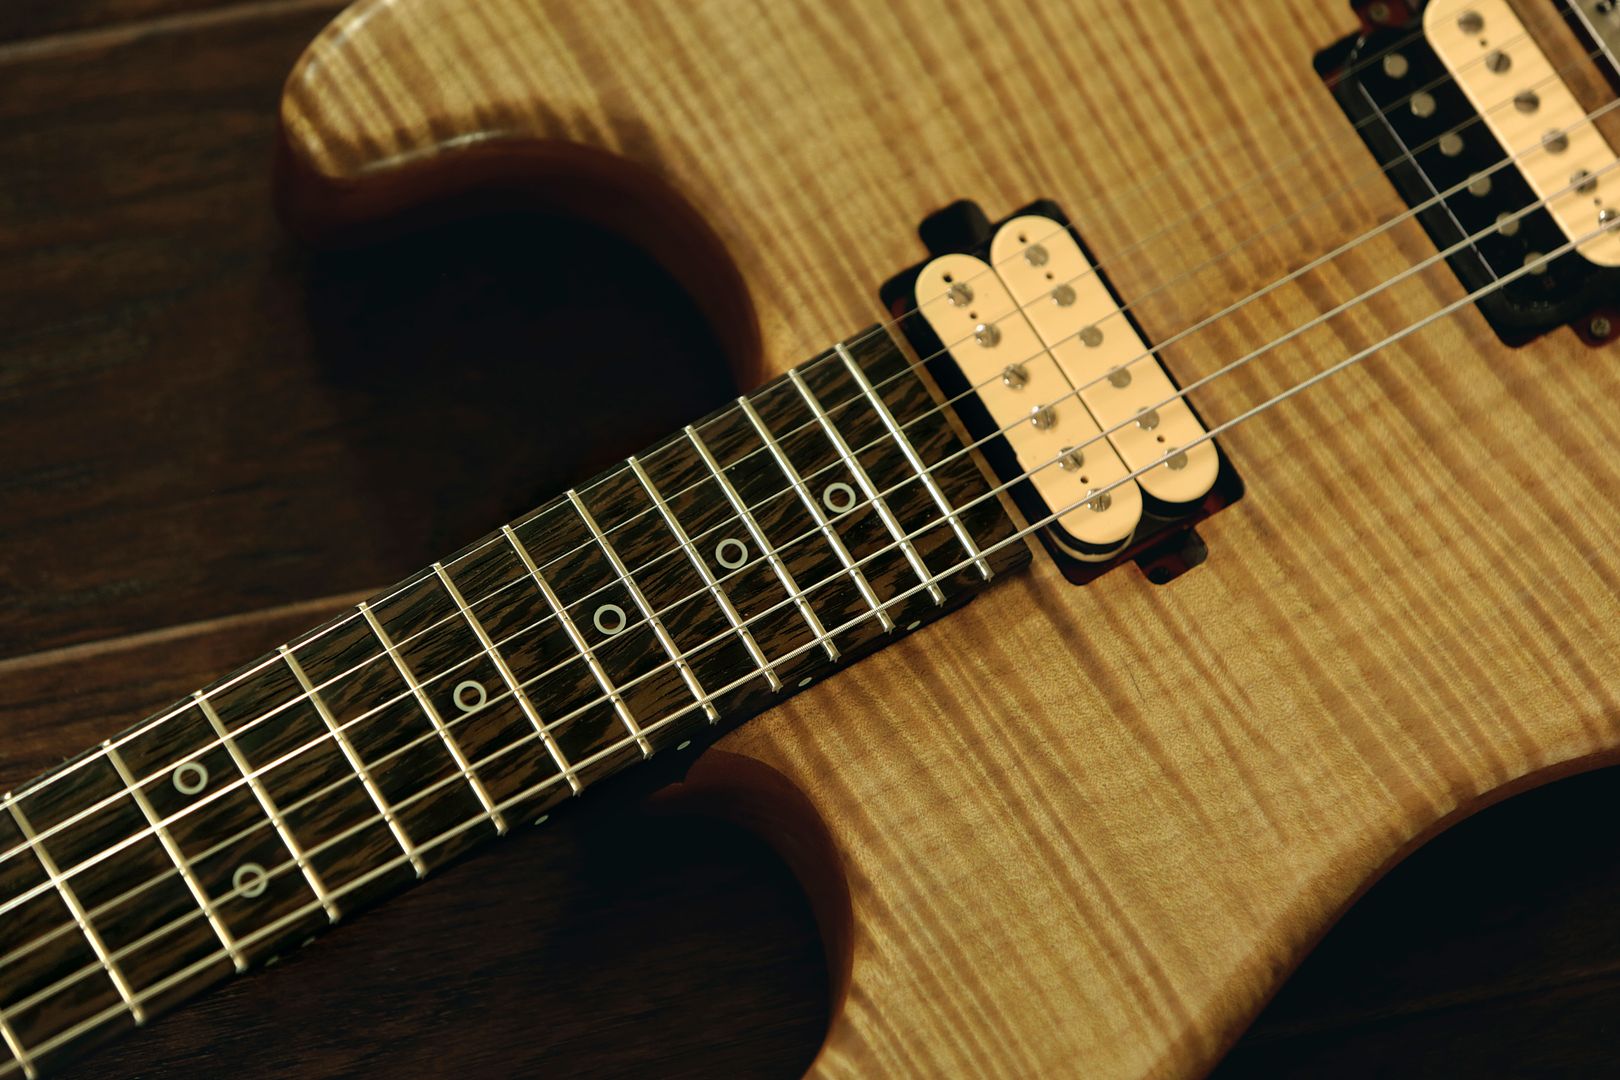
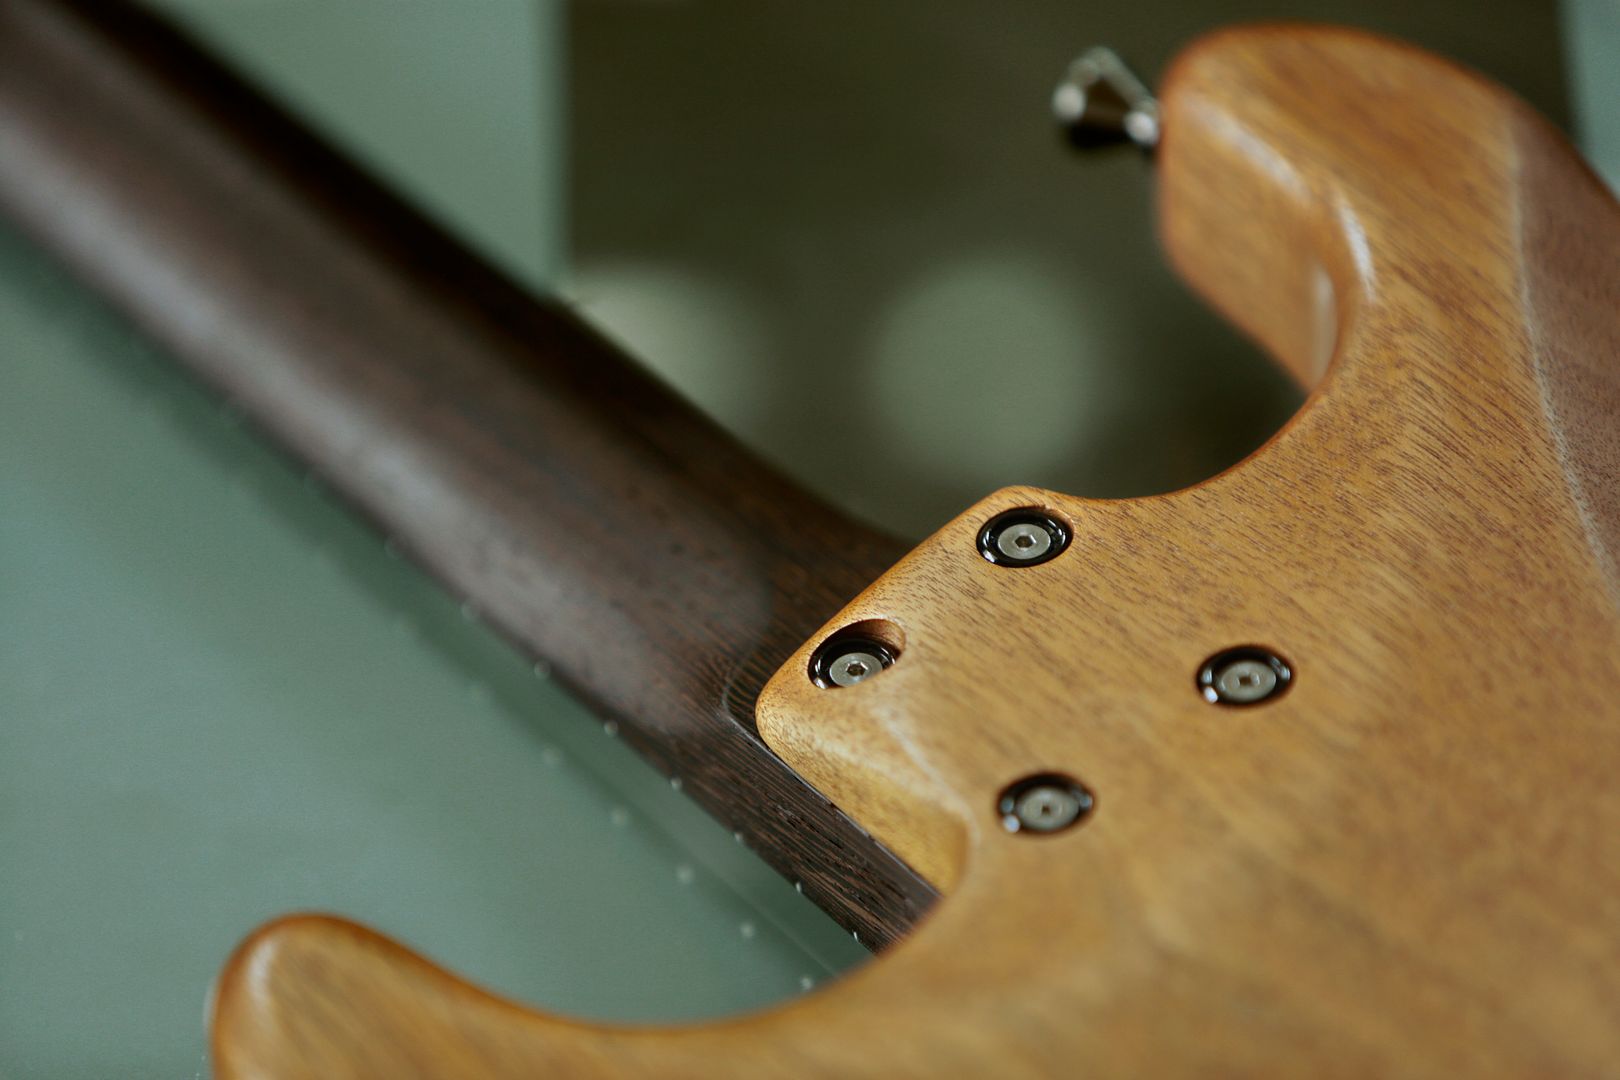
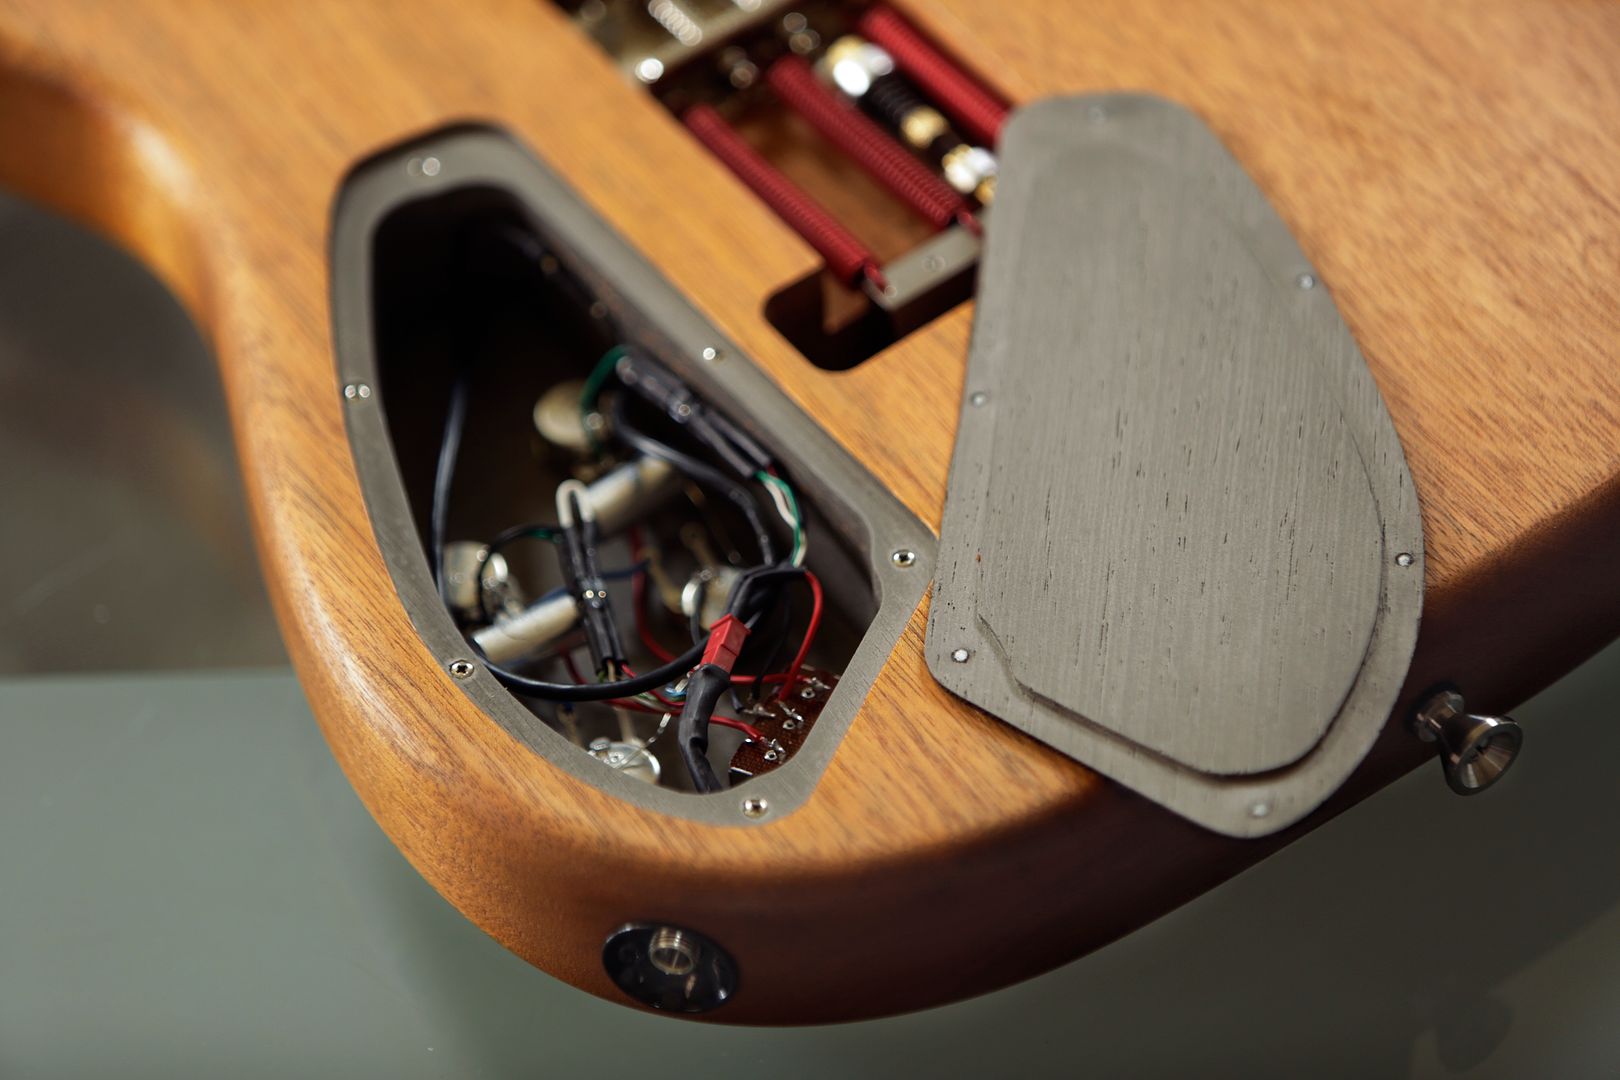
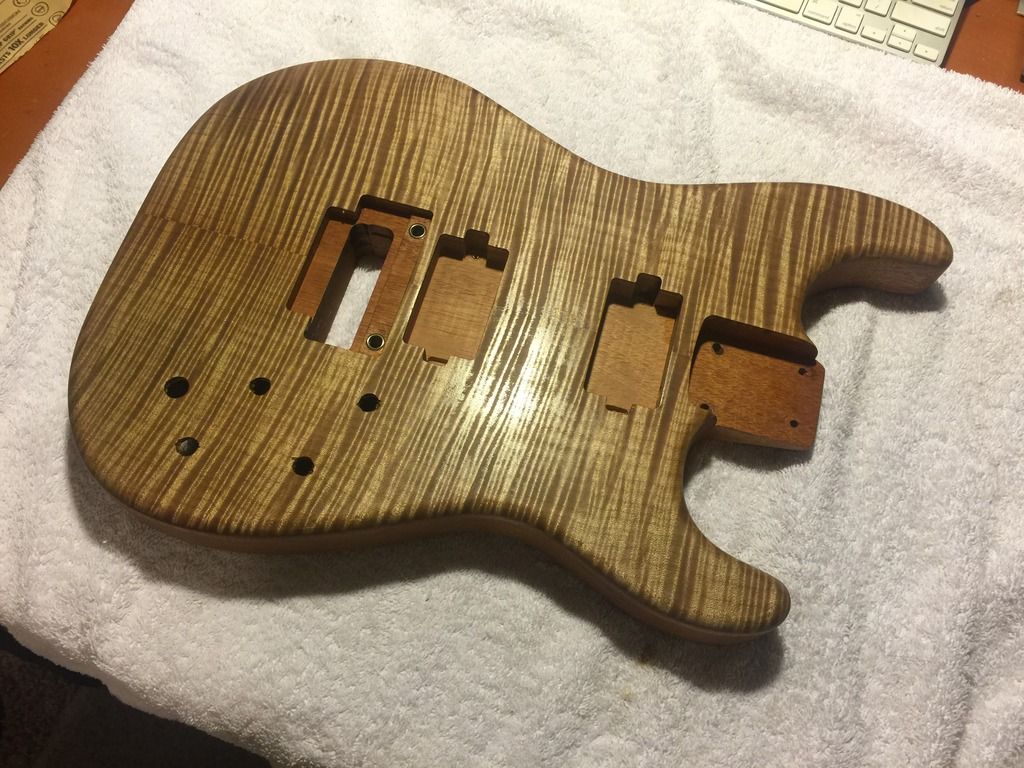
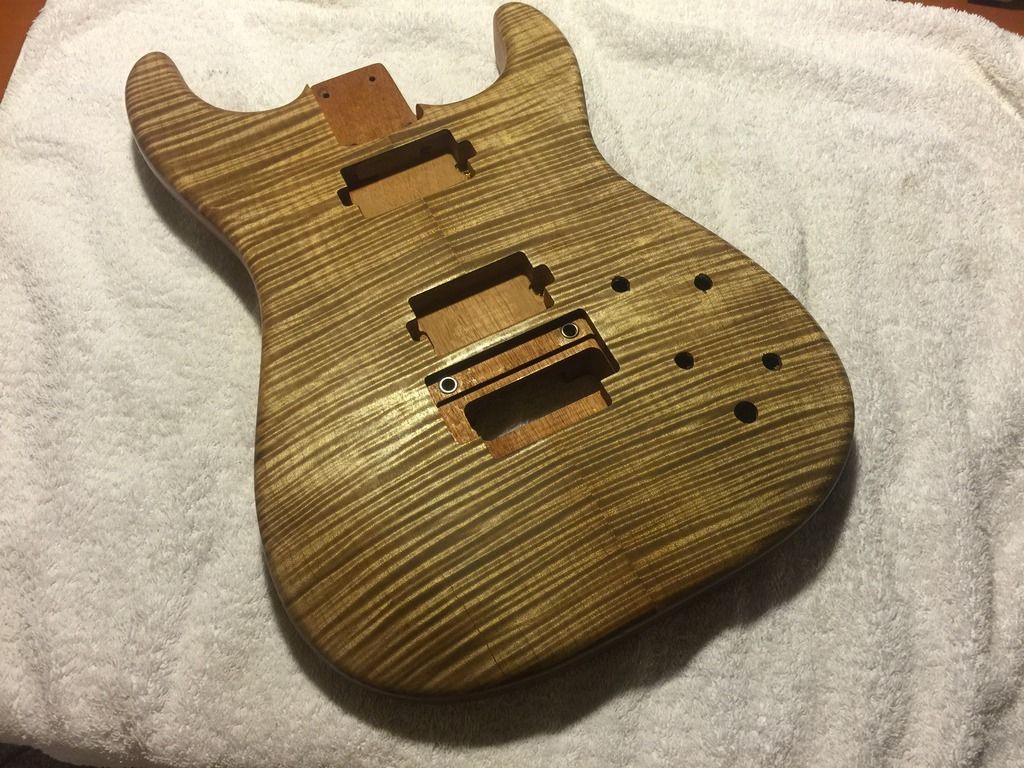
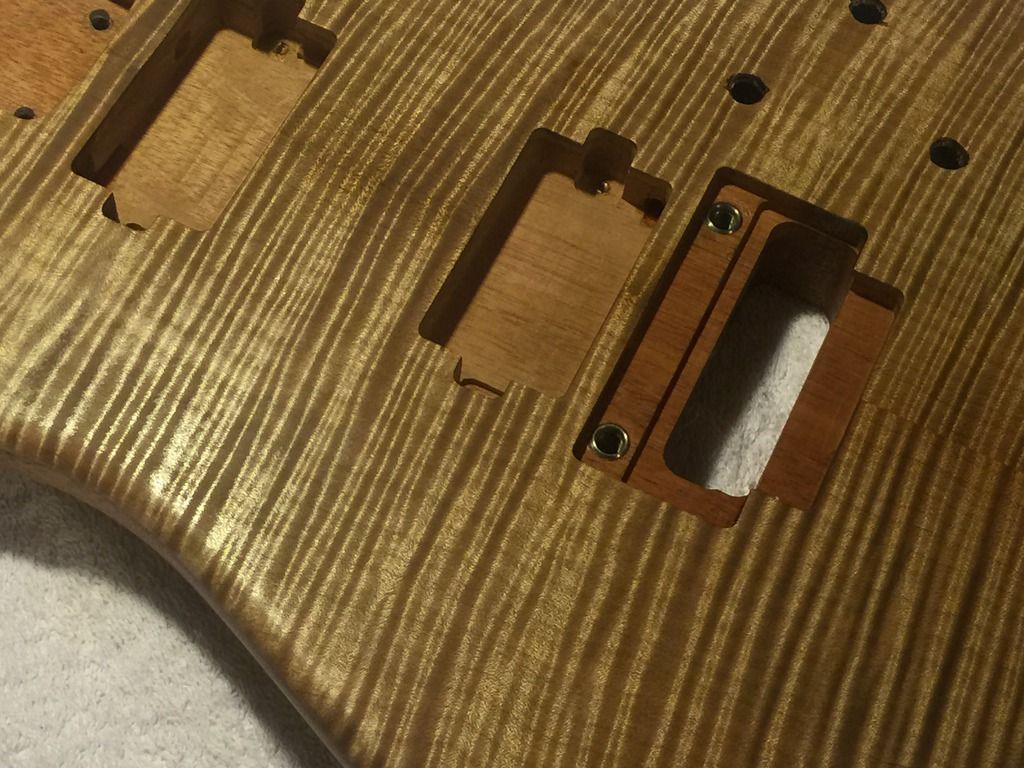
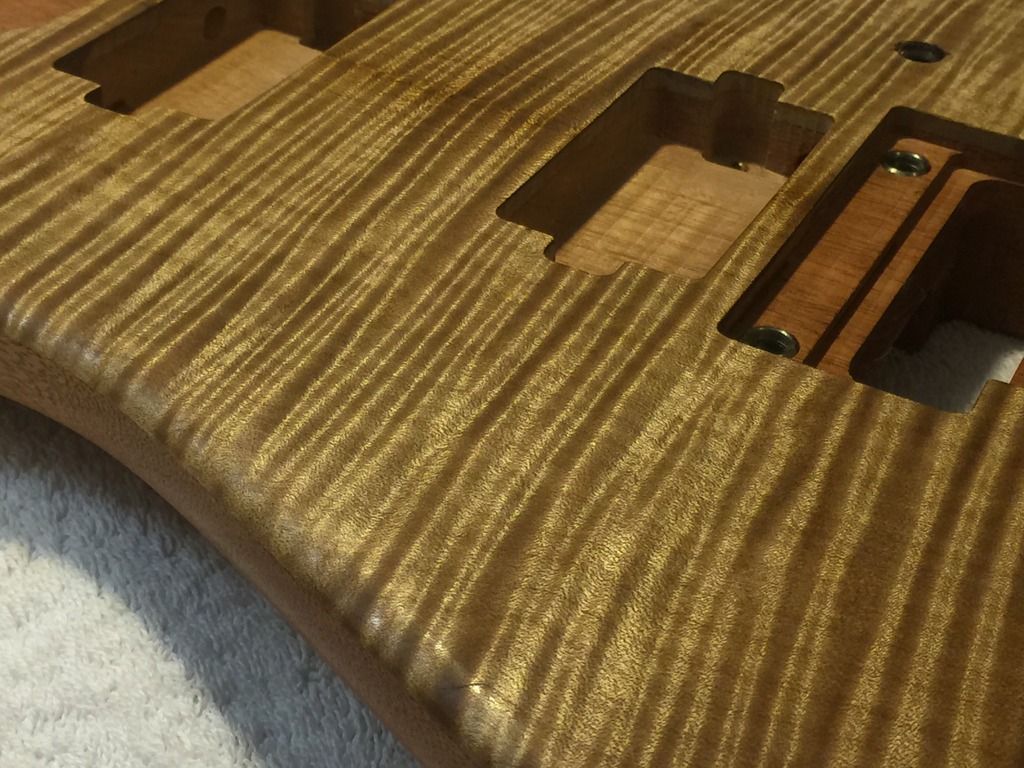
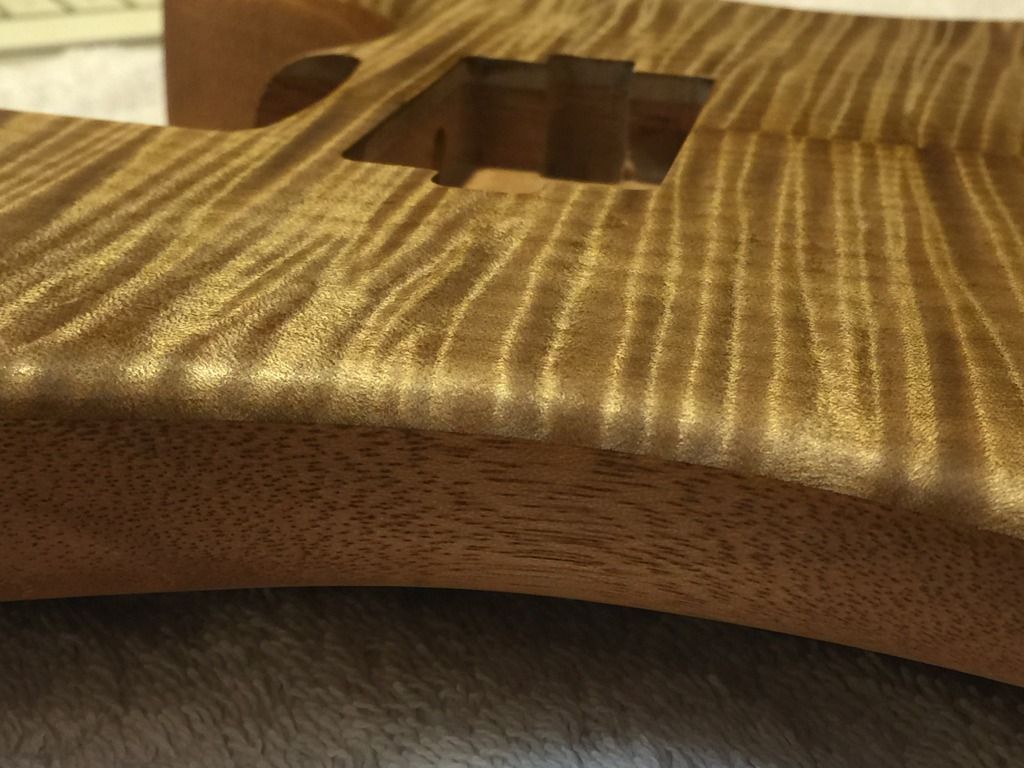
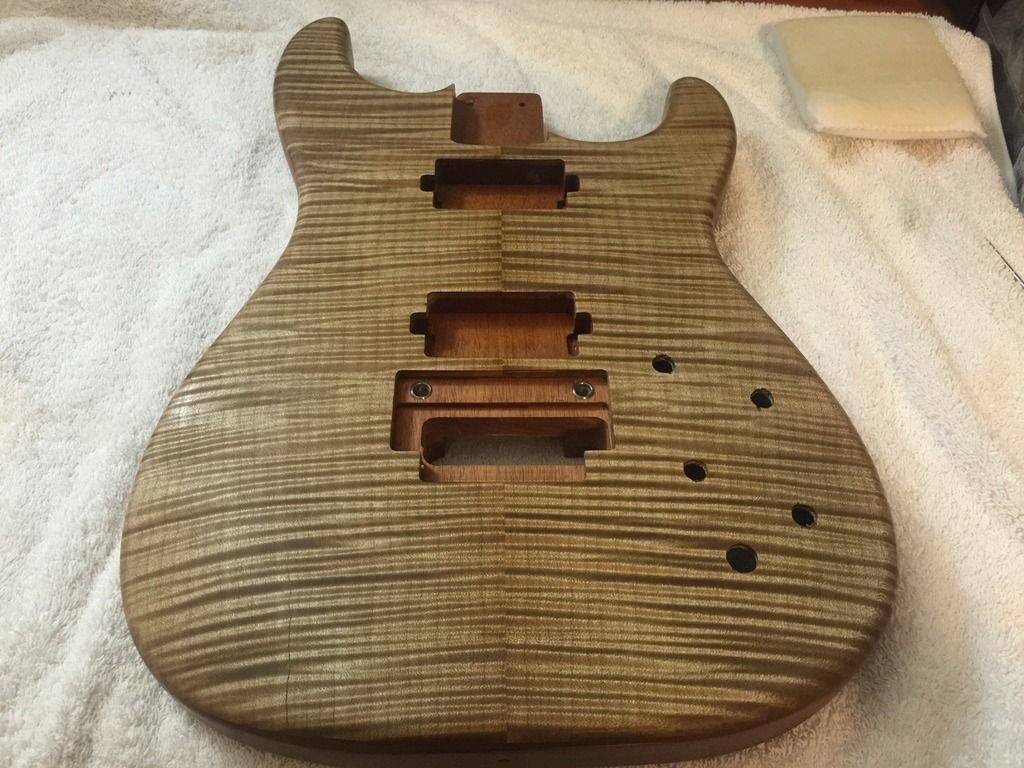
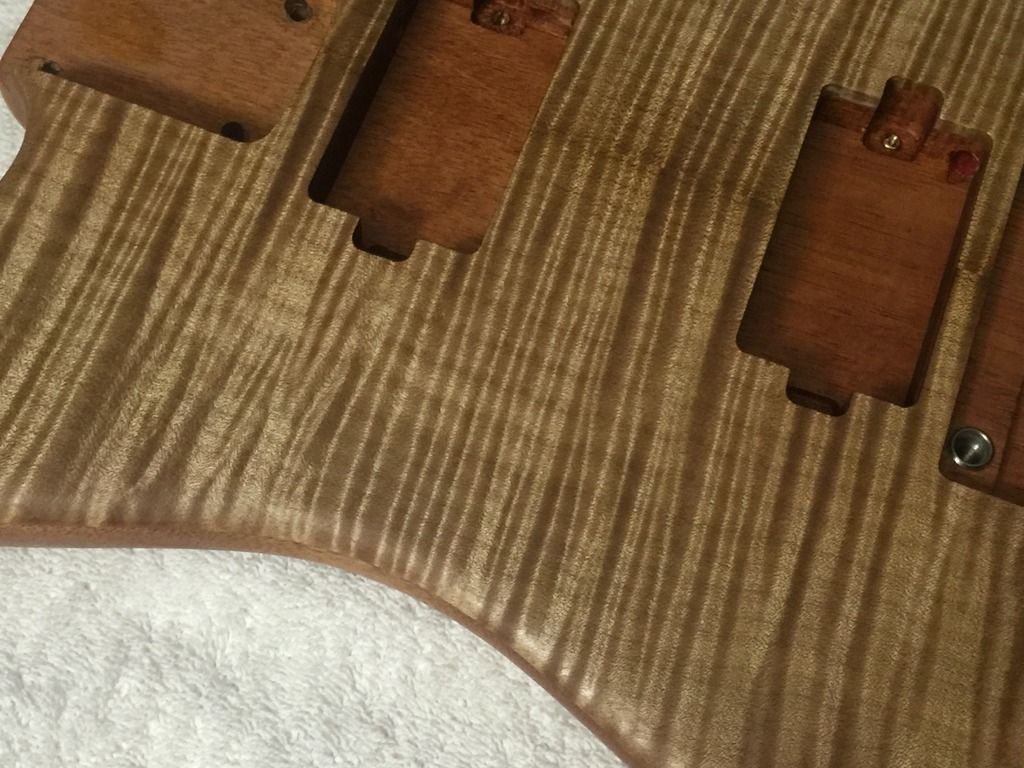
Ok a few pics with the protective coating on the guitar. I've got two coats on the top/sides and that'll be enough. Will do one more coat on the back tomorrow. It's still wet so it's darker than it'll be once it dries. The flame changes and shimmers depending on how you move it. Looks really good in person and can't wait to snap a few pics on proper daylight.

The amber dye added just the right amount of that golden hue to the mahogany and maple.
B97132EC-7CB9-43AD-AA0D-F339F8F3D974_zpskjmjgqgv.jpg

20E7D86E-F2C8-43DF-971D-7E0FA9CF4B96_zpsklge8o2p.jpg

F9420084-8D8E-4051-8D6F-881F4710D4C1_zpsgnsb0y6o.jpg

1A0CB43E-C236-410B-A095-681BC9A517B2_zpsgc64st6z.jpg

E6AE7FA2-BEA9-49EA-8CF8-F546A13877E4_zpspg6nuvrp.jpg

89DE75CF-6BC1-451C-996D-4BB81FA98407_zpsr0qz3tzj.jpg

F310E29B-3DFF-49F1-81D7-0C5B878B1B32_zpsvogcd4u1.jpg
 

This site may earn a commission from merchant links like Ebay, Amazon, and others.

Tonejunkie

Bored
Joined
Jun 21, 2016
Messages
96
Reaction score
0
Location
North Canton, OH
Sorry for the lack of updates as of late, just super busy with work and daily life. Anyway, I've spent some time "studying" how to use liquid dye in either water or alcohol to stain a guitar and been running additional tests.

I sanded the body down again with 400 grit, slightly off axis of the grain which turns top to bottom. I did apply a light black coating which once dried, you could hardly tell it was there. I then did what was really a not-dark-enough amber dye which honestly just came out yellow. I wet the wood prior to using the dye which I suspended in water to help promote an even application. Was really easy, honestly, but as I said, I didn't go dark enough.

So...I ended up sanding that mostly off. And I think I like the results. It has enough yellow to turn what I hope is a faint golden glow once the top protective coat is applied.

I remixed some of the amber dye, this time much more concentrated, but I've chickened out. I can't bring myself to apply it to the guitar for fear I'll hate it.

I've not sanded the radius around the top of the body as much for a bit of a faux binding look.

My real worry is once I apply the wipe-on poly that it won't look a thing like what it does when I wipe the body down with alcohol.

Dry body. There's just a hint of yellow overall:
B5ADE9F1-0186-4AAB-B8FA-5863D9F675A2_zpsvidhk90n.jpg


Apply alcohol and the grain really pops. iPhone photos don't really do it justice but it has a very 3D effect. It's a little blotchy in appearance as the alcohol evaporates quickly.
6452DD5F-A8C5-4D8B-828A-7907D8A62D0D_zpsgtjrgwp3.jpg

22C6370D-56E4-40D3-919D-67A4D5DEEED4_zpsfx8la3dp.jpg


I need to stain the back of the mahogany a bit and sand that down yet. The edges of the body have a slight stain to them (the amber dye) and I can see a line where I didn't dye the body despite me sanding everything down.

Frankly, manning up to apply the poly finish is going to be a tough one. I need to grow a pair and just do it. I just don't want to eff it up.

On another note, a BIG shout out to Jason Ungleich at Hipshot. He sent me black washers and nuts to replace the silver washers and nuts for the tuners. Due to the small headstock shape, I felt the silver washer and nut sort of overwhelmed everything. The black washer (two sizes, I used the smaller one) and nut help to minimize everything. Much better IMO. Anyway, I thought it was super cool of him to send them out. Very much appreciated and glad to know a company like that does nice things for the little guys occasionally. I'll definitely use their products going forward.
6ED11CAA-D920-4D68-B4AD-30928407FDE8_zpsejjj2m8f.jpg


I've yet to order more wenge for the back cover and truss cover but that'll get done in the next day or two.

I had a few issues with an order and Jason also went above and beyond to help me out....Great service an great products.......Sweet build BTW
 

Ape Factory

Well-Known Member
Joined
Nov 6, 2012
Messages
324
Reaction score
61
Location
San Antonio/Florida
With the finish complete and the cavities covered in shielding paint, I put everything together last night and even got to play her for a bit. I still need to do the final setup and tweak a few things. Haven't adjusted the truss rod but with string height at less than 2mm, there's no buzz, zero dead spots, just plays well up and down the neck. I do have to adjust the shims as the high and low E is a hair higher. Taking out one shim may solve my Floyd issue with the screw not going in straight.

The shielding paint comes in a spray can for nice, easy and an even application. Means you have to meticulously tape everything off but it's worth that tiny bit of extra effort.
CD8A2BD1-4E25-41ED-97B6-198E833E499F_zpsv1a3ftel.jpg

D0F1FD81-BCFB-4256-A065-2263E556FB2E_zpsljl3h9yf.jpg

D166E6F3-E715-48E9-9E2B-299DEF42C8CA_zpsdzn3p1bf.jpg


Still drying in this photo...
CDDBAB02-F5DE-44B0-B901-06ACD86E4B93_zpsxalnv2m3.jpg


This is what it looks like dry. Yes, I put screws into my pickup mounting inserts before spraying.
99731B89-883D-40BE-9339-414720D51718_zpsmppbsali.jpg

4BECBAB8-9DFB-4309-AB7A-7059DE50A619_zpsjwncmqoh.jpg

B1D93751-AD13-4824-870C-753A246AD11D_zpstfshhto6.jpg


Slid the harness back in along with pickups and snapped everything together. No soldering! The neck is a Rewind Creme Brûlée and the bridge is supposed to be a "vintage" JB but it's output is too high to be a vintage JB. Will most likely swap in a different magnet.
38D1E512-0C75-492D-891F-68EE050BD2A6_zpsfgedkxsk.jpg


Closeup of the quick disconnect ends. If anyone wants to see how I make these, go here, has all the sources for parts. http://www.sevenstring.org/forum/showthread.php?t=304587
4BE8F107-FD78-4E7F-A398-2F30E1E7DEA1_zpsp49pdqzo.jpg


JB installed. I managed to drop it and cracked the cream bobbin. Grr. I ended up transforming the long legs into a short legs and re-drilling the pickup mounting holes. Yes, those are red base plates (to match the red springs of course!) on the pickups. The neck is the double cream.
02288F1C-177D-4682-99F4-E11534983C2D_zpsic2kyknd.jpg

C78C7944-2EE8-49AF-A92F-20F148DA67A1_zpsmjzqz0ap.jpg


Everything in, tested, and ready to go! Now where's that neck...
60997CD4-E20C-4C36-B3D4-5F16A7B022C3_zpssqyelokt.jpg


Jimmy approves.
8E0A004C-B9D7-4CC0-897C-7F5DFEEE5A9C_zps7osvwtsc.jpg

7CC5F656-7CD3-47E5-89AB-780E982BCFF6_zpsgf6qs17a.jpg

9DF0E44A-69D1-4131-9DC3-19EF63A98030_zpsdyir2cwv.jpg


The wenge for the rear and truss cover has not arrived yet. Other than that and the final setup, she's done. Once that's complete I'll take proper photos with the big cameras as the iPhone and mixed, multiple light sources just doesn't do the guitar justice.
 

BlackMastodon

\m/ (゚Д゚) \m/
Contributor
Joined
Sep 26, 2010
Messages
8,688
Reaction score
5,662
Location
Windsor, ON
This build is so classy.

Do you have a link for the shielding paint for those of us who don't like fiddling with copper tape?
 

Ape Factory

Well-Known Member
Joined
Nov 6, 2012
Messages
324
Reaction score
61
Location
San Antonio/Florida
I think I got it from Mouser Electronics. Will have to find my email receipt. Try googling the brand name. It's supposed to be the best stuff you can buy. That can would last for 200 builds easy.
 

FourT6and2

Well-Known Member
Joined
Feb 12, 2014
Messages
577
Reaction score
469
Location
CA
Looks awesome!

Make sure to check continuity between electronics cavity shielding paint and the back of the cavity cover (which I assume you also shielded), otherwise your shielding won't actually do anything. Doesn't look like there's any shielding or anything up over the edge of the cavity. So you'll want to find a way to make the cover contact.
 

Ape Factory

Well-Known Member
Joined
Nov 6, 2012
Messages
324
Reaction score
61
Location
San Antonio/Florida
Ok so I should probably coat the inside of cavity cover and the lip around the actual cavity? I will be counter sinking screws into the lip and magnets will be adhered to the cover.
 

FourT6and2

Well-Known Member
Joined
Feb 12, 2014
Messages
577
Reaction score
469
Location
CA
Ok so I should probably coat the inside of cavity cover and the lip around the actual cavity? I will be counter sinking screws into the lip and magnets will be adhered to the cover.

Yeah, you need something to connect the cover (which should be shielded as well) to the shielding of the cavity. Same with the pickup cavities. The shielding needs a connection to ground to work. But maybe the screws attached to the pickups are doing that. In the control cavity, I assume the pots are making that ground connection so you should be good. But check with a meter.

For example, here's how Mayones does it with copper foil. You can see the little lip around the edge. This contacts the foil on the back of the cover.

limitedcavity_by_haftelm-da6pndt.jpg
 

Ape Factory

Well-Known Member
Joined
Nov 6, 2012
Messages
324
Reaction score
61
Location
San Antonio/Florida
Ah makes sense. I'll go ahead and spray the lip then too. Thanks for the photo!

As for the pickup cavities, the screws will indeed do that as the paint is also covering the top of the inserts

Last night was the first time I was able to play the guitar in anger. Family was out of the house and I was able to crank things up in peace so to speak. I'd played at low volume levels the other night but cranking things up was a whole new ballgame. I play through a Kemper+monitors and they do sound better at volume. Anyway, the guitar just sings. Really has a lot of sustain, easily as much as my Strandberg. I had the bridge JB pickup fairly low and I had to swap out to longer screws to raise it. I raised it way up, fairly close to the strings and it made a huge difference. I initially thought the JB would be lacking on the low end but definitely not the case with it properly adjusted. Have to say the Rewind Creme Brûlée is a perfect match to the JB bridge. The middle position adds a good deal of versatility in dialing in the tone with the four controls and the neck isn't too dark. Just right really. Can really get anything you want out of it (two humbucker tones anyway). I don't feel it sounds like it has a trem, let alone a Floyd, but I should probably pick up and play a singlecut right after to compare. It doesn't get a plinky, thin sound like some Floyds can produce. Not sure if it's just the better contact between the saddles and the base plate, the titanium trem block or all of the above. The pickups don't loose their sustain when you turn the volume down either. I've experienced where the pickup's decay was so rapid after turning them down to say six, that the guitar became uninspiring to play. Using the tone knob will soften them a bit as it's "50's" wiring and can get some wicked woman tones with it dialed way down.

Attack isn't as aggressive as my Strandberg. I'd say it leans towards the aggressive side with the pickups that are in there. It's a bit more ambitious than an LP or PRS SC58 which I consider about midway between hard and soft attack. It's very responsive to pick attack and how you play. Honestly, it makes me wonder why I pay (more) for off the shelf guitars. I think I saved about $2K vs. buying a Govan. Sorry Guthrie.

Really happy. Plays great and I don't even have it set up perfectly yet, haven't done the final saddle height adjustment. The Warmoth V neck is more severe than the Musikraft V profile but it's honestly wonderful. I usually go for the 59 roundback but this is really nice as it sort of bridges the gap between having meat out back at the v's pinnacle yet small shoulders which I prefer. Upper fret access is great being a strat shape and I don't notice the heel. The whole guitar has a nice big, defined sound. Both pickups sing for solo work. I've not found a "meh" moment yet with it. I didn't even really notice the frets which means they're just right. No dead spots, no howling, louder notes, just nice and even all up and down the neck.

I know the cork sniffers cringe at any mention of poly but the satin poly finish on my strandberg convinced me. On this guitar it's just very soft but slick feel, and not the least bit sticky, just like the neck which is raw wood. Time will tell how it'll hold up. It's probably microns thick as opposed to mm thick on most poly finished, mass market guitars.

Next step is sending the Rewind pickup back to James. I found a copper strand that wasn't tightly wound and I may have injured the pickup somehow when I removed the cover or swapped over to a short leg base. Still sounded great. He's going to put his own proper short leg base (has a process where the base is threaded the first time the screws are installed for tighter fit) and also convert it to a four wire so I can install push/pull pots down the road. Haven't installed the ESP trem stabilizer yet either.

I have to admit, I'm actually surprised it turned out so well. Parts guitars can always be a crap shoot and I've had good luck with all of mine and have kept them all but one which was a duplicate.
 

Ape Factory

Well-Known Member
Joined
Nov 6, 2012
Messages
324
Reaction score
61
Location
San Antonio/Florida
Well she's pretty much finished!. I am just absolutely stoked at how great the guitar plays and sounds.. Man I know it's the honeymoon thing but the four control layout really gives the guitar a wide palate of sounds.. I haven't even done the push/pull pots for some split tones yet.. As promised, higher quality photos.. I didn't have decent light today (overcast) so I'm hoping to do a few outdoor shots in the sun as well.

The last steps were to do the covers for the truss rod and the the control cavity, shield the control cavity cover, install magnets in all the covers (no screws visible), re-install the Rewind Creme Brûlée neck pickup (James did a short leg base and converted it to four wire, all for free because he's the man and has great customer service), final setup and micro polish the frets.. I bought some slabs of wenge, book matched, off of ebay.. There was plenty of material for Jamie to experiment in making the covers.. He really went above and beyond.

He used a pantograph to cut the covers and it's variable from 1:1 to 16:1.. Here's the pattern (it's really big) with the first truss cover:

A0B3D5F1-8B9B-4532-BB45-CFE8AD332B7A_zpsav4f0wym.jpg


Tracing...
6102065C-9372-4626-8F6F-2605AF6235E0_zpsk4hpirtm.jpg


And cutting at the other end.

45712B1E-FD64-4242-803A-9D43F5516F0F_zpsdbeh8wr9.jpg


Final product, one of two.. Second one was sans screw holes.. I chose to go with a section that looks like the fretboard instead of the straight grain of the neck for contrast purposes.

52D41968-DBE8-42BE-B655-C2DA8AD57025_zps5vwhmbda.jpg

E6CA7BFE-F036-4FD5-9EDF-E9749DA81B91_zpsg3kgt4ac.jpg


_MG_9600_zpsy9ohd8tk.jpg

_MG_9594_zpsxtpwidzi.jpg

_MG_9592_zpsf9igzfqw.jpg

_MG_9606_zpstl4uq7xd.jpg

_MG_9611_zps19j0mleq.jpg

_MG_9569_zps80vhzgyj.jpg

_MG_9557_zpsdtb7qzxf.jpg

_MG_9578_zpspyi8t2tb.jpg

_MG_9544_zpsby2b0sxn.jpg

_MG_9543_zpsujpux5mz.jpg

_MG_9526_zpskl8ky593.jpg

_MG_9538_zpsd0velewq.jpg

_MG_9551_zps2x2sbqfm.jpg

_MG_9553_zpsasv9ansk.jpg
 

Vinchester

Well-Known Member
Joined
Aug 26, 2010
Messages
849
Reaction score
151
Location
Bangkok, Thailand
That red baseplate and zebra pups and really everything about the guitar... wow!!
Thanks for posting this awesome build!
 
Top