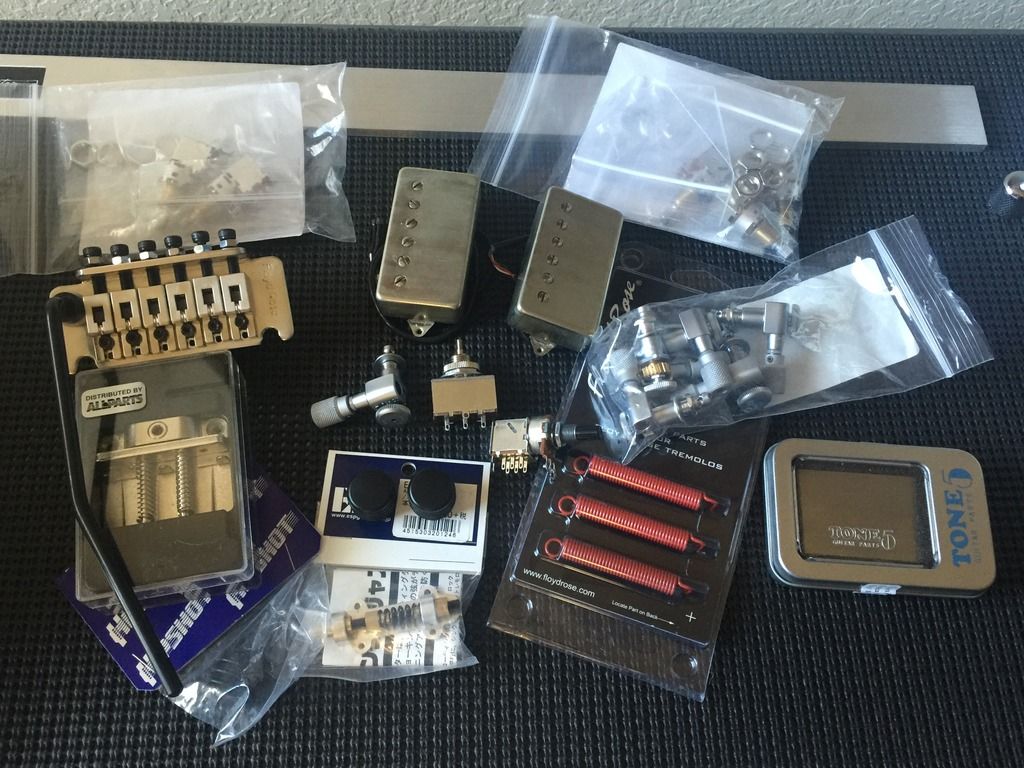
Interesting that the trem tone block came in the exact same packaging as commercial magic mushrooms do here in the Netherlands. Or so I've been told, *cough cough*
Really clean work man, this looks like it will be a killer guitar.
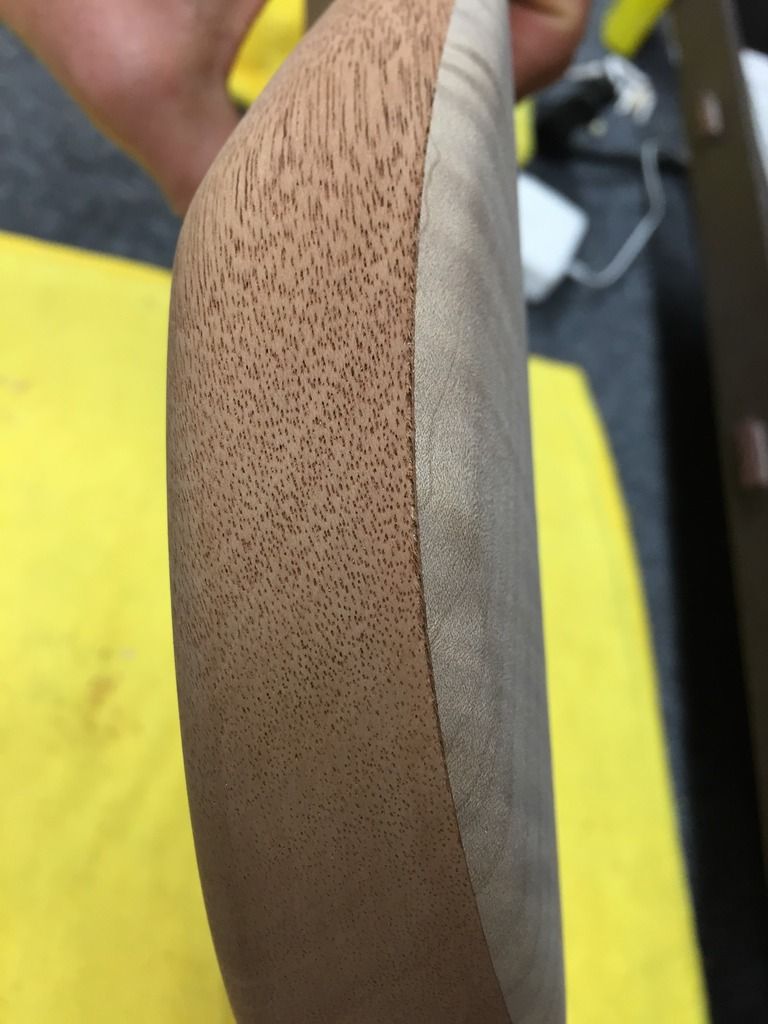
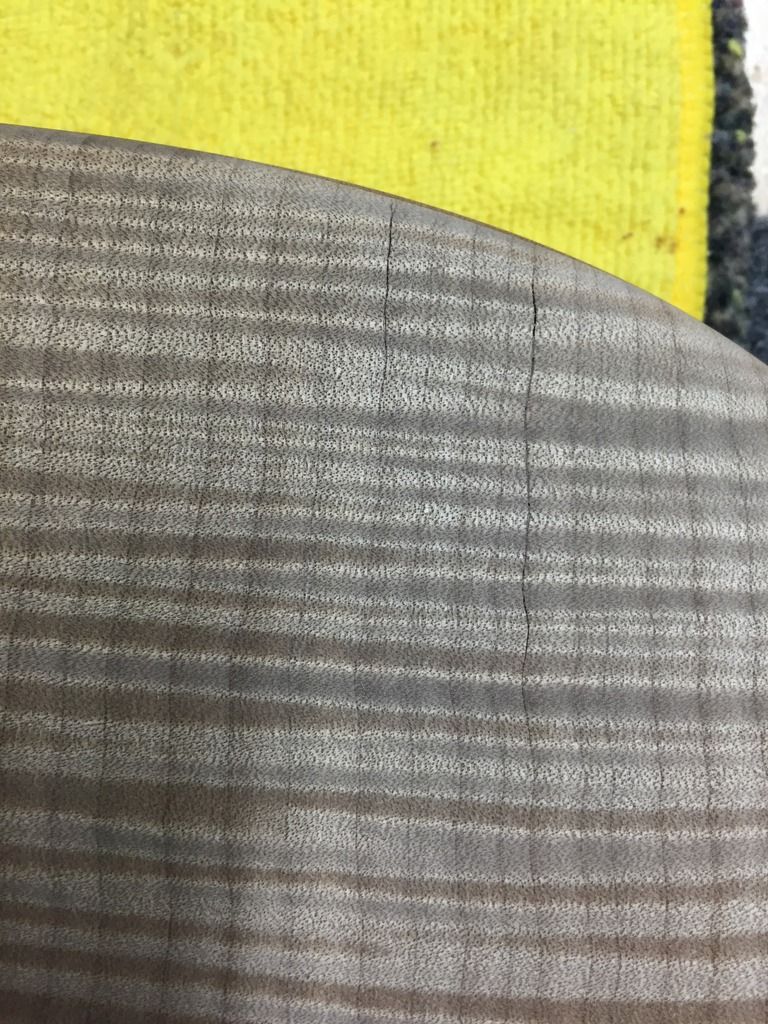
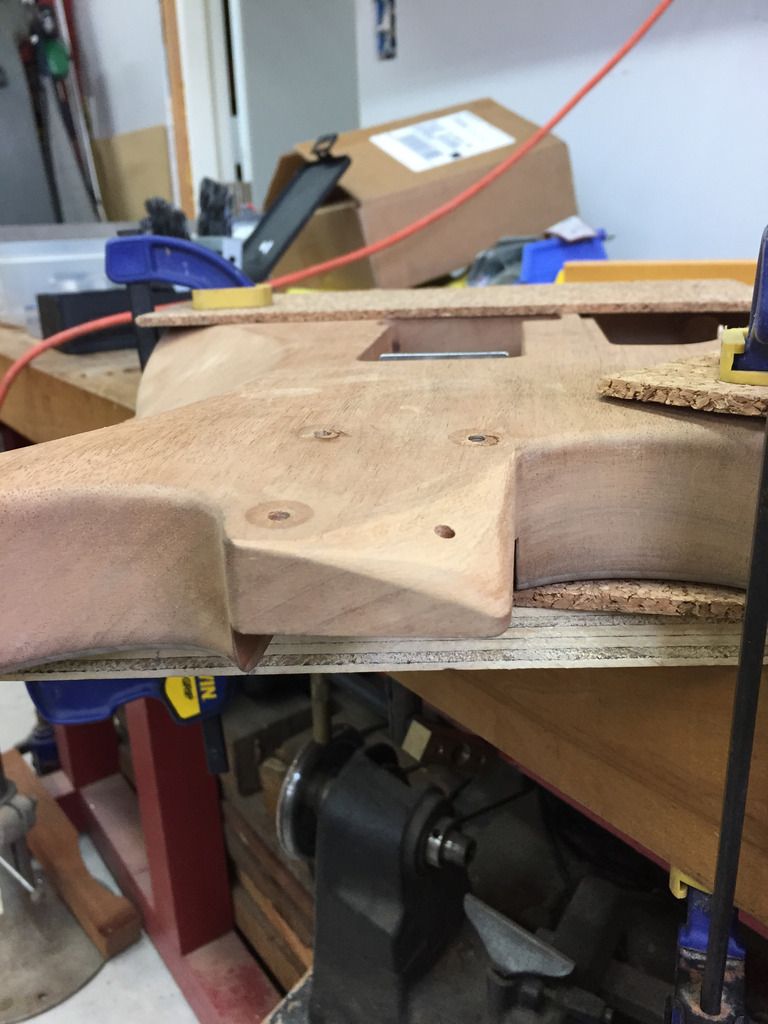
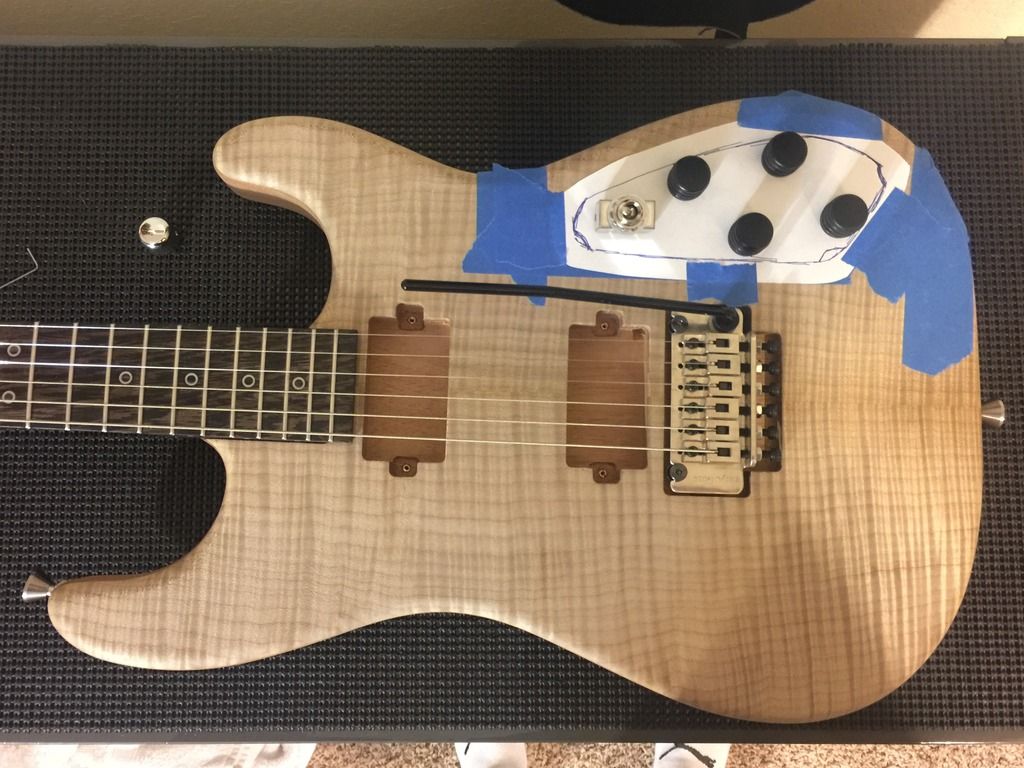
So there's been a snag. It appears the maple top is separating from the body ever so slightly down at the arm bevel. Also, two fine cracks have appeared in the top where the maple is splitting. I don't have great photos yet but was wondering if the body can be salvaged and what my best options are.
I've got an email into the manufacturer to see what they say. Other than doweling the stud holes, no work has been done on the body. I know these sort of things don't fix themselves and never stay that small. The cracks are going to be a little hard to see in the photo as they follow the flame.
Any remedy for this that won't leave a blemish once I stain/coat the body? I didn't find out til late last night and I've not even had a chance to talk to Jamie but will do so today.
Talk to Musikraft. I think you're within the 90 day warranty period and you haven't made any obvious modifications to the body (although technically dowelling the posts will invalidate the warranty). If they won't help you then start thinking about fixes but until then, try and get a replacement or at least a partial refund.
So we're back on track. Sent the body into Musikraft and as expected, they did the bare minimum and flowed some (most likely) superglue into the two top cracks and it looks like they jammed some glue into the space along the edge of the arm contour and pressed it back down. There's glue residue/stain on the mahogany where they re-glued it. I think it'll sand off. The top cracks are still visible and I'm pretty sure the glue won't take stain or finish like the rest of the wood. It is what it is and I'm moving on. Still, for $800+ I expect more.
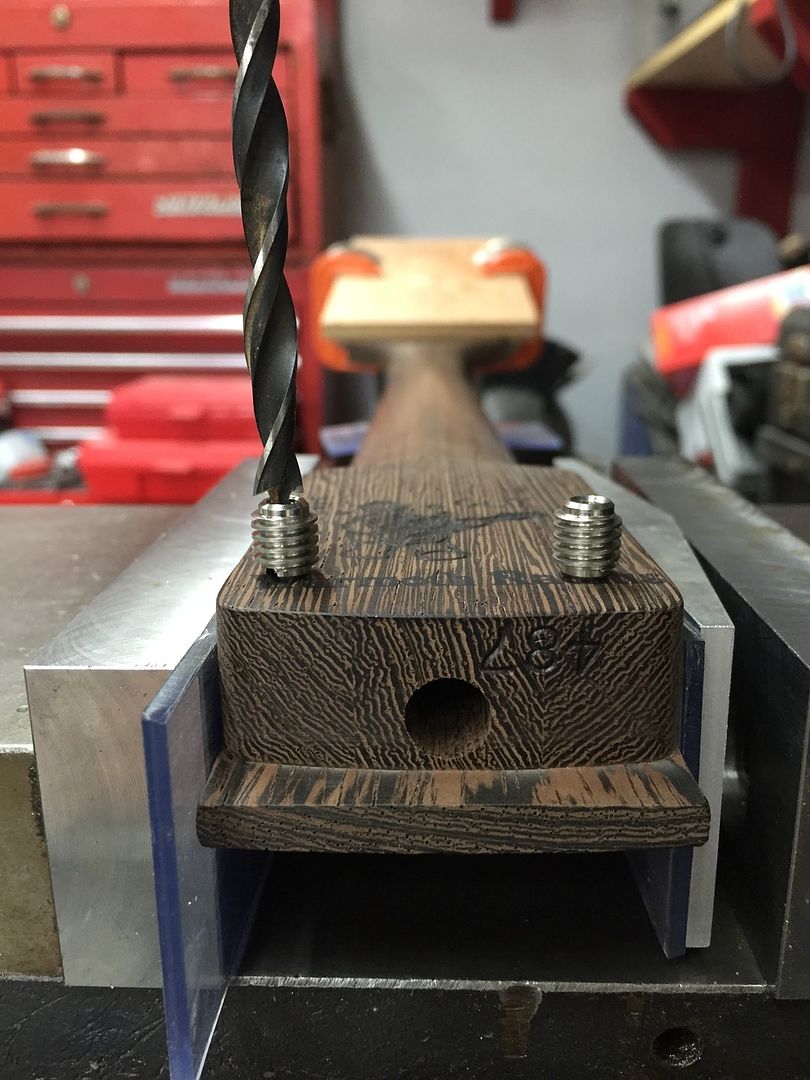
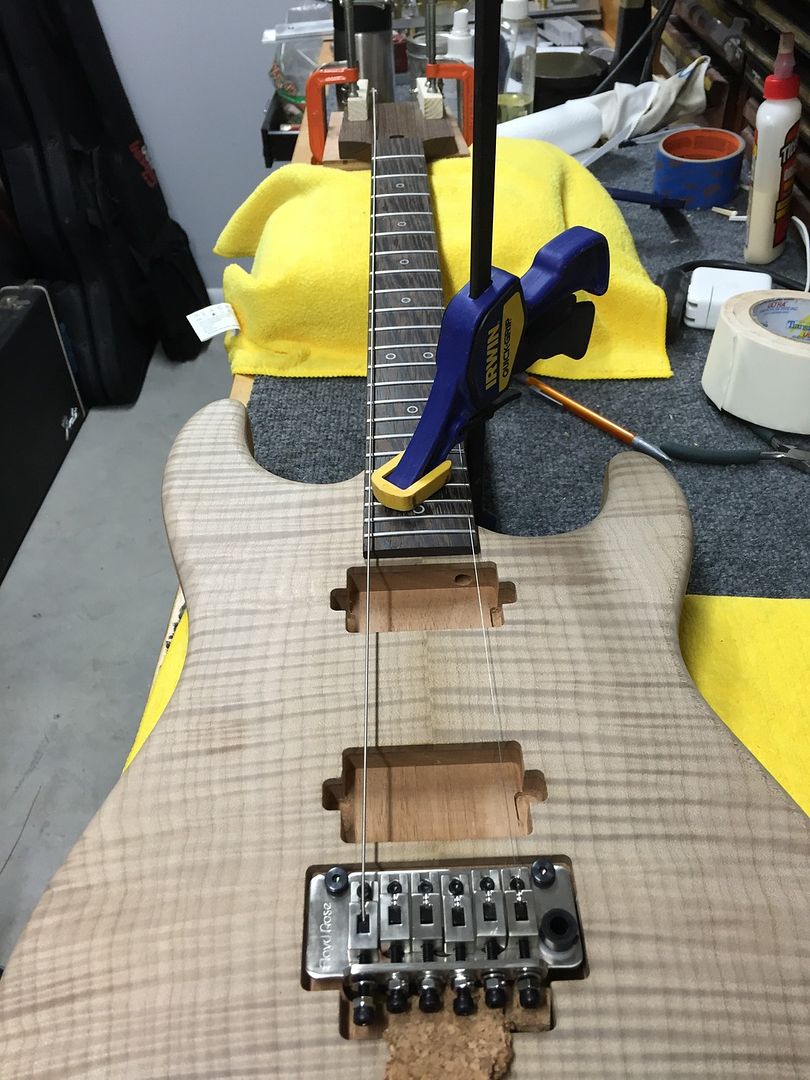
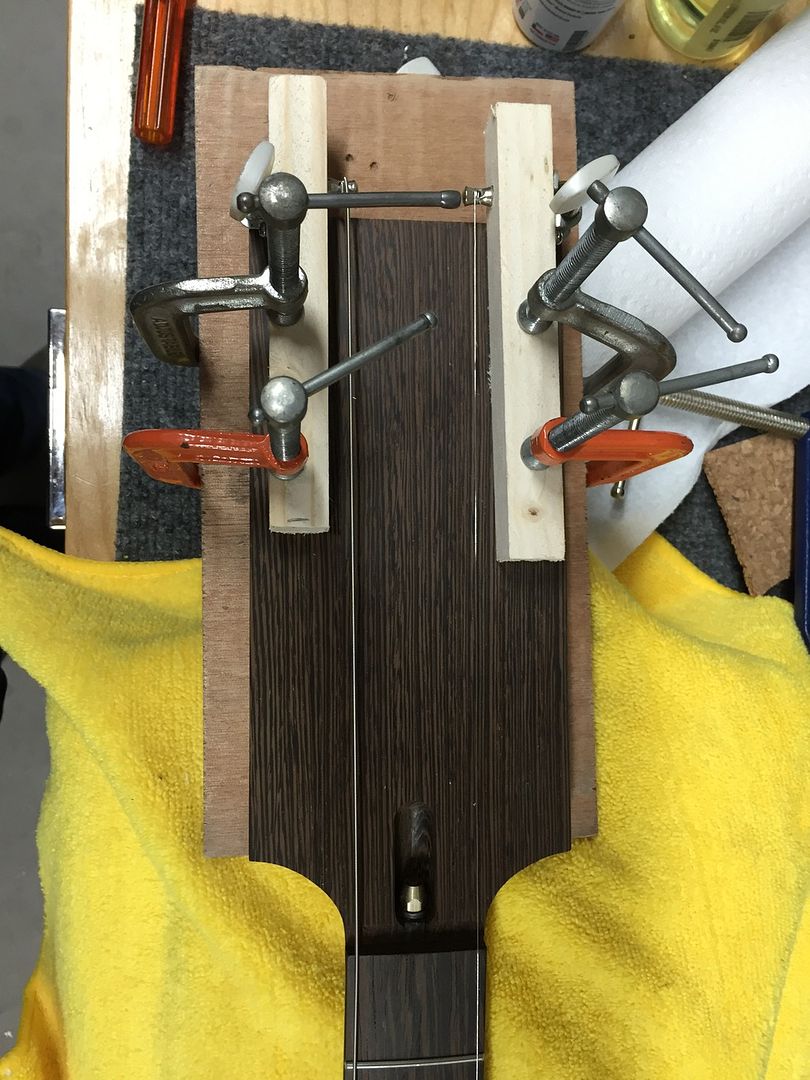
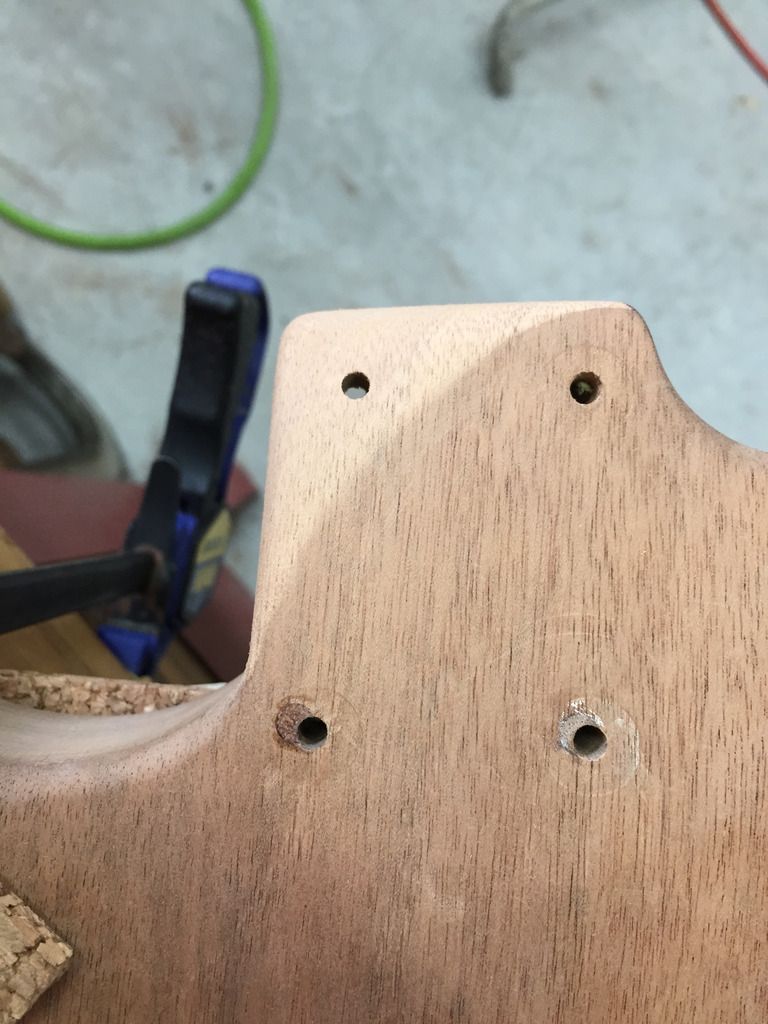
So thing are going to move along quickly. We're in the process of getting the neck on straight and making sure string alignment is good. Once we have the neck where we want it, two more neck mounting holes will be drilled in the body. Oh yeah. Musikraft managed to offset the two pre-existing holes slightly skewed to one side. So...backtrack. Doweling both holes (which are also waaay bigger than M8 bolts) and redrilling. Since I'm using countersunk ferrules, they probably won't show. We'll see.
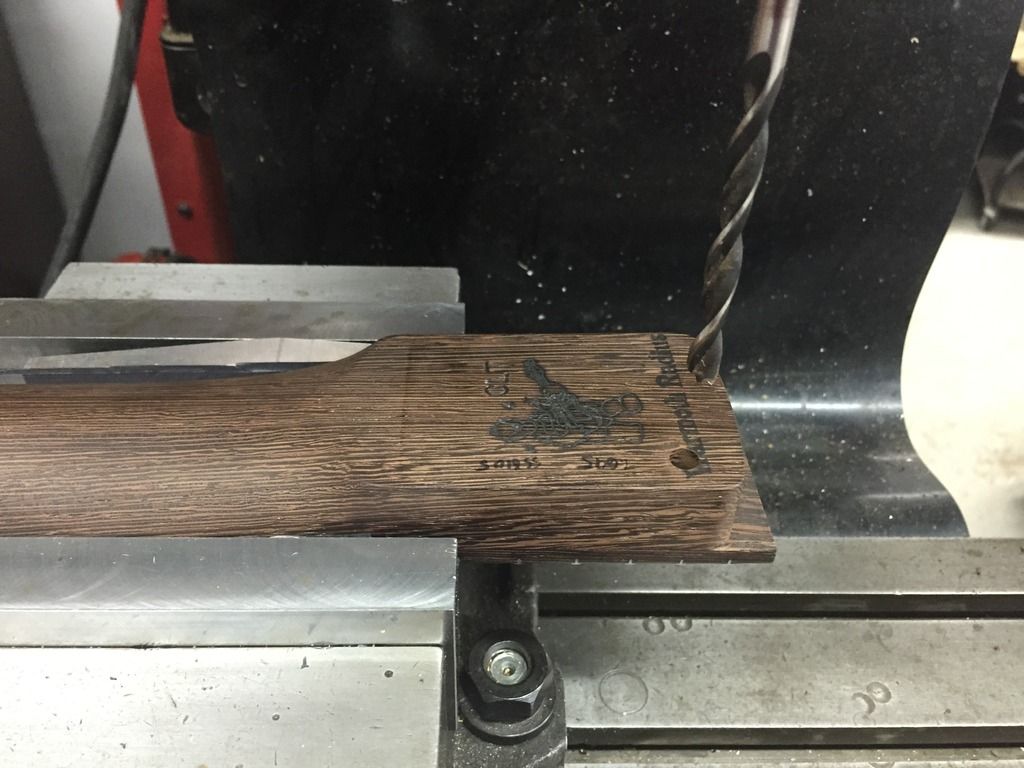
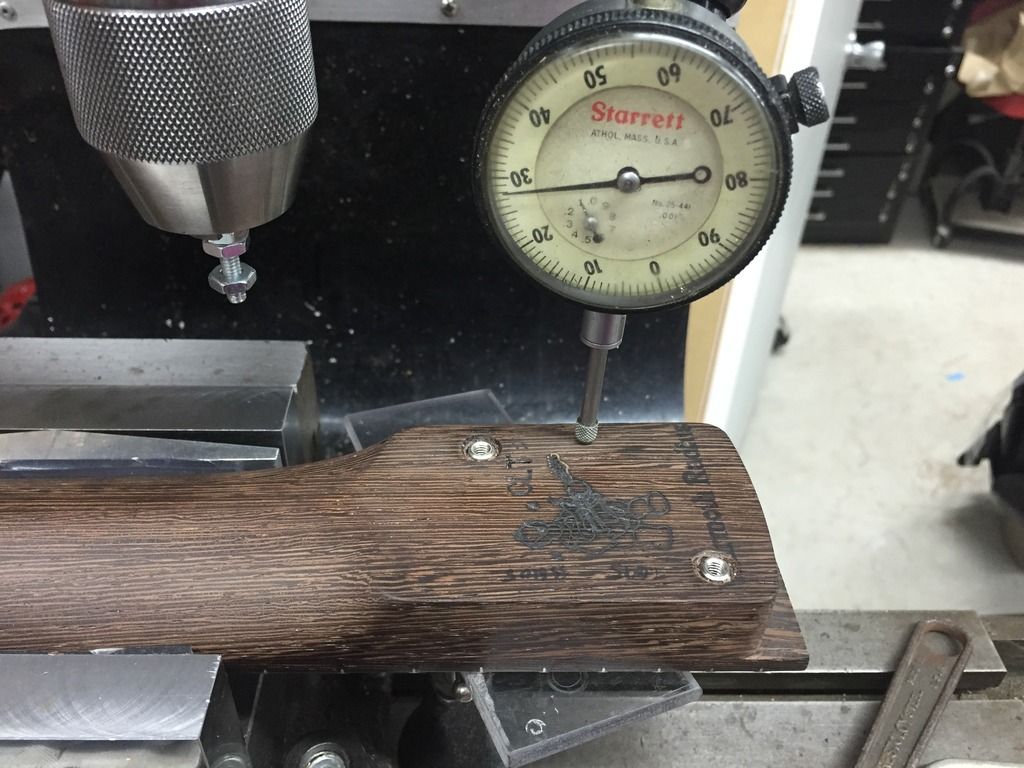
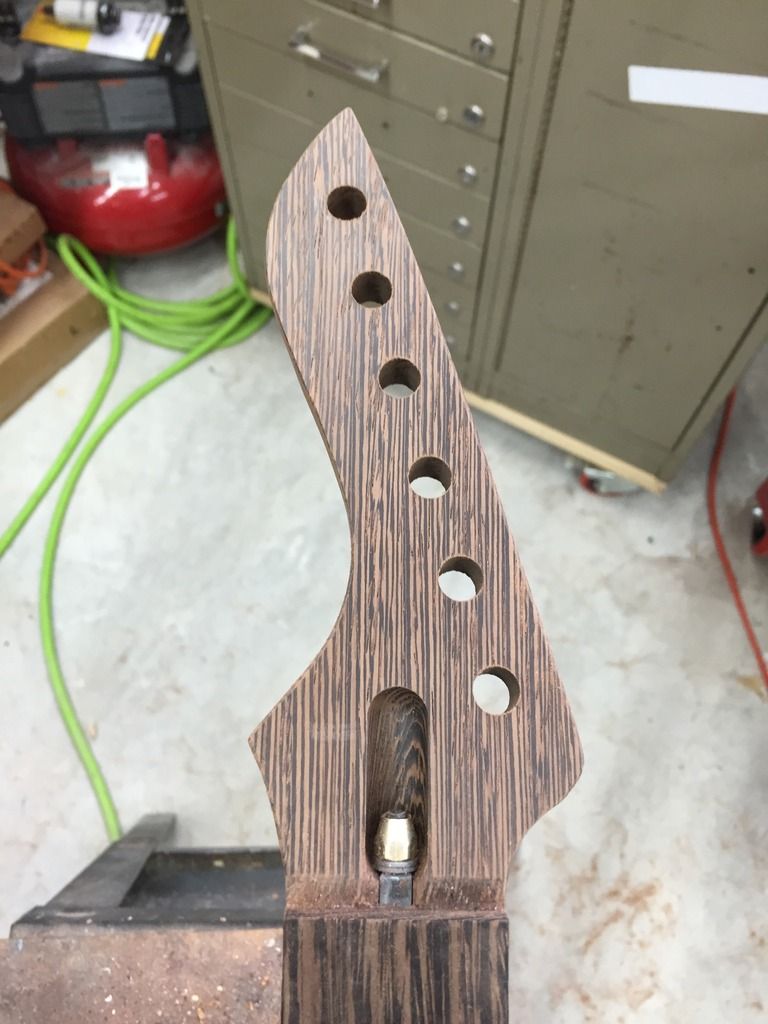
Anyway...inserts for the neck mounting M8 bolts too. Once the neck is on, we'll mark and drill for the tuners for 100% straight pull taking the tuner post radius into account. It'll be a reverse headstock. Once the tuner holes are drilled, I'll mark the headstock shape and cut away. It'll be a Parker-esque design and we may reinforce with carbon fiber on the back. Wenge's pretty tough so we'll see.
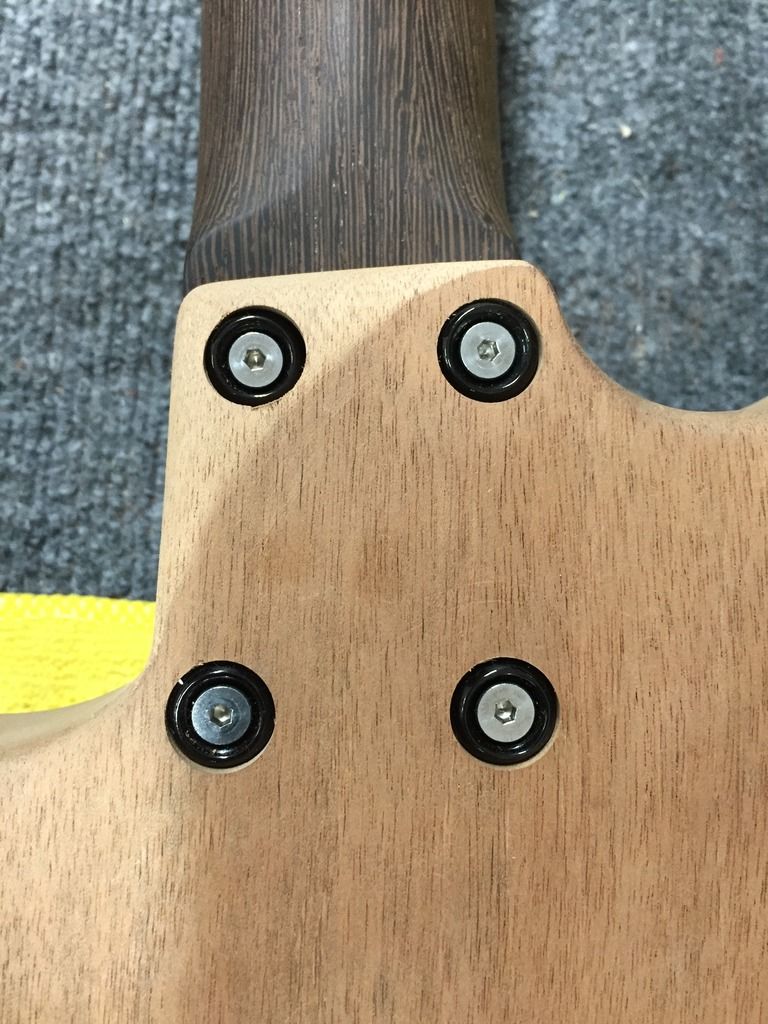
The inserts sit where Musikraft drilled holes in the body. You can see how they'd be off on one side of the neck. Nice Musikraft! Seems you have issues drilling holes.
And temporary mounting of the neck. Going with unbleached bone nut.
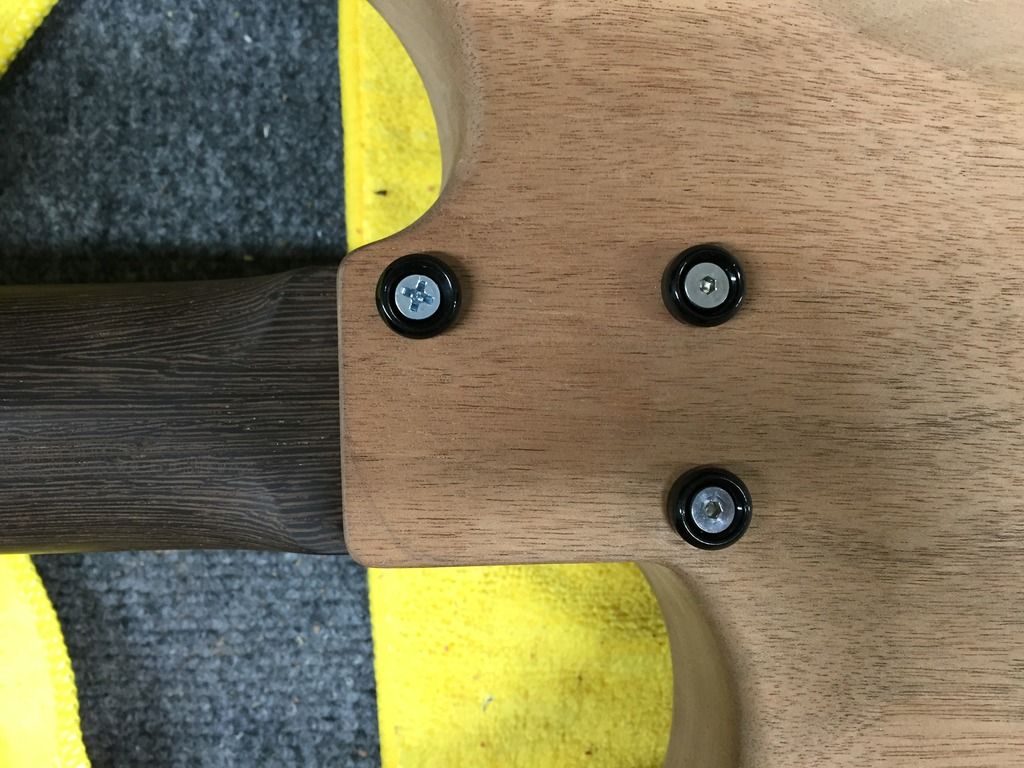
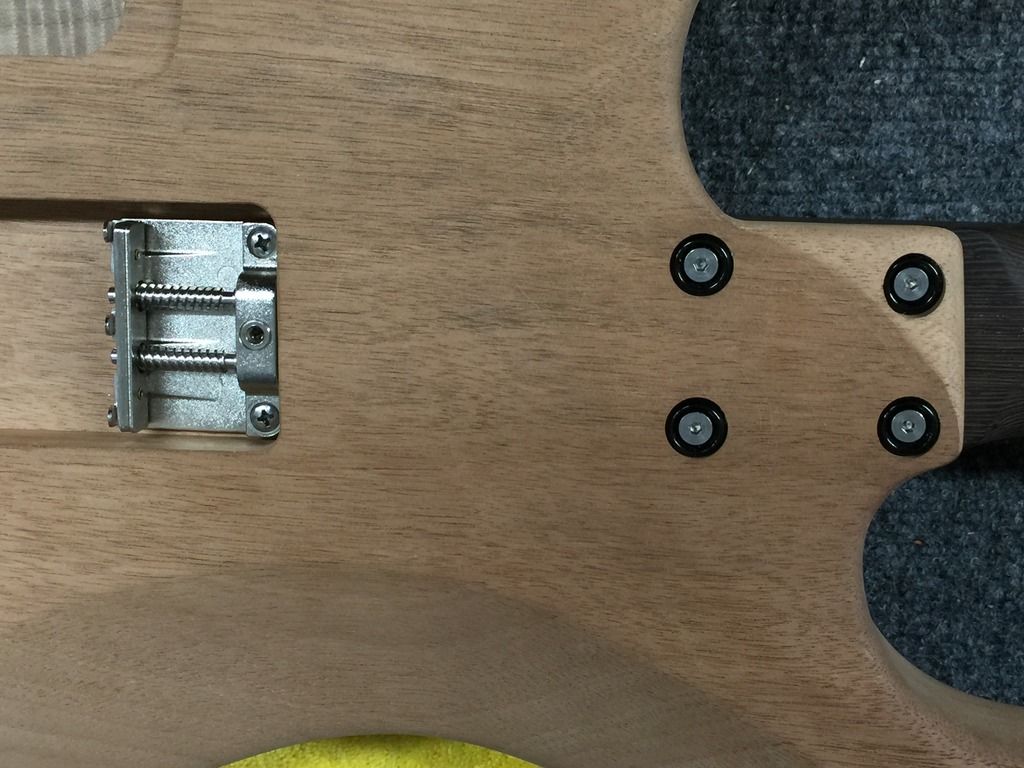
More progress, neck mounting holes in body plugged and redrilled, mounting studs for neck and pickups are inserted, enlarged the wiring routing (large enough for quick disconnects), and lowered the pickup routes where the pickup legs would go.
The left corner of the heel will be shaved down at an angle and all the ferrules will be countersunk.
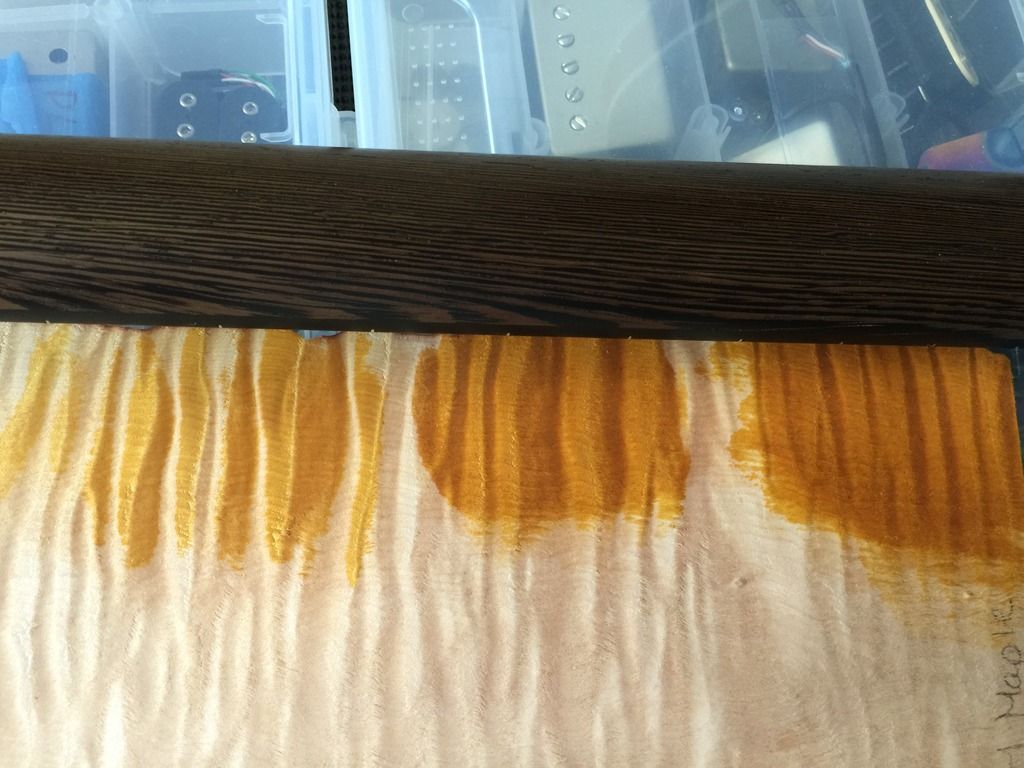
I'll admit I'm a bit lost on staining the top. I have amber dye and a piece of "test" flamed maple. I have a few test strips and several types of protective coating from a satin nitro to a matte poly. I'm not quite sure where I'm going with it but a lemon top (ala LP) is a possibility. I may try adding some darker brown dye to the mix.
More updates...
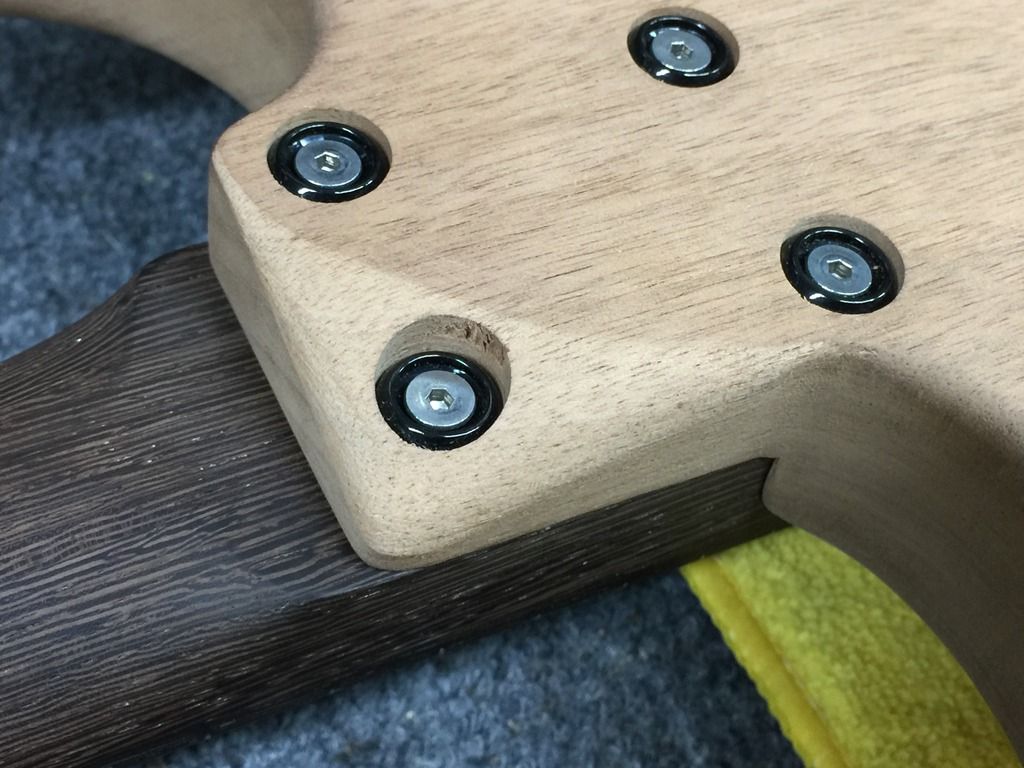
Sculpted the heed for easier upper fret access.
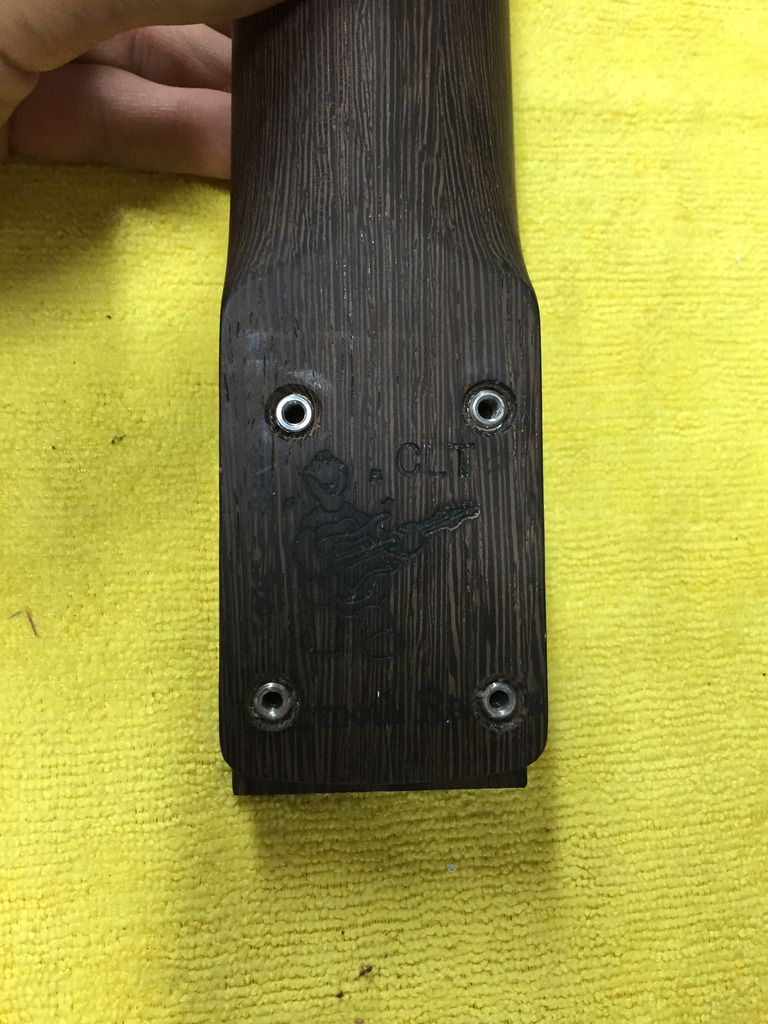
Inserts all in on the neck now.
Neck screws and ferrules all countersunk.
Next up, tuner holes drilled then the headstock shape gets finalized and cut. That'll be the last step before tearing everything apart for the body finishing.
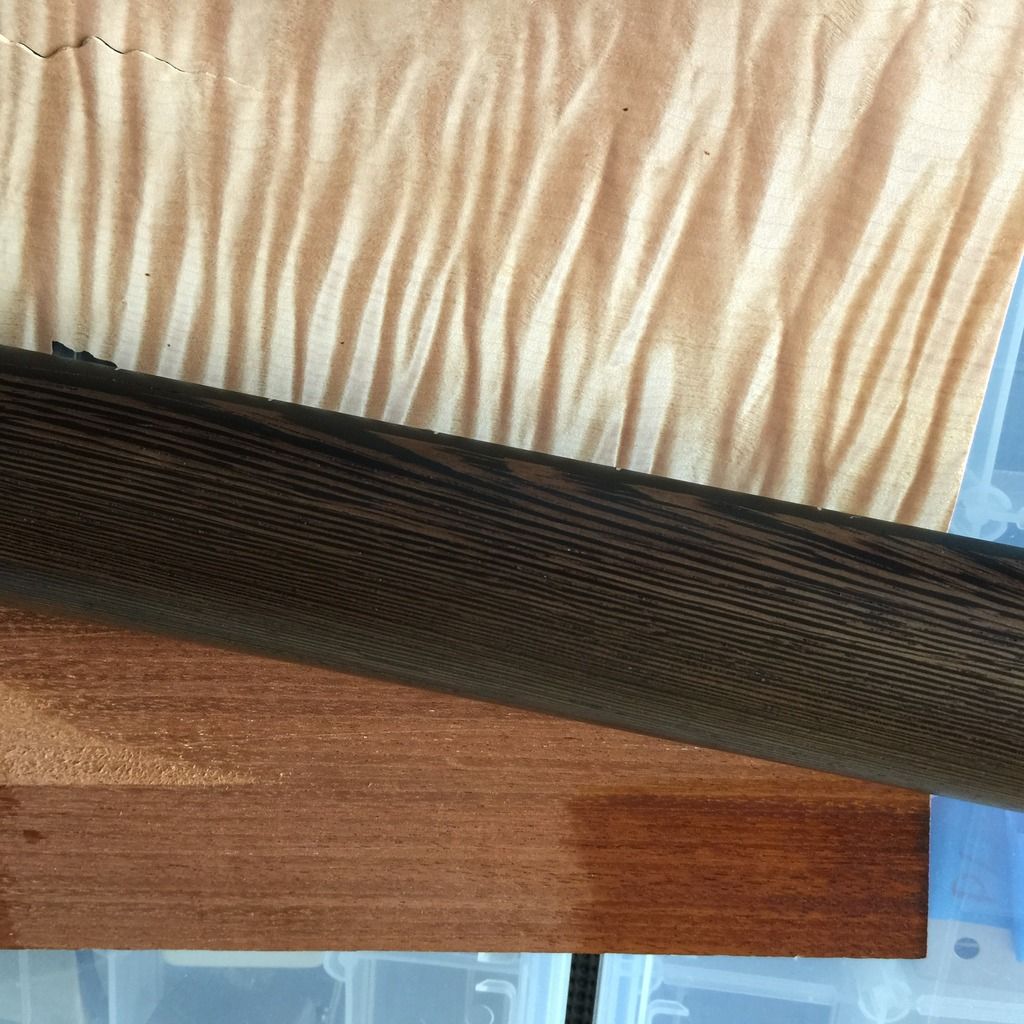
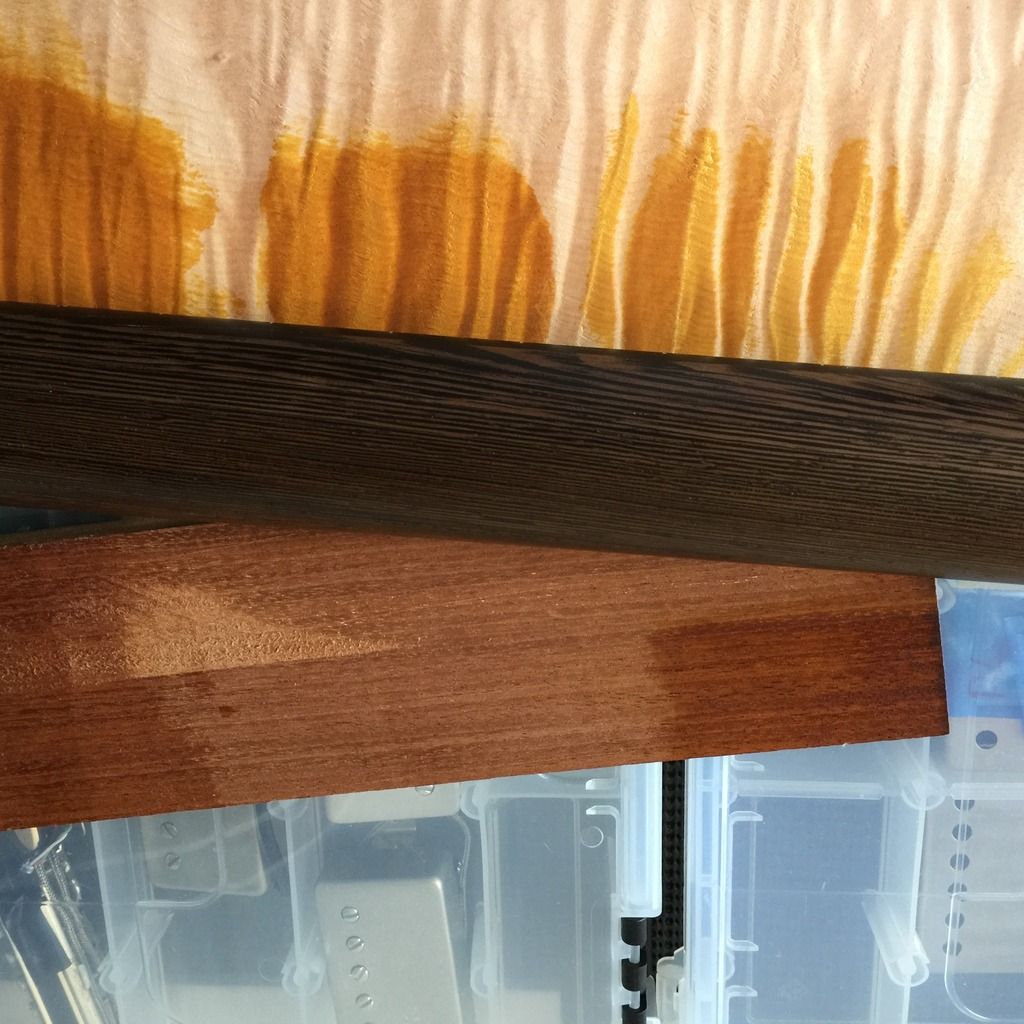
So for finishing, I've been experimenting with some curly maple veneer and a chunk of mahogany. Here's the palate I have to work with, curly maple top, wenge neck, mahogany back.
I have a satin spray nitro, Minwax wipe-on satin poly and I think a tinted Reranch satin nitro as well. I also purchased Stew Mac's amber tint which I'm thinning with alcohol.
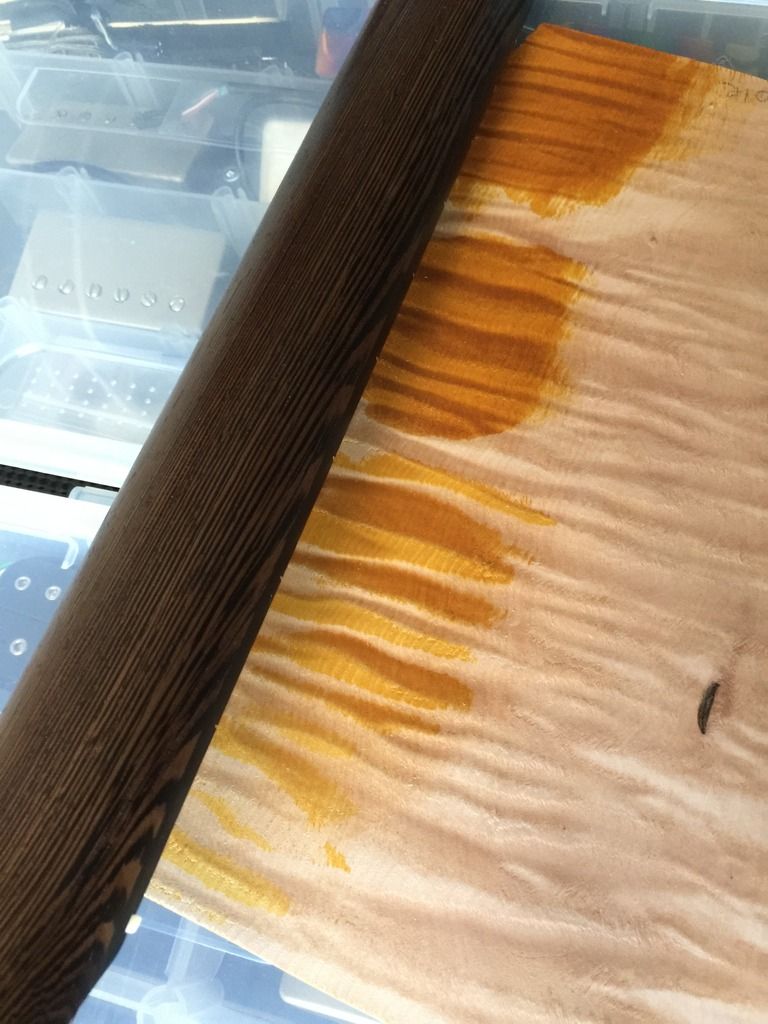
Here's one sample where we have the dye on the maple, darkest left, fairly dark middle and sanded back on the right. Hard to tell the difference in the photo but I'd really like to do something similar to the Private Stock McCarty 594's that came out recently. PRS Guitars Private Stock McCarty 594 - Guitar of the Month February 2016
I kind of like the sanded back look. I may try that first and I can always dye the top again for a more standard look. I think I've also settled on the wipe on poly. Just too easy to get right and it's super slick. I know I'll get more flame pop with a gloss finish but I might be willing to forego that. They make a gloss too so I may, at the very least, test that out.
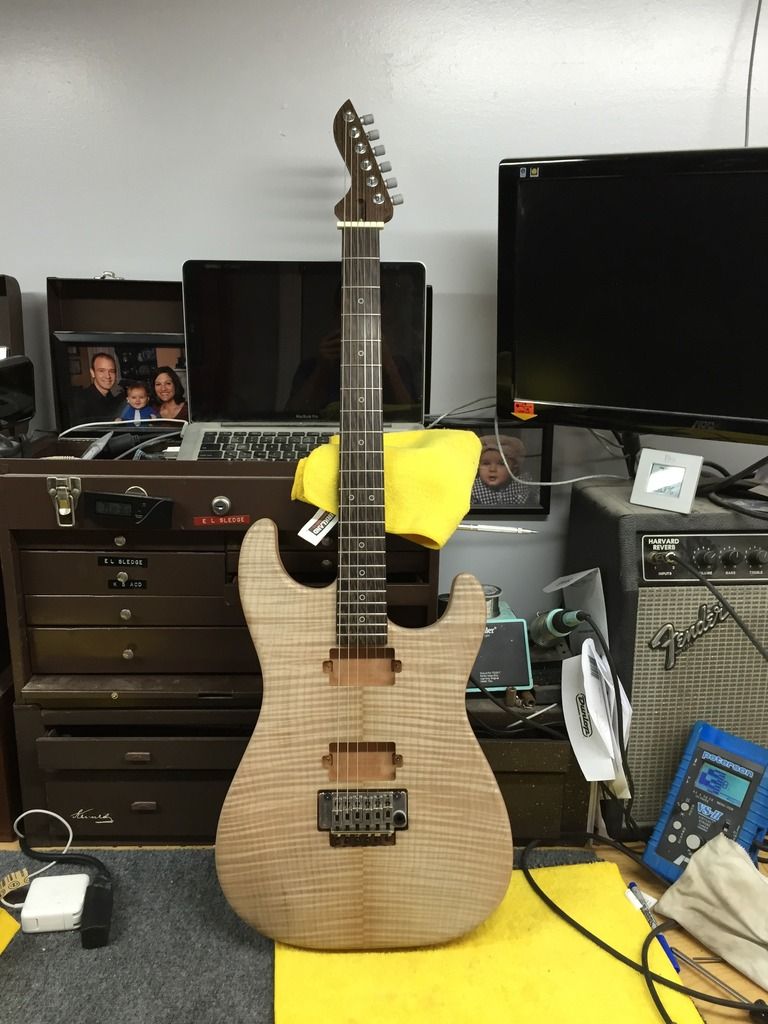
More progress. The neck heel just disappears in my hands. The guitar is super light with no electronics, tremolo or pickups installed. Feels a bit neck heavy but that was with the full paddle headstock, 2/3 of which will be removed.
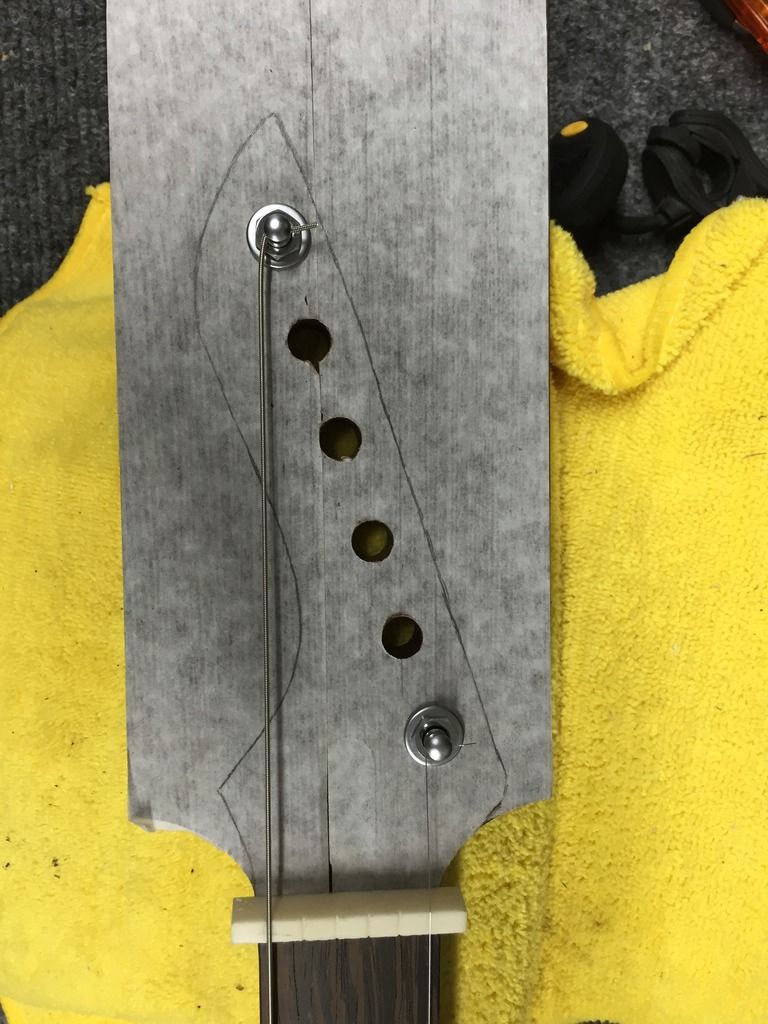
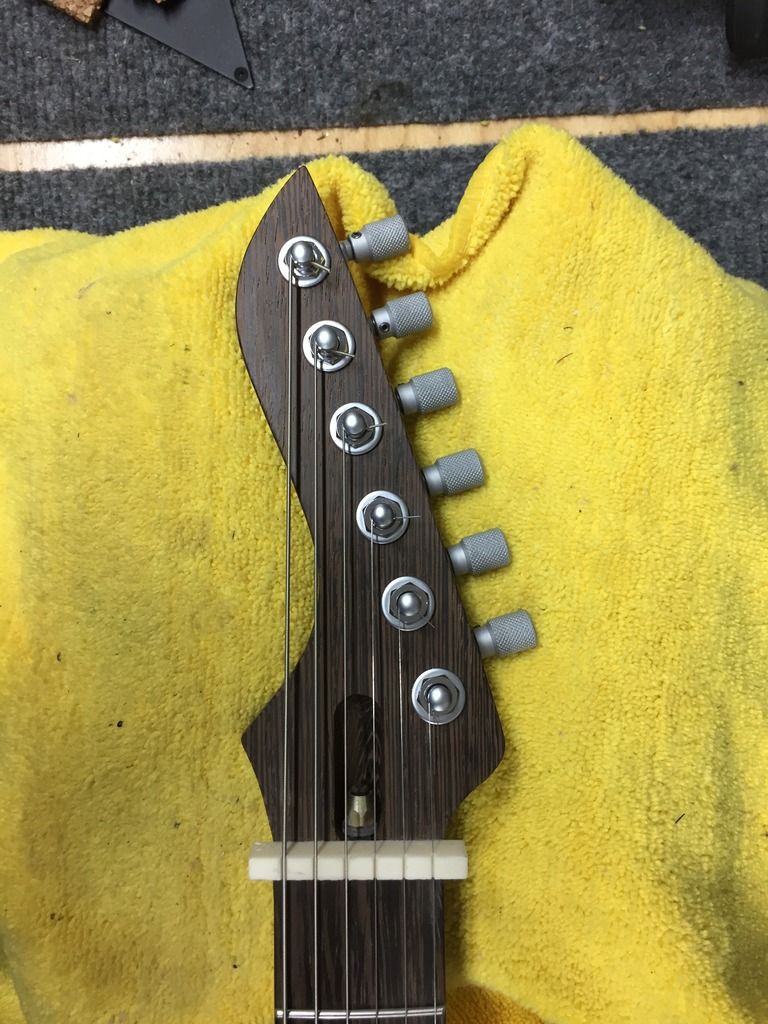
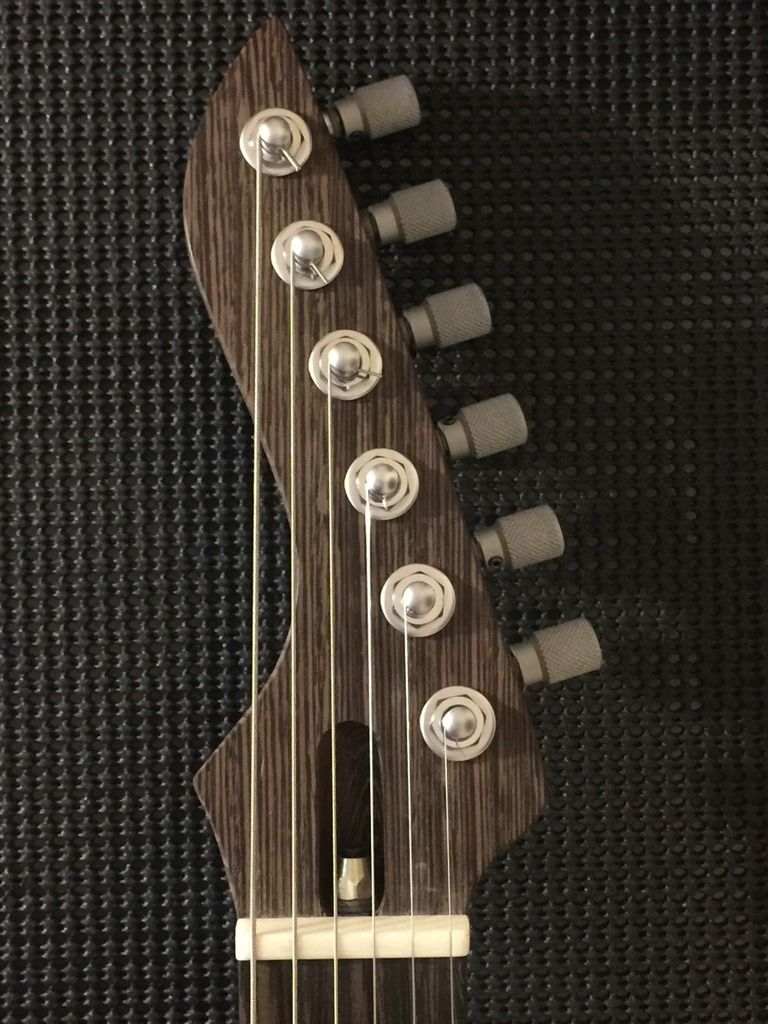
The headstock design was transferred over and the holes for the tuner shafts were calculated so the strings are direct pull with no angle side to side through the nut. The nut in the photos, obviously, is used for mockup purposes but it'll be an unbleached bone nut. I'll probably finesse a few angles on the headstock with block sanding as a few of the curves actually have little break angles in them. I wanted to make sure the headstock flared out enough I could hang it on the wall no problem. If there's any flex, I've got some dry prepreg carbon sheet to go on the back side.
A few minor details and adjustments will be made and then I'll do the electronics before taking everything apart and staining the body. Cannot wait to get done!
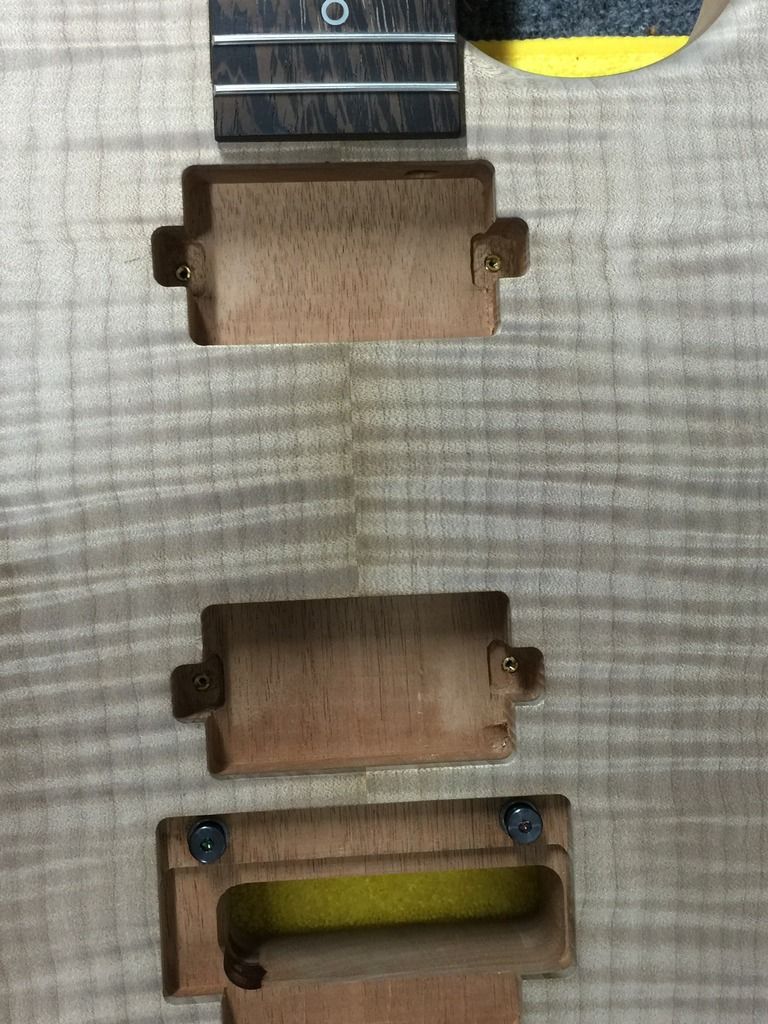
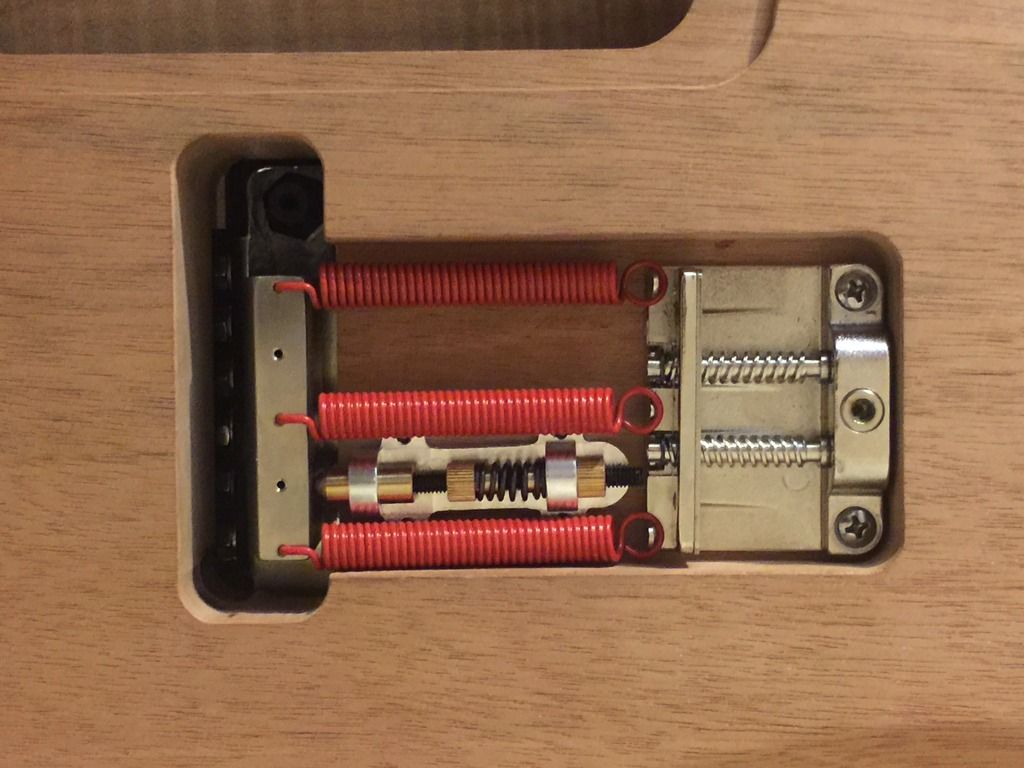
Sure claw installed...it'll also have the ESP trem stabilizer.
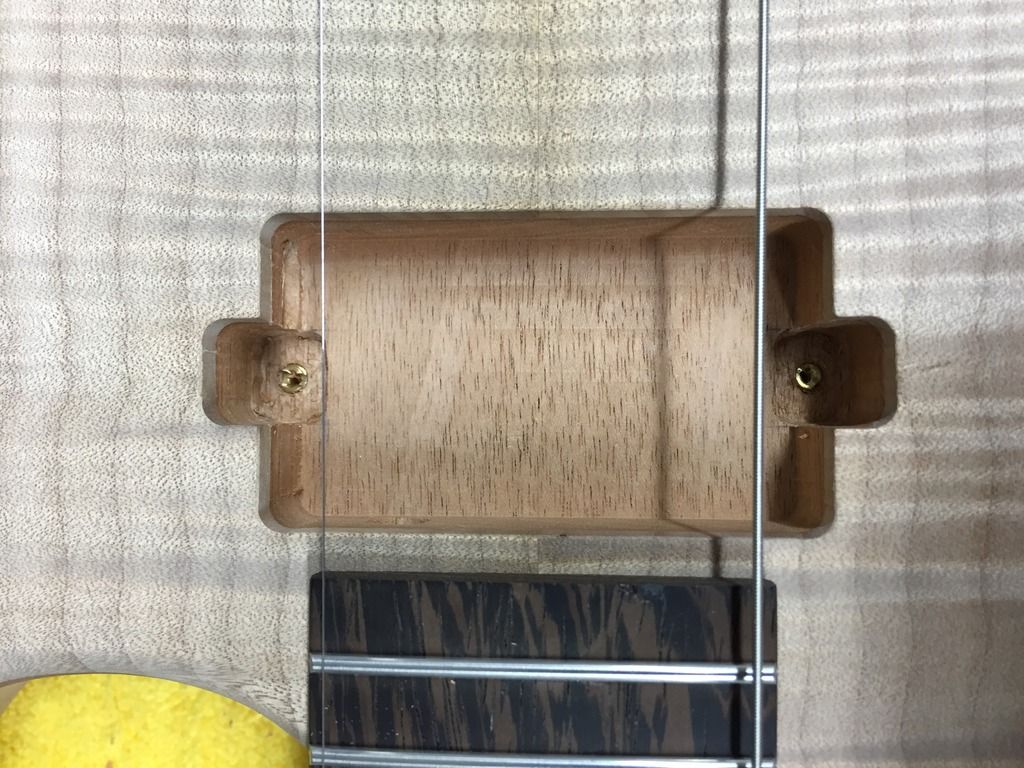
Look close, 2-56 inserts for pickup mounting. The base of the pickup routes was lowered where the legs would go. Will use 2-56 machine screws which slide through the stock pickup mounting holes and don't destroy anything like the usual wood mount screws.
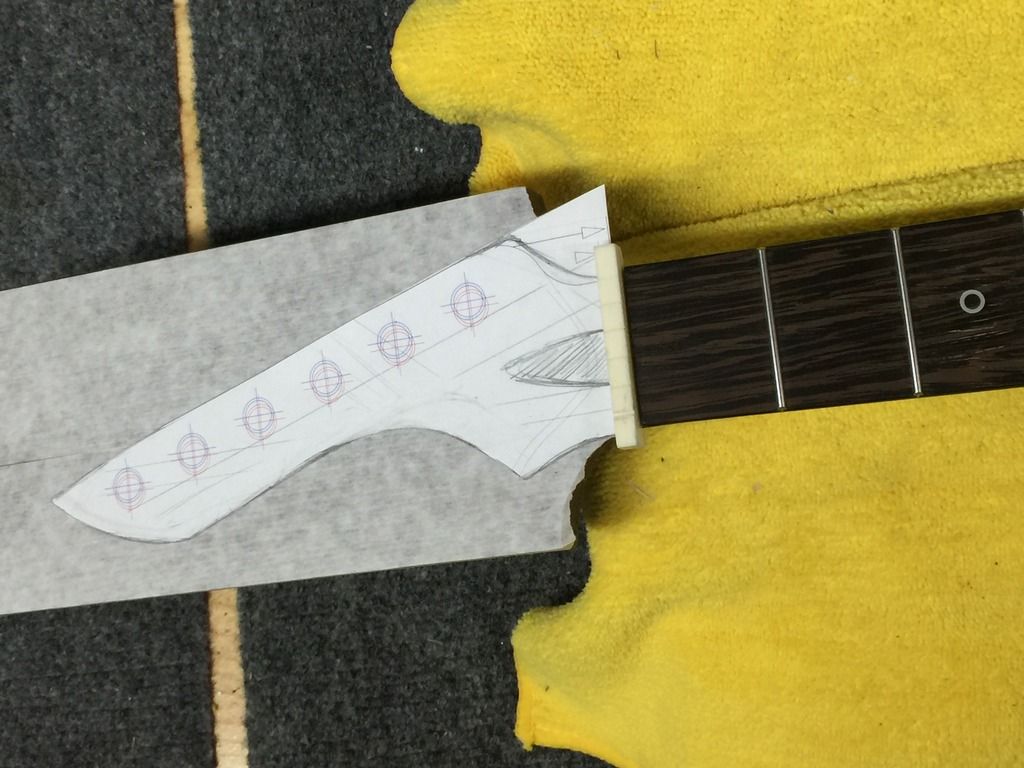
Angle shot of the neck heel. Will be doing a bit of sanding to finesse the shape.
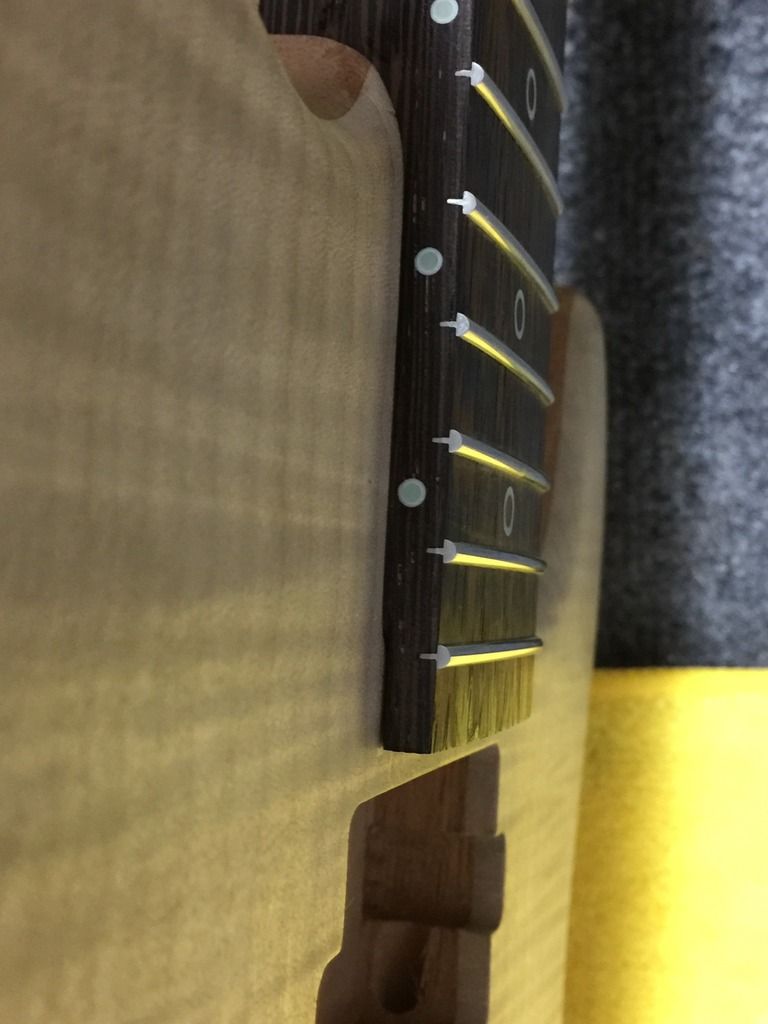
No gap between the fretboard and the body.
Shot of the lumen lay side dots.
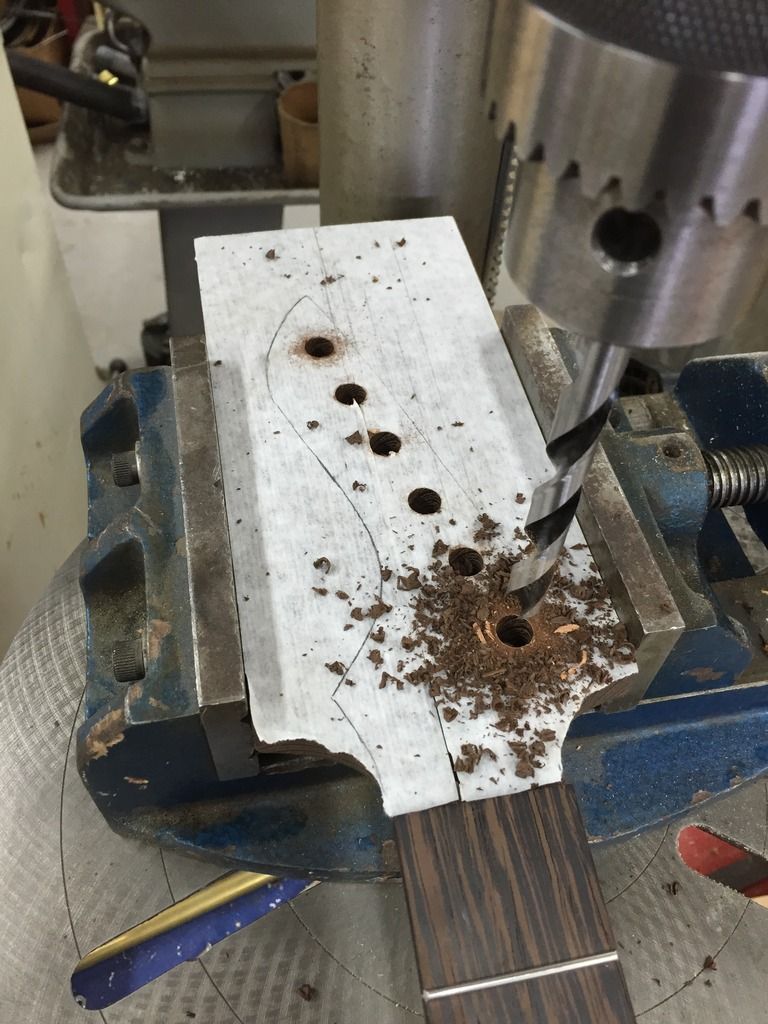
Design transferred to the headstock. Loosing quite a bit of material!
Yeah I can't wait til I get it all together. Making a wenge rear control plate attached with magnets yet. Then I have figure out what I'm going to do with the electronics, stain and seal it, and do final setup once it's reassembled. I've got about a dozen sets of pups to test out as well.
Alright, a bit more progress. I'll be doing the electronics over the next few days and take care of little odds and ends. Waiting for a piece of wenge to come in for the back cover. Jamie couldn't find one locally so it has to be ordered.
I did get some play time on it (obviously unplugged). It sounds wonderful unplugged and sustains really well, better than I thought it would.
I took the time to weigh it and as it stands, with strings but no electronics, it's 6.4 pounds. It's ever so slightly neck heavy which'll change once the pickups are installed. I should end up with a low 7 pound guitar.
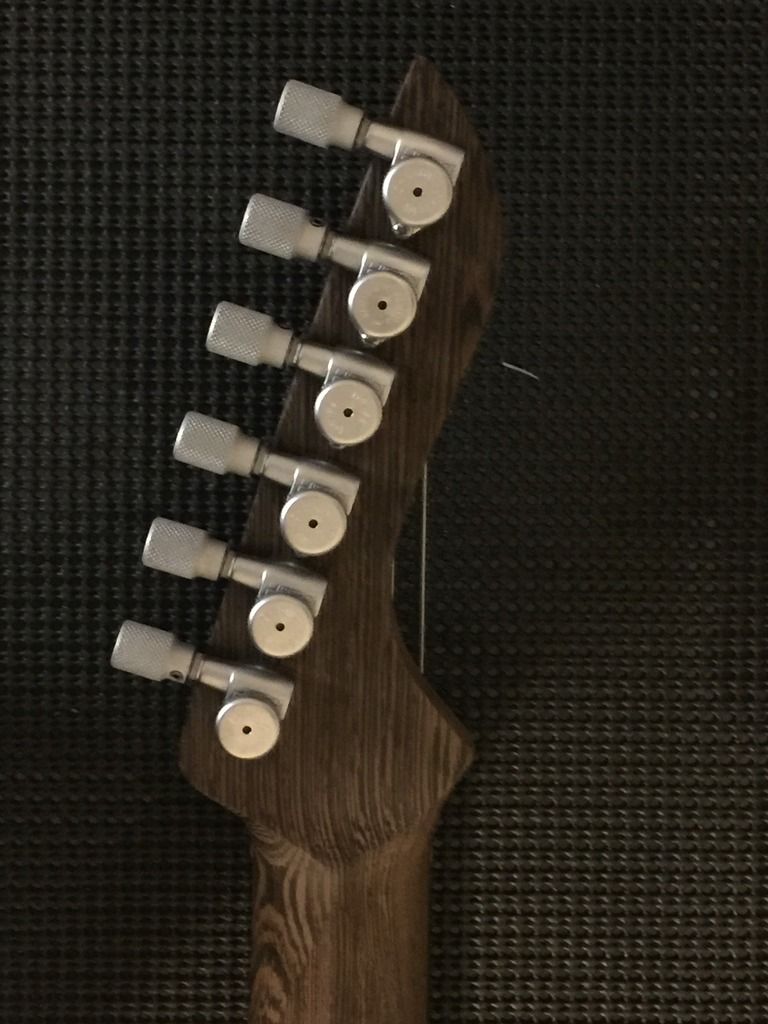
The Hipshot tuners. I thought the tuner "buttons" would make it difficult to tune, sort of like a Strandberg bridge. Not so. It's liquid. Super easy to turn and dial in. These are my first hipshots. Highly recommended. I've used just about everything out there and I actually rank these above PRS Phase 3's for overall feel. They're very solid too. I could have dropped some serious weight using the Gotoh stealths but I just liked the style of these with my planned headstock shape.
More images which just don't do the guitar justice. Hey, they're just iPhone pics. I'll pull out the big cameras when she's finished.
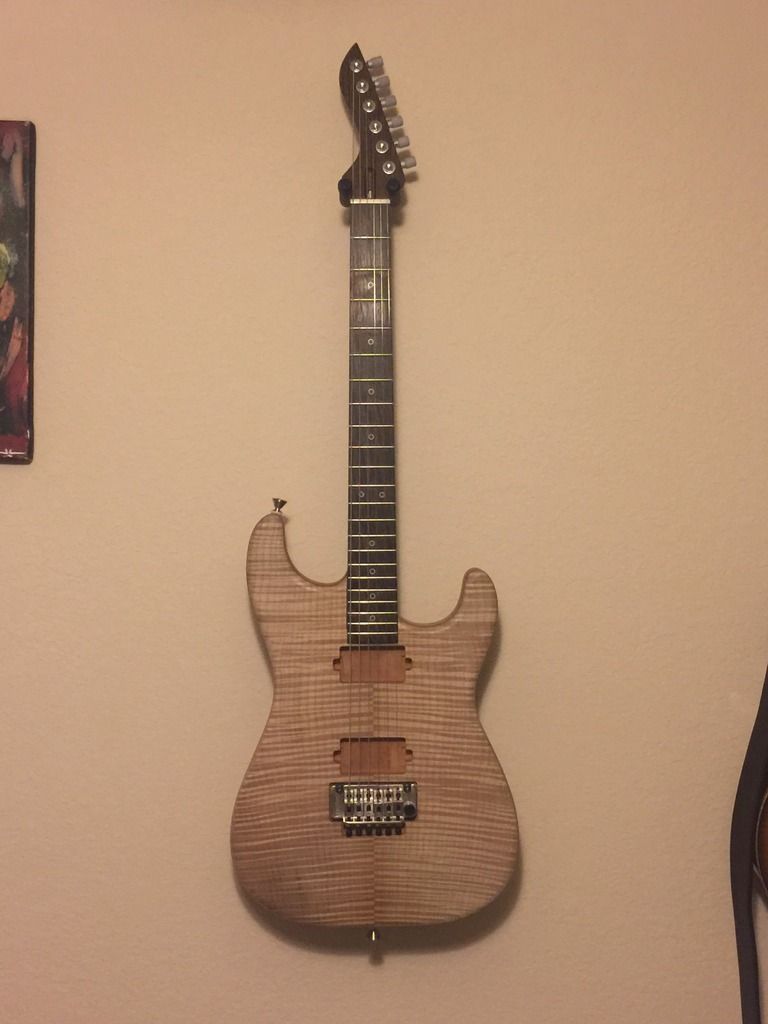
First official hang on the wall
Headshots
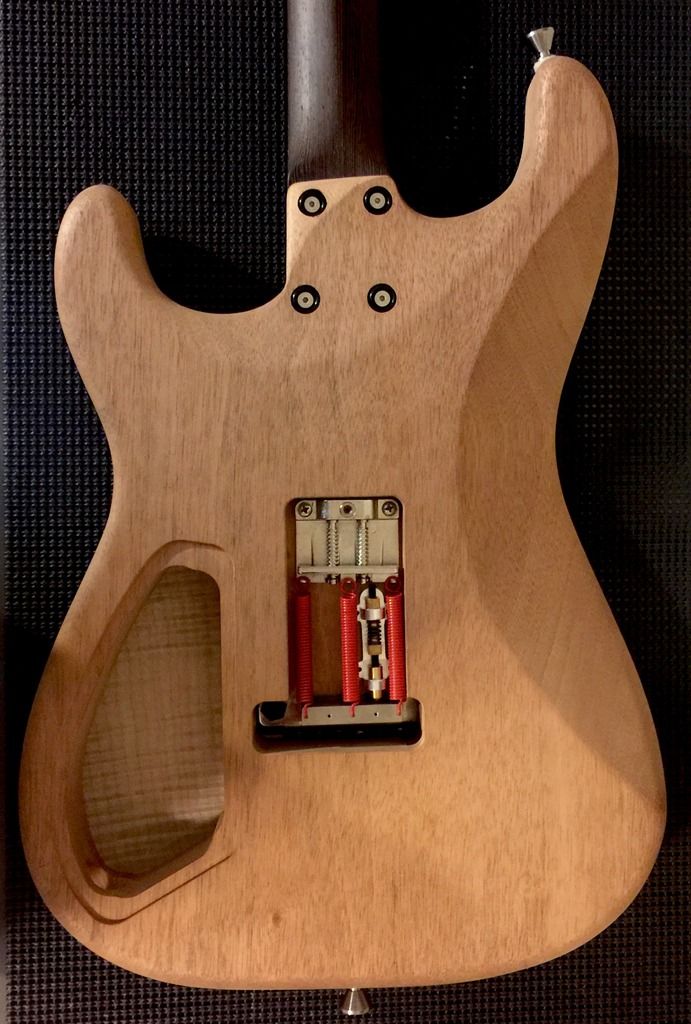
Back of the guitar, still have to install the ESP trem stabilizer. It's much smaller than the Goldo Blackbox and about 1/8th the weight.
Front shot, still deciding on control placement and I really, really want a four control layout but that'll mean the toggle is about where a 5-way would be meaning easy to hit. I thought about doing stacked pots too. That's all for now. Pulling the guitar apart to do the electronics and stain the body. Wish me luck on that one.
")